Table of Contents
Advertisement
Advertisement
Table of Contents

Related Manuals for Logik L90BMS10


Summary of Contents for Logik L90BMS10
- Page 1 Stainless Steel Breadmaker Instruction Manual L90BMS10...
-
Page 3: Table Of Contents
Contents Unpacking ..........................................4 Product Overview ......................................5 The Breadmaker ......................................5 Control Panel ......................................... 6 Preparation ........................................... 7 How to Remove the Bread Pan ................................7 How to Attach the Bread Pan .................................. 7 How to Attach the Kneading Paddle ..............................7 How to Measure the Ingredients.................................. -
Page 4: Unpacking
Congratulations on the purchase of your new Logik Breadmaker. We recommend that you spend some time reading this instruction manual in order that you fully understand all the operational features it offers. You will also find some hints and tips to help you resolve any issues. -
Page 5: Product Overview
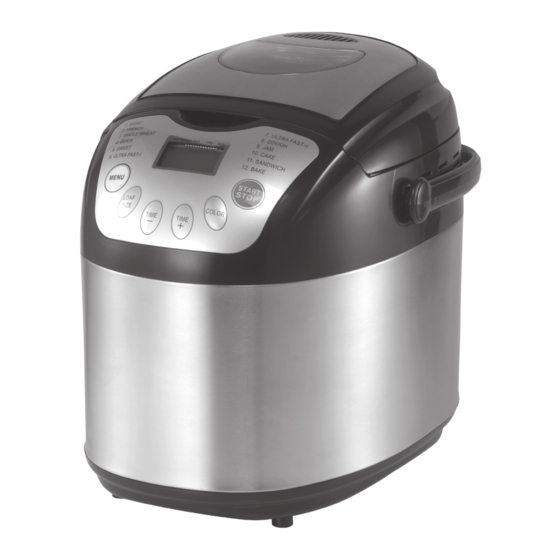
Product Overview The Breadmaker Steam Vent Inspection Window Hinged Lid Control Panel Carry Handle Oven Element Kneading Assembly Handle of the bread Bread Pan Rotating Shaft • Set inside the bread pan Oven Element Kneading Paddle GB-5... -
Page 6: Control Panel
Control Panel Loaf Size Indicator Colour (Crust) Indicator Display Programme Programme Guide Guide Start/Stop Menu Selector Button Loaf Size Colour Button Selector Delay Timer Buttons Item Description Programme Guide List out the corresponding programmes with their numberings. Menu Selector Select one of the 12 programme menus Loaf Size Selector Select different sizes of bread (700g or 900g) Delay Timer Buttons... -
Page 7: Preparation
Preparation Before using your breadmaker for the first time, wash the inside of the bread pan, the kneading paddle and the measuring utensils in hot soapy water. Rinse and dry well. Wipe the interior of the lid and the exterior of the bread pan and breadmaker with a damp cloth. -
Page 8: Before Baking
The supplied measuring spoon may be used to measure yeast, sugar, salt, dry milk and spices. The large side measures 1 tablespoon; the smaller side measures 1 teaspoon. For dry ingredients, fill to overflow and then level it. Do not press or shake down. Before Baking Ensure you have all the ingredients to hand. -
Page 9: Start Baking
Start Baking The control panel display will light up and will sound a long beep. The appliance will automatically be set to the BASIC programme with the crust setting at MEDIUM. The display will show Choose a Programme with the MENU button. Press LOAF SIZE button to select the Loaf Size (as needed). -
Page 10: After Use
Make sure the kneading paddle has been removed before slicing the bread. Occasionally, the kneading paddle will stay in the loaf; wait until the loaf is cool and then remove the kneading paddle with kneading paddle puller tool to avoid damage to the nonstick surface. If you need assistance to remove the loaf from the bread pan, use only wooden or heat proof plastic utensils. -
Page 11: Other Functional Buttons
Programme Comments ULTRA FAST -II • Time: 58 minutes for 900g loaf only • The breadmaker bakes the bread in 58 minutes. The bread is denser in texture with this setting. You should use slightly hotter water (around 48°C-50°C) and use a cooking thermometer to gauge the water temperature. -
Page 12: Setting The Delay Timer
Setting the Delay Timer The time delay function allows you to delay the start time of baking by up to 12 hours, depending on the length of the baking cycle. For example: It is 8:00p.m. and you want to have fresh bread (using the Basic setting) at 7:00a.m. The the difference between now (8:00p.m.) and 7:00a.m. - Page 13 Programme Recipes Ingredients Portions Menu White bread Basic or Quick Water at room temperature (20 °C) 1 1/3 cups Vegetable Oil 1 tbsp Salt 1 tsp Strong White Bread Flour 3 1/3 cups White Sugar 1 tsp Dried Yeast 2 tsp White bread Basic or Quick The ingredients listed below are additional to the white bread mix...
- Page 14 Programme Recipes Ingredients Portions Menu Garlic bread Basic or Quick Water at room temperature (20 °C) 1 1/8 cups Olive Oil 2 tbsp Salt 1 1/2 tsp Garlic (fresh pressed) 3/4 tsp Strong White Bread Flour 3 cups Sugar 1 tbsp Parmesan Cheese (grated) 3 tbsp Basil (dried)
- Page 15 Programme Recipes Ingredients Portions Menu Carrot bread Basic Water at room temperature (20 °C) 3/4 cup Plain Yogurt 1/4 cup Carrots (grated) 1 cup Honey 2 tbsp Molasses (or dark brown muscovado sugar) 2 tbsp Strong White Bread Flour 2 1/4 cups Wholemeal Bread Flour 1 cup Dried Milk...
- Page 16 Programme Recipes Ingredients Portions Menu Tomato bread Basic or Quick Water at room temperature (20 °C) 1 cup* Olive Oil 2 tbsp Salt 1/2 tsp Strong White Bread Flour 3 1/3 cups Sundried Tomatoes 30g (2 1/4oz) Dried Yeast 1/2 tsp • * Made up from the water used to soak the tomatoes plus fresh water.
- Page 17 Programme Recipes Comments Menu Swiss buns Dough When the programme is completed, mould into 15 torpedo shapes on a greased baking sheet. Leave the dough to rest for 10-20 minutes (method as for pizza dough). Doughnuts Dough When the programme is completed, mould into 15 balls and re- prove for 10-20 minutes.
-
Page 18: Care And Maintenance
Programme Recipes Ingredients Portions Menu Wholemeal soda Ultra Fast 1 Water at room temperature (20 °C) 1 cup bread Natural Greek Yogurt 150ml (5/8 cup) 1 tsp Salt 3 1/3 cups Wholemeal Bread flour 1 tsp Bicarbonate of Soda 1 tbsp Baking powder Care and Maintenance • Always disconnect the breadmaker from the mains supply immediately after use. -
Page 19: Hints And Tips
Maintenance When storing the bread pan in the breadmaker, store it in the LOCKED position, but leave the kneading paddle loose in the pan and ready for assembly. About the Nonstick Coating on the bread pan and the kneading paddle: • To protect the nonstick coating: • Do not use hard utensils such as metal spatulas, knives or forks. -
Page 20: Q & A For Baking Bread
Symptom Possible Cause Remedy Texture lumpy or • Flour to water ratio is incorrect. • Check quantity and quality of all uneven ingredients. • Flour is damp or out of date. Mushroom-like rough • Too much flour, especially with • Check quantity and quality of all surface white bread. -
Page 21: Abnormal Conditions
Abnormal Conditions Status Condition Cause Remedy The buttons do not The mains plug is not connected Connect the breadmaker to the mains operate. to the mains socket properly or is socket securely or connect to the mains disconnected from the mains socket. socket. -
Page 22: Safety Warnings
Safety Warnings • When selecting the location for the appliance, • Please read all the instructions and familiarise ensure that children do not have access to it. yourself with the features and operation of your breadmaker before using the appliance. Make • Ensure that the mains cable does not touch sure you read all the safety notes carefully and any hot surface and that it does not overhang... - Page 24 There are separate collection systems for recycling in the EU. For more information, please contact the local authority or your retailer where you purchased the product. All trademarks are the property of their respective owners and all rights are acknowledged. DSG Retail Ltd • Maylands Avenue • Hemel Hempstead • Herts • HP2 7TG • England (P.N.: L90BMS10-A)
Need help?
Do you have a question about the L90BMS10 and is the answer not in the manual?
Questions and answers