Table of Contents
Advertisement
Advertisement
Table of Contents

Related Manuals for Logik L1BMS11


Summary of Contents for Logik L1BMS11
- Page 1 Stainless Steel Bread Maker Instruction Manual L1BMS11...
-
Page 3: Table Of Contents
Contents Unpacking .................................4 Product Overview .............................5 The Breadmaker ....................................5 Control Panel ....................................6 LCD Display ....................................... 6 Preparation ...............................8 How to Remove the Bread Pan ..............................8 How to Attach the Bread Pan ..............................8 How to Attach the Kneading Paddle ............................8 How to Measure the Ingredients ........................8 Measuring Cup and Spoon ................................ -
Page 4: Unpacking
Thank you for purchasing your new Logik Stainless Steel Bread Maker. These operating instructions will help you use it properly and safely. We recommend that you spend some time reading this instruction manual in order that you fully understand all the operational features it offers. -
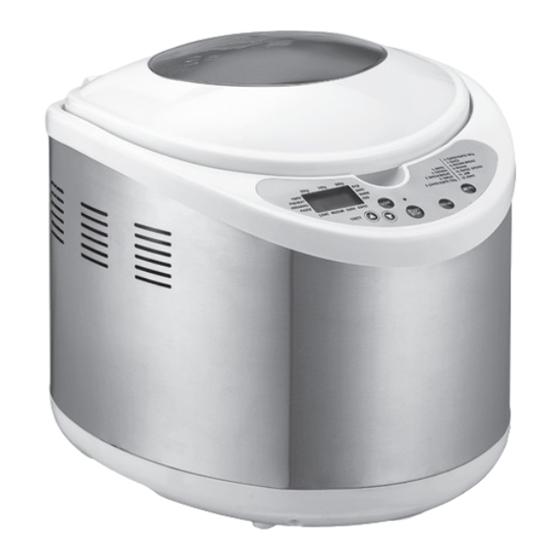
Page 5: Product Overview
Product Overview The Breadmaker Steam Vent Hinged Lid Inspection Window Control Panel Oven Element Kneading Assembly Handle of the bread pan Bread Pan Rotating Shaft • Set inside the bread pan 6.SUPER RAPID 900g 500g 700g 900g 7.QUICK 1.BASIC 8.BROWN BREAD TIMER RISE 2.FRENCH... -
Page 6: Control Panel
Control Panel Start Indicator Light 6.SUPER RAPID 900g 500g 700g 900g 7.QUICK 1.BASIC 8.BROWN BREAD TIMER RISE 2.FRENCH 9.DOUGH 3.WHOLE WHEAT 10.BAGEL DOUGH BAKE PREHEAT 4.SWEET 11.JAM KNEADING WARM 5.SUPER RAPID 700g 12.BAKE Programme Guide PAUSE LIGHT MEDIUM DARK RAPID Menu Button T I M E R LCD Display... - Page 7 Item Description Used when setting the delay timer to increase or decrease the time. TIMER Button These buttons allow you to select a delay time period if you don’t want your bread maker to start cooking immediately. Select the loaf size 500g, 700g or 900g when using programme 1 (BASIC), 2 (FRENCH), 3 (WHOLEWHEAT) or 4 (SWEET).
-
Page 8: Preparation
Preparation Before using your unit for the first time, wash the inside of the bread pan, the kneading paddle and the measuring utensils in hot soapy water. Rinse and dry well. Wipe the interior of the lid and the exterior of the bread pan and unit with a damp cloth. How to Remove the Bread Pan To remove the non-stick coated bread pan pull with medium force on its carrying handle. -
Page 9: Before Baking
Before Baking Ensure you have all the ingredients to hand. Carefully fill the pan making sure you do not leave any ingredients out. When filling, it is essential that the ingredients are filled in the prescribed order. Otherwise the bread will not bake properly. The ingredients should be at a warm room temperature (20°C-25°C ). -
Page 10: Basic Steps For Baking
Basic Steps for Baking Attach the kneading paddle to the bread pan, precisely measure the ingredients and add them to the bread pan in the following order: Water (or other liquids). Bread flour, sugar, dry milk, salt and butter. Make a depression in the middle of the flour and sprinkle the yeast in it. -
Page 11: Warming
Warming Once the baking is over, the buzzer goes off to signal that the bread can be removed. The 1 hour warming time starts immediately. The unit sets the baking temperature and time automatically. If the bread is too light at the end of the baking programme, use the BAKE programme to let it brown more. -
Page 12: Using Your Bread Maker
Using Your Bread Maker Super Rapid Bread Programme The super rapid programmes (5 and 6) can bake a loaf in about 1 hour. Please note that you must use hot water at 45-50°C. Use a cooking thermometer to measure the temperature. The influence of temperature is very critical to the performance of baking. -
Page 13: Programme Times
Programme Times Number Programme Crust Colour 500g 700g 900g Keep Warm Timer Delay LIGHT / MEDIUM / DARK 3:13 3:18 3:25 BASIC 60 min RAPID 2:12 2:17 2:24 LIGHT / MEDIUM / DARK 3:30 3:32 3:35 FRENCH 60 min RAPID 2:30 2:32 2:35... -
Page 14: Bread Recipes
Bread Recipes If your bread isn’t coming out the way you like, try changing the recipe slightly. Don’t be afraid to experiment and before long you’ll be baking perfect loaves each and every time. Please only use Fast Action Break Yeast. Do not use yeast which requires being activated in water first. Basic White Bread - Programme 1 Add the ingredients in the order listed. -
Page 15: Sweet Bread - Programme 4
Sweet Bread - Programme 4 A mixed fruit loaf. Add the ingredients in the order listed. When added, the yeast and salt should be kept separated from each other. Ingredients 500 g 700 g 900 g Water (Tepid) 160 ml 220 ml 330 ml Sunflower Oil... -
Page 16: Quick - Programme 7
Quick - Programme 7 Add the ingredients in the order listed. When added, the yeast and salt should be kept separated from each other. Ingredients Quantity Water (Tepid) 360 ml Sunflower Oil 2 tbsp Salt 1½ tsp Caster Sugar 2 tbsp Milk Powder 2 tbsp Strong White Bread Flour... -
Page 17: Bagel Dough - Programme 10
Bagel Dough - Programme 10 Basic dough for dinner rolls or breadsticks. Shape into rolls or breadsticks and bake in your own oven. Ingredients Quantity Water (Tepid) 300 ml Granulated Sugar 1½ tbsp Salt 1½ tsp Strong white bread flour 500 g Fast Action Bread Yeast 2 tsp... -
Page 18: Care And Maintenance
Care and Maintenance • Always disconnect the unit from the mains supply immediately after use. • Allow the unit to cool down after use before you clean or store it. It takes about 30 minutes until the unit is cool enough to be used again. -
Page 19: Maintenance
Maintenance When storing the bread pan in the unit, store it in the LOCKED position, but leave the kneading paddle loose in the pan and ready for assembly. To protect the non-stick coating on the bread pan and the kneading paddle: • Do not use hard utensils such as metal spatulas, knives or forks. -
Page 20: Q & A For Baking Bread
Q & A for Baking Bread Question Answer Why do loaves sometimes vary in height Any one of the following could affect the height and shape: temperature, and shape? weather, humidity, altitude, use of the timer and fluctuations in household current. -
Page 21: Safety Warnings
Safety Warnings Please read all the instructions and familiarise yourself with the features and operation of your unit before using the appliance. Make sure you read all the safety notes carefully and retain for future reference. • Before using this appliance ensure that the voltage of your electricity supply is the same as that indicated on the rating plate of the appliance. - Page 22 There are separate collection systems for recycling in the EU. For more information, please contact the local authority or your retailer where you purchased the product. All trademarks are the property of their respective owners and all rights are acknowledged. DSG Retail Ltd • Maylands Avenue • Hemel Hempstead Herts • HP2 7TG • England (P.N.: L1BMS11-001)
Need help?
Do you have a question about the L1BMS11 and is the answer not in the manual?
Questions and answers