Table of Contents
Advertisement
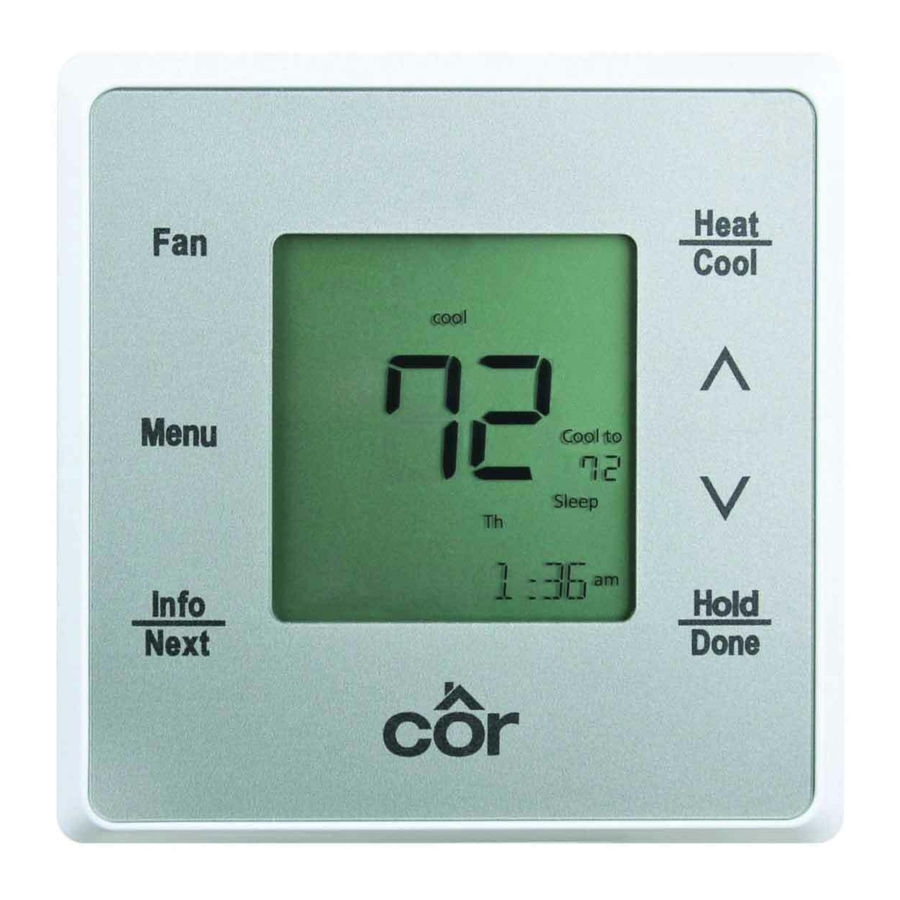
TSTPHA01, Côr 5
TSTWHA01, Côr 5C
TSTPRH01, Côr 7
TSTWRH01 Côr 7C
Residential Thermostats
Advanced Installation and Configuration
. . . . . . . . . . . . . . . . . . . . . . . . . . . . . . . . . . . . . . . . . . . . . . . . . . . . . . . . . . . . . . . . . . . . . . . . . . . . . . . . . . . . .
. . . . . . . . . . . . . . . . . . . . . . . . . . . . . . . . . . . . . . . . . . . . . . . . . . . . . . . . . . . . . . . . . . . . . . . . . . . . . . . . . .
. . . . . . . . . . . . . . . . . . . . . . . . . . . . . . . . . . . . . . . . . . . . . . . . . . . . . . . . . . . . . . . . . . . . . . . . . . . . . .
. . . . . . . . . . . . . . . . . . . . . . . . . . . . . . . . . . . . . . . . . . . . . . . . . . . . . . . . . . . . . . . . . . . . . . . . . . . . . . . . . . . . . . . .
. . . . . . . . . . . . . . . . . . . . . . . . . . . . . . . . . . . . . . . . . . . . . . . . . . . . . . . . . . . . . . . . . . . . . . . . . . . . . . . . . . . . . . . . . . . .
. . . . . . . . . . . . . . . . . . . . . . . . . . . . . . . . . . . . . . . . . . . . . . . . . . . . . . . . . . . . . . . . . . . . . . . . . . . . . . . . . . . . . . . . . . . .
. . . . . . . . . . . . . . . . . . . . . . . . . . . . . . . . . . . . . . . . . . . . . . . . . . . . . . . . . . . . . . . . . . . . . . . . . . . . . . . . . . . . . . .
Instructions
r
r
TABLE OF CONTENTS
. . . . . . . . . . . . . . . . . . . . . . . . . . . . . . . . . . . . . . . . . . . . . . . . . . . . . . . . . . . . . . . . . . . . . . . . . . .
. . . . . . . . . . . . . . . . . . . . . . . . . . . . . . . . . . . . . . . . . . . . . . . . . . . . . . . . . . . . . . . . . . . . . . .
. . . . . . . . . . . . . . . . . . . . . . . . . . . . . . . . . . . . . . . . . . . . . . . . . . . . . .
. . . . . . . . . . . . . . . . . . . . . . . . . . . . . . . . . . . . . . . . . . . . . . . . . . . . . . . . . . . . . . . . . . . . . . .
. . . . . . . . . . . . . . . . . . . . . . . . . . . . . . . . . . . . . . . . . . . . . . . . . . . . . . . . . . . . . . . . . . . .
. . . . . . . . . . . . . . . . . . . . . . . . . . . . . . . . . . . . . . . . . . . . . . . . . . . . . . . . . . .
. . . . . . . . . . . . . . . . . . . . . . . . . . . . . . . . . . . . . . . . . . . . . . . . . . . . . . . . . . . . . . . . . . . . . . . .
. . . . . . . . . . . . . . . . . . . . . . . . . . . . . . . . . . . . . . . . . . . . . . . . . . . . . . . . . . . . . . . . . . . . . . .
. . . . . . . . . . . . . . . . . . . . . . . . . . . . . . . . . . . . . . . . . . . . . . . . . . . . . . . . . . . . . . . . . . . . . . . . . . .
. . . . . . . . . . . . . . . . . . . . . . . . . . . . . . . . . . . . . . . . . . . . . . . . . . . . . . . . .
r
r
(No Humidity Control)
. . . . . . . . . . . . . . . . . . . . . . . . . . . . . . . . . . . . . . . . . . . . . .
. . . . . . . . . . . . . . . . . . . . . . . . . . . . . . . . . . . . . . .
. . . . . . . . . . . . . . . . . . . . . . . . . . . . . . . .
1
PAGE
2
2
2
3
10
10
12
12
12
19
19
19
19
19
19
21
22
22
. . . . . . .
23
24
26
Advertisement
Table of Contents

Related Manuals for cor thermostat 5


Summary of Contents for cor thermostat 5
-
Page 1: Table Of Contents
TSTWHA01, Côr 5C TSTPRH01, Côr 7 TSTWRH01 Côr 7C Residential Thermostats Advanced Installation and Configuration Instructions 7 Non- -Wi- -Fi, Côr 5 Non- -Wi- -Fi, Côr 7C Wi- -Fi Series Côr 5C Wi- -Fi Côr (Humidity Control) (No Humidity Control) -
Page 2: Safety Considerations
INTRODUCTION The Côr 5 series and Côr 7 series thermostat models are 7- -day, 5/2- -day, 1- -day programmable wall- -mounted, low- -voltage controls. The Côr 7 and Côr 7C combines temperature and humidity control in the units. The Côr Thermostats have no need for batteries to store user- -configured settings in memory. -
Page 3: Wiring Diagrams
Check to make sure wiring is correct before proceeding with installation or turning on unit. WIRING DIAGRAMS The following pages provide wiring diagrams for multiple heating and cooling equipment configurations. Côr 5, Côr 5C, Côr 7, or Côr 7C Thermostat Fan Coil Heat Pump Reversing Valve... - Page 4 Côr 5, Côr 5C, Côr 7, or Côr 7C Thermostat Fan Coil Air Conditioner Heat Stage 2 O/W2/B Cool Stage 1 Y1/W2 Cool Stage 2 Y/Y2 Y/Y2 24VAC Hot Cooling Rc/V+ 24VAC Hot Heating 24VAC Common C/Vg Heat Stage 1...
- Page 5 Humidify HUM* Humidifier Solenoid Valve* * Indicates connection may not be required /available Fig. 5 - - FV/FK Fan Coil with 1- -Stage Heat Pump *Indicates connection may not be required/available Fig. 6 - - Typical Fan Coil Heating Only...
- Page 6 Côr 5, Côr 5C, Côr 7, or Côr 7C Thermostat Fan Coil Air Conditioner Heat Stage 2 O/W2/B Y1/W2 Cool Stage 1 Y/Y2 Y/Y2 Remove J2 Jumper for 24VAC Hot Cooling Rc/V+ heat staging 24VAC Hot Heating 24VAC Common C/Vg...
- Page 7 Côr 5, Côr 5C, Côr 7, or Côr 7C Thermostat Furnace Heat Pump Reversing Valve O/W2/B Heat/Cool (Stage 1) Y1/W2 Heat/Cool (Stage 2) Y/Y2 Y/Y2 Y/Y2 24VAC Hot Cooling Rc/V+ 24VAC Hot Heating 24VAC Common C/Vg W2** Aux Heat (Stage 3)
- Page 8 Côr 5, Côr 5C, Côr 7, or Côr 7C Thermostat Furnace Air Conditioner Heat Stage 2 O/W2/B Cool (Stage 1) Y1/W2 Cool (Stage 2) Y/Y2 Y/Y2 Y/Y2 24VAC Hot Cooling Rc/V+ 24VAC Hot Heating 24VAC Common C/Vg Heat Stage 1...
- Page 9 * Indicates connection may not be required /available ** Some heat pumps may designate W 1 Fig. 13 - - Variable Speed, Multi- -Stage and Modulating Furnace with Single- -Stage Heat Pump Côr 5, Côr 5C , Côr 7, or Côr 7C Thermostat Furnace O/W 2/B...
-
Page 10: Installations Without A Common (C) Wire
1. Repurpose the G wire as a C wire per the instructions below. 2. Use the Add- -A- -Wire for the Côr 5/5C or Use the Two Wire Relay Module for the Côr 7/7C thermostats. 3. Run an additional wire from the equipment to the thermostat. - Page 11 IMPORTANT: This is only recommended on single stage Gas, Oil or Propane Furnace equipment applications with 4 wires running the thermostat (R, W, Y, G) and Carrier/Bryant Fan Coils. 1. Use the G wire for the C wire at the equipment. 2.
-
Page 12: Equipment Configuration
1. On the Côr 7/7C thermostats press START if the MENU button is not visible. 2. On the main screen touch and hold the MENU button (about 5 seconds) until the Options Menu is showing SW01 blinking. Configuration Options - - Description Summary... - Page 13 CONFIGURATION DESCRIPTION SUMMARY OPTIONS Only those marked with an asterisk (*) are available to the homeowner. SW01 – Equipment Type SW02 – Clean Filter Timer Adjustment SW03* – Fahrenheit/Centigrade Selection SW04 – Fan (G) on with W/W1 Selection SW05 – Room Air Temperature Sensing (Côr 7/7C only) SW06 –...
- Page 14 Configuration Options–Selection SW01–Equipment Type Range: H2, A2, HP1, AC1, HH1, HH2, HT, CL HP2 – operates a two- -speed heat pump with a fan coil HP1 – operates a single- -speed heat pump with a fan coil AC2 – operates a two- -speed AC with a fan coil or furnace AC1 –...
- Page 15 OFF - - function is disabled. Auxiliary heat is allowed to operate whenever sufficient demand for heat is available. 5 to 55_F (- -15 to 13_C) - - Outdoor temperature above which the auxiliary heat is not allowed to operate (unless MODE is set to Emergency Heat).
- Page 16 See Wiring Diagrams for more information. Default is OFF. SW20 —Outdoor Air Temperature Offset Adjustment This selection allows the calibration, or deliberate miscalibration of the outdoor air temperature sensor reading. The selection ranges from - -5 to +5_F. Default is 0.
- Page 17 SW25 —Number of Programmable Periods This selection allows the installer to configure the Thermostat for two or four periods per day. Two periods is a common commercial application and four periods is more common for residential. This selection is not available if SW24 has been set to nP to configure the Thermostat for non—programmable operation.
- Page 18 SW40 —Humidify Fan This selection controls whether humidification can only be done when a heating demand is present. If the homeowner turns humidification OFF, this configuration operates as if the selection was set to OFF. OFF – The humidity output will only energize when there is a humidity demand and the heating equipment is energized. On –...
-
Page 19: Côr 7 Non- -Wi- -Fi
3. Menu options are: Schedule, Alerts, Settings, and Wi- -Fir. 4. Use the up or down arrows to move through the 4 menu options. 5. Côr 5 touch Next to go into that menu and on Côr 7 touch Select. 5 Non- -Wi- -Fi, Côr... - Page 20 Enable (Yes/No), Limit (50- - 90_F), Dismiss (Yes/No) AUX RUNTIME Enable (Yes/No), Limit (1- - 8 hours), Dismiss (Yes/No) LO HUMIDITY Enable (Yes/No), Limit (5- - 95%), Dismiss (Yes/No) HI HUMIDITY Enable (Yes/No), Limit (5- - 95%), Dismiss (Yes/No) BAD DEFROST...
-
Page 21: Operational Information
OPERATIONAL INFORMATION Timers Five- -Minute Compressor Timeguard This timer prevents compressor from starting unless it has been off for at least 5 minutes. It can be overridden for 1 cycle by simultaneously pressing FAN and UP buttons. Cycle Timer Based on the selection of 2, 4, or 6 cycles per hour, this timer is set to 30, 15, or 10 minutes. This much time must elapse from the start of one cycle before another cycle can start. -
Page 22: Dehumidification Options
If timed control of the system blower is required, the dry contact can be used for this function. The G terminal can be connected to one of the dry contact terminals with the other terminal being connected to Rc and/or Rh for timed control of the fan. Note that this is not the same as programmable fan SW30. -
Page 23: Perfect® Humidity / Ideal® Humidity System Technology (Standard Dehumidification + Super Dehumidification)
50- -65% of cooling speed (dependent on the equipment). 3. Smart Evapt - - the blower will shut down within 5 seconds after cooling cycle to prevent re- -evaporation of the water on the coil back into the home. -
Page 24: Perfect® Humidity / Ideal® Humidity System Technology With Fk/Fv Fan Coils
CAUTION PROPERTY DAMAGE HAZARD Failure to follow this caution may result in property damage. Super dehumidification may cause the system/duct work to sweat in some unconditioned installations in high humidity areas. Perfectr Humidity / Idealr Humidity System Technology with FK/FV Fan Coils Standard Dehumidification: When there is a call for cooling and a call for dehumidification, the fan coil delivers airflow which is approximately 80% of the nominal cooling airflow to increase the latent capacity of the system. - Page 25 3. Use the next button so Off/On is blinking. 4. Use the up arrow to change to Dehum. 5. Touch next to go back to SW19 (it should be blinking). 6. Use the up arrow to move to SW41 (variable speed).
-
Page 26: Standard Dehumidification With Fv/Fk Fan Coils
Standard Dehumidification with FV/FK Fan Coils Enhanced dehumidification is achieved by reducing the blower speed to 80% of the cooling blower speed during a call for dehumidification. You can also choose to use Overcool to Dehumidify and set the cooling off delay to 0 to prevent re- -evaporating water on the coil after a cooling cycle. - Page 27 Fig. 27 - - FK- -FV Coil Circuit Board Set the dehumidify option under Menu > Settings > Dehumidify > Normal. This will allow you to set the RH% desired for the home. NOTE: The DHUM on the fan coil control board is active in the open state. The dry contact is active open for dehumidification. In other words, dehumidify output logic is reversed –...
- Page 28 Standard Dehumidification with FX4 Multi- -tap ECM Fan Coils For better Dehumidification, the D2 terminal on the Two- -Wire Relay Module can be used to control a speed tap when there is a no call for dehumidification. The G terminal will be used to control a speed tap when there is a call for Dehumidification. The D2 terminal will need to be set up properly for dehumidification through the thermostat setup menu.
- Page 29 Dehumidification. Super Dehumidification setting automatically over cools up to 3_F. 3. SmartEvapt: The blower will shut down within 5 seconds after a cooling call to prevent re- -evaporation of the water on the coil. NOTE: When Super Dehumidification is enabled, this feature cannot be overridden.
- Page 30 When the call for cooling is satisfied and there is a demand for dehumidification, the cooling blower- -off delay is decreased from 90 seconds to 5 seconds. If the unit is in continuous fan, there will not be an off delay.
- Page 31 Set Up Dehumidification on Furnaces with Tapped ECM Motors 1. Dry Contact D1 should be connected with R on the Fan Coil. D2 should be connected to the DH terminal on the Fan Coil 2. Set up the thermostat with the Two- -Wire Relay Module so the dry contact is configured for Dehum., Variable speed and Super Dehum.
- Page 32 2. Up/Down arrow to move to Dehumidify. 3. Touch Select. 4. Up/Down arrow to move to Normal. 5. Touch Next to change humidity level. 6. Up/Down arrow to change humidity %. 7. Touch Start to return to the Home Screen.
- Page 33 TROUBLESHOOTING No display If the display doesn’t power up after power is applied, check the Rc/Rh and C terminals for 24VAC. When using the Two- -Wire Relay Module on the Côr 7 series thermostats, check the voltage between Vg and V+. This voltage will be approximately 12- -20VDC. If voltage is present, check the polarity to make sure it is wired correctly.
- Page 34 Table 2 – Equipment Configuration Outputs Equipment Options Cool Cool Heat Heat Heat Heat Type Stage 1 Stage 2 Stage 1 Stage 2 Stage 3 Stage 4 Heat Heat Stage 1 Stage 2 1 Stage 1 Stage - - - - Y/Y2 - - - - W/W1...
- Page 35 Yes on the Côr 7 or Côr 7C thermostat a wired outdoor air temperature sensor can be added using the Two- -Wire Relay Module accessory. The Côr 5 and Côr 5C thermostats do not support the Two- -Wire Relay Module accessory and therefore cannot use a wired outdoor air temperature sensor.
- Page 36 2, 4 or 6 cycle per hour with 4 being the default from the factory. At 4 cycles per hour the thermostat will run the system no more than once per 15 minutes including the 5 minutes needed for a compressor time guard and the heating or cooling time can’t run less than 3 minutes.
- Page 37 Why is my Gas Furnace running at an outdoor temperature that is above my Aux Heat lockout setting? If the gas furnace started heating while the outdoor temperature was below the lockout temperature, then the outdoor temperature increased above the lockout temperature, the gas furnace will continue heating until the temperature set point is satisfied and the system shuts down. If the outdoor air temperature is still above the lockout temperature at the beginning of the next cycle, the gas furnace will run at the beginning of the cycle.
- Page 38 Catalog No: IM---TST ---01 Copyright 2017 Côr Home Automation S P .O. Box 4808 S Syracuse, NY 13221 Edition Date: 07/17 Manufacturer reserves the right to change, at any time, specifications and designs without notice and without obligations. Replaces: NEW...
Need help?
Do you have a question about the 5 and is the answer not in the manual?
Questions and answers