Advertisement
Quick Links
Advertisement

Related Manuals for Weltevree TABLEBENCH 4-SEATER


Summary of Contents for Weltevree TABLEBENCH 4-SEATER
- Page 1 TABLEBENCH 4-SEATER PRODUCT MANUAL...
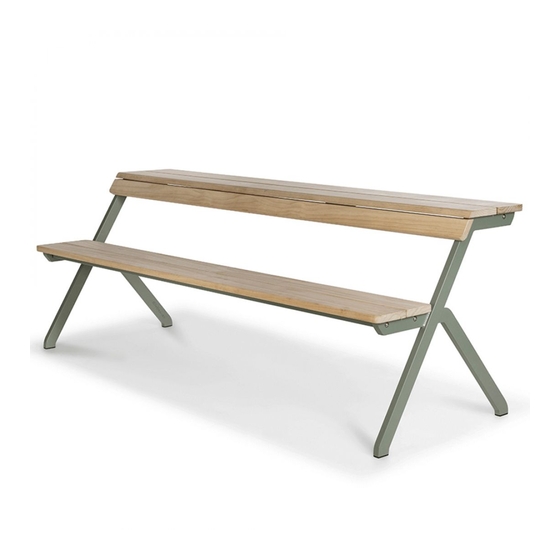
- Page 2 MODERN INTERPRETATION OF A CLASSIC PICNIC TABLE...
- Page 3 TABLEBENCH by Jair Straschnow Gefeliciteerd met de aankoop van uw Tablebench! De Tablebench is een moderne interpretatie van de klassieke picknicktafel. Het bestaande ontwerp is gehalveerd, waardoor het product in zijn functie uitzonderlijk veel meerwaarde heeft gekregen. De toepasbaarheid in verschillende settings maakt hem veelzijdig en krachtig.
-
Page 4: Dimensions And Specifications
DIMENSIONS & SPECIFICATIONS 210 cm / 82.5 inch 75,5 cm / 30 inch 29 cm / 11.5 inch 27,5 cm / 11 inch Ontwerper / Designer / Designer Onderhoud / Maintenance / Wartung The Tablebench can be treated with a coating, this makes it easier to keep the Jair Straschnow Spuit het hout van de Tablebench twee... - Page 5 Benodigdheden: 2 personen, gebruikshandleiding Necessities: 2 persons, construction manual Sie brauchen: 2 Personen, Anleitung TABLEBENCH 4-SEATER PRODUCT MANUAL...
- Page 6 Onderdelen kleine doos / Parts in small box / Teile in kleiner Box M8 x 70 mm M8 x 50 mm M6 x 60 mm M6 x 14 mm M6 ring 1 x 4 mm Inbussleutel 1 x 5 mm Inbussleutel 2 x Lockpaatje 1 x 4 mm Allen key 1 x 5 mm Allen key...
- Page 7 Losse onderdelen / Loose parts / Einzelteile Tafelblad / Table top / Tischplatte Zitting / Seat / Sitzfläche Poten / Legs / Beine...
- Page 8 Stap 1 Zet de twee poten naast elkaar, het Weltevree logo zit op de linker poot aan de binnenzijde. Step 1 Place the two legs next to each other, the Weltevree logo is placed on the left leg on the inside.
- Page 9 Stap 3 Plaats de zitting op de poten. Zowel de kop van de voorgemonteerde bouten als de ringen moeten hierbij door het slotgat vallen. Step 3 Place the seat on the legs. Make sure that both the pre-assembled bolts and rings go through the slotted hole.
- Page 10 Stap 5 Zet de zitting nu vast vanaf de zijkant met de bijgeleverde M8 x 50 mm bouten. De zitting moet hierbij zo ver mogelijk naar voren geschoven zijn, zoals te zien in stap 4. Step 5 Fix the seats from the side with the supplied M8 x 50 mm bolts.
- Page 11 Stap 7 Draai de meegeleverde M6 x 14 mm bouten met de veerring drie slagen rond in de voorgemonteerde moeren van het tafelblad. Let op, in de rugleuning hoeven geen bouten voorgemonteerd te worden. Step 7 Tighten the supplied M6 x 14 mm bolts with the spring washer three turns in the pre-assembled nuts of the table top Note that no bolts need to be mounted...
- Page 12 Stap 9 Schuif het tafelblad nu zo ver mogelijk naar voren, zodat de rugleuning vlak aansluit met de poten. Step 9 Slide the tabletop forward as far as possible, so the backrest connects with the legs. Schritt 9 Schieben Sie die Tischplatte nun so weit wie möglich nach vorne, sodass die Rückenlehne mit den Beinen verbunden ist.
- Page 13 Stap 11 Draai nu ook de andere M8 bout vast in het tafelblad vanaf de zijkant. Gebruik hiervoor de M8 x 50 mm bout, er is geen lockplaatje nodig. Step 11 Now also tighten the other M8 bolt in the table top from the side. Use the M8 x 50 mm bolt, no lock plate is required for this.
- Page 14 Stap 13 Draai de voorgemonteerde bouten in het tafelblad nu vanaf de onderzijde strak aan. Let op dat je de goede richting op draait om de bout vast te draaien. Zie de afbeelding hieronder voor de juiste richting. Step 13 Tightly tighten the pre-assembled bolts in the table top from underneath.
-
Page 15: Warranty
Thank you for your Vielen Dank für Ihren aankoop. purchase. Einkauf. Weltevree levert kwaliteit Weltevree delivers quality Weltevree liefert Qualität Wanneer er iets mis is met uw product If you encounter something wrong with Gibt es etwas an Ihrem Produkt zu...
Need help?
Do you have a question about the TABLEBENCH 4-SEATER and is the answer not in the manual?
Questions and answers