Table of Contents
Advertisement
Quick Links
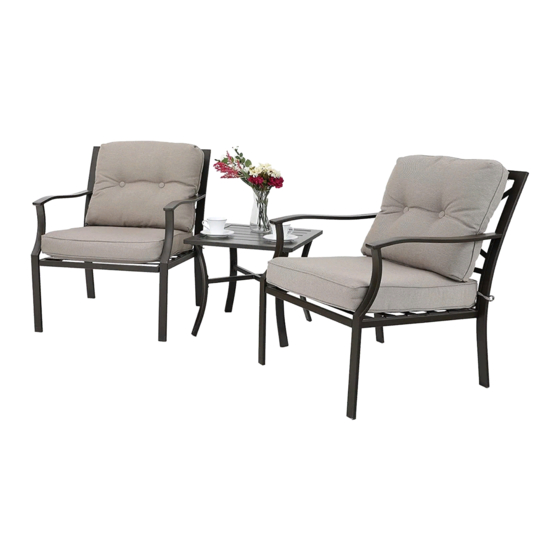
3PCS PADDED CONVERSATION SETS
Safety Information
PRODUCT CAUTION
This dining set was made for the explicit purpose of providing outdoor functions and is not to be used as a toy. This product is intended for
normal outdoor use; however, the manufacturer recommends storing and / or covering this set when any formidable / severe weather is
Children under the age of 10, near the product, should be supervised by a competent adult at all times. This product is NOT intended for
commercial use and will void the warranty.
Warranty
1 YEAR FRAME AND 1 YEAR FABRIC LIMITED WARRANTY
CUSTOMER SERVICE
Call Our After Sales Support Hotline 1-866-283-4412 Monday-Friday 7am-5pm CST
Or Our Email Address: service@alphamarts.com
AlphaMarts.com
ASSEMBLE INSTRUCTION
AlphaMarts.com
E02GF040802801
product.
Advertisement
Table of Contents

Related Manuals for PHI VILLA 3PCS PADDED CONVERSATION SETS


Summary of Contents for PHI VILLA 3PCS PADDED CONVERSATION SETS
- Page 1 AlphaMarts.com E02GF040802801 3PCS PADDED CONVERSATION SETS ASSEMBLE INSTRUCTION Safety Information PRODUCT CAUTION This dining set was made for the explicit purpose of providing outdoor functions and is not to be used as a toy. This product is intended for normal outdoor use; however, the manufacturer recommends storing and / or covering this set when any formidable / severe weather is product.
- Page 2 AlphaMarts.com PART LIST FIGURE QUANTITY DESCRIPTION 4PCS LEG CONNECTOR TABLE RIM TILE 16+1PCS FLAT WASHER 16+1PCS BOLT (M6*15) ALLEN WRENCH STEP 1 A. PLACE TABLE RIM (C) UPSIDE DOWN ON A FLAT, PROTECTED SURFACE. B. ATTACH LEGS (A) TO TABLE RIM (C) WITH FLAT WASHER (E) AND BOLT (F) USING ALLEN WRENCH (G).
- Page 3 AlphaMarts.com PART LIST FIGURE QUANTITY DESCRIPTION LEFT ARM RIGHT ARM BACK SEAT 2+1PCS SHORT BOLT(M6*20) 6+1PCS LONG BOLT (M6*40) 8+1PCS FLAT WASHER ALLEN WRENCH STEP 1 A. PLACE LEFT ARM (A) UPSIDE DOWN ON A FLAT PROTECTED SURFACE. B. ATTACH SEAT (D) TO LEFT ARM (A) WITH FLAT WASHER (G) AND BOLT (F) USING ALLEN WRENCH (H).
Need help?
Do you have a question about the 3PCS PADDED CONVERSATION SETS and is the answer not in the manual?
Questions and answers