Table of Contents
Advertisement
Quick Links
Life Gets Better With
USE AND CARE GUIDE
THD-E02GS010
MODEL#: F210020-A1
F210020-C2
ANS Z21.97 CSA 2.41-2017
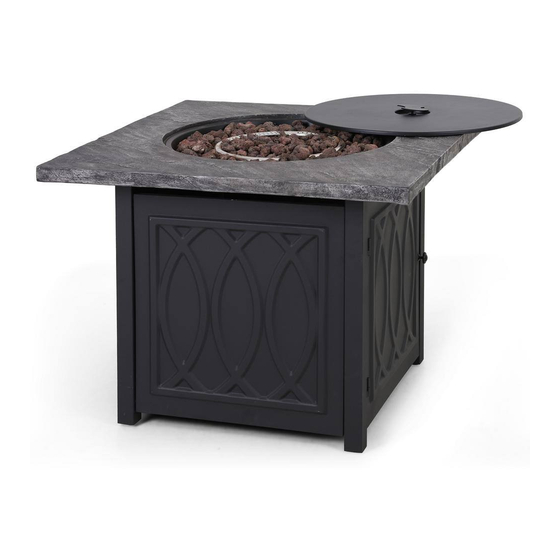
Outdoor Decorative Gas Appliances
Questions, problems, missing parts? Before returning to the store,
please contact our Customer Service
service@alphamarts.com
THANK YOU
We appreciate the trust and con dence you have placed in PHI VILLA through the purchase of our product. We strive to continually create quality
products designed to enhance your home. Visit us online to see our full line of products available for your home improvement needs.
Thank you for choosing PHI VILLA!
Advertisement
Table of Contents

Related Manuals for PHI VILLA THD-E02GS010


Summary of Contents for PHI VILLA THD-E02GS010
- Page 1 THANK YOU We appreciate the trust and con dence you have placed in PHI VILLA through the purchase of our product. We strive to continually create quality products designed to enhance your home. Visit us online to see our full line of products available for your home improvement needs.
-
Page 2: Table Of Contents
Table of Contents 11-12 Table of Contents Natural Gas Conversion Warnings & Important Safety Information Operation Instructions 13-15 Speci cation & Package Contents Care and Maintenance Assembly instructions 6-10 Warranty WARNING: For Outdoor Use Only. INSTALLER: Leave this manual with the appliance. Installation and service must be performed CONSUMER: Retain this manual for future reference by a quali ed installer, service agency, or... - Page 3 IMPORTANT SAFETY INFORMATION The installation must conform with local codes or, in the absence of local codes, with the National Fuel Gas Code, ANSI Z223.1 NFPA 54; National Fuel Gas Code; Natural Gas and Propane Installation Code, CSA B149.1; or Propane Storage and Handling Code, CSA B149.2, as applicable.
- Page 4 IMPORTANT SAFETY INFORMATION (About Propane Gas) The propane gas supply cylinder to be used must be constructed and marked in accordance with the U.S. Deparment of Transportation (D.O.T.) Speci cations for propane gas Cylinders, or the Standard for Cylinders, Spheres and Tubes for Transportation of Dangerous Goods and Commission, CAN/CSA-B339, as applicable.
- Page 5 PACKAGE CONTENTS PART DESCRIPTION QUANTITY PART DESCRIPTION QUANTITY 1 pc Lava rock (6.6 lbs / pack) 2 pack 1 pc 1 pc Weather cover Table top assembly 1 pc 1 pc Front panel Door handle 1 pc 1 pc Door panel Natural gas ori ce 1 pc 16 pcs...
-
Page 6: Assembly Instructions
ASSEMBLY INSTRUCTIONS 1. Carefully unpack all parts from the box, compare parts with package content listed above, make sure all parts are present before beginning assembly of product. If any part is missing or damaged, do not attempt to assemble the product. Contact customer service for replacement parts. - Page 7 ASSEMBLY INSTRUCTIONS 4. Attach right panel (F) to front-right leg (G) and back-right leg (J) with bolts (AA) and washer (CC) using hex screw driver (DD), (see Figure 4). NOTE: DO NOT tighten the screws completely. Hardware Used Bolts (M6 x 15) Washer (M6) Hex screw driver Figure 4...
- Page 8 ASSEMBLY INSTRUCTIONS 6. Attach gas cylinder support (K) to back-left leg (I) and back-right leg (J) and front-left leg (H) and front-right leg (G) with bolts (BB) and washer (CC) using hex screw driver (DD), (see Figure 6). NOTE: Tighten all screws completely. Hardware Used Bolts (M6 x 25) Washer (M6)
- Page 9 ASSEMBLY INSTRUCTIONS 9. Open the box of lava rocks, put the lava rocks (L) into the re bowl of the re table, (see Figure 9). A gas re pit requires 13.2 lbs lava rocks. WARNING Keep children away during assembly, as this item contains lava rock, which are small pieces and can be swallowed by children.
- Page 10 ASSEMBLY INSTRUCTIONS 10. Open the door panel (D). Place the gas cylinder into the gas cylinder support (K) and connect the regulator by turning the black handle clockwise to tighten. To remove the regulator, turn the black handle counter-clockwise. Secure the gas cylinder by tightening clockwise the retention point found on gas cylinder support (K), (see Figure 10), so that the gas cylinder cannot move from side to side or fall down.
-
Page 11: Natural Gas Conversion
NATURAL GAS CONVERSION STOP STOP NATURAL GAS CONVERSION Natural gas conversion must be performed only by natural gas provider or a service company. 1. Disconnect the propane hose from the gas valve (see Figure 12). Caution: The propane tank shall be shut off prior to disconnecting the propane hose, before proceeding with the conversion. gas valve propane hose Figure 12... - Page 12 NATURAL GAS CONVERSION 4. Connect the natural gas hose to the gas valve by screwing clockwise tightly (see Figure 15). Plug the natural gas xture into the natural gas supply system (see Figure 16). The conversion kit should be CSA certi ed. Below are several suggested CSA certi ed conversion kits for your reference.
-
Page 13: Operation Instructions
OPERATION INSTRUCTIONS Battery Make sure the control knob is in the “OFF” position. Unscrew the push button cap on the ignitor module located on the control panel to access the battery compartment. The ignitor module requires one AAA size battery, (see Figure 18). BATTERY IS NOT INCLUDED. WARNING: 1. - Page 14 OPERATION INSTRUCTIONS gas valve / regulator hose connection (Figure 22) inlet tube / bellows connection (Figure 23) To perform a leak test: 1. Make 2~3 oz. of leak solution by mixing one part liquid dishwasher detergent and three parts water. Noted: make sure control knob is “OFF”.
-
Page 15: Care And Maintenance
OPERATION INSTRUCTIONS Observe Flame Height When Lit: The burner will display blue and yellow ames. These ames should be a blue / yellow color between 1~2 in. height, (see Figure 25). These ames should not be yellow or produce thick smoke. This would indicate an obstruction of air ow through the burners. -
Page 16: Warranty
WARRANTY Firepits Burner, steel re pit bowl, all mechanical parts and ttings to control panel and burner assembly, and all re pit tops that are not cast aluminum are warranted for a period of one (1) year from original date of purchase, against defects in material and or workmanship. Rust is not covered. - Page 17 THANK YOU We appreciate the trust and confidence you have placed in PHI VILLA through the purchase of our product. We strive to continually create quality products designed to enhance your home. Visit us online to see our full line of products available for your home improvement needs.
-
Page 18: Warranty
Table of Contents Table of Contents Pre-assembly Safety Information Assembly Warranty Care And Maintenance What is Covered What is Not Covered Safety Information • Tighten each bolt firmly and properly. Do not completely tighten screws until all screws are started. •... -
Page 19: Pre-Assembly
Pre-assembly (continued) Assemble the item on a soft, non-abrasive surface, such as carpet or cardboard to avoid damaging the item. Seek assistance to assemble bulky or heavy items. Identify all parts packed in the carton against the parts list. NOTE: Remove all the protective material carefully and DO NOT use a knife to prevent scratching the furniture. - Page 20 Pre-assembly (continued) Assemble the item on a soft, non-abrasive surface, such as carpet or cardboard to avoid damaging the item. Seek assistance to assemble bulky or heavy items. Identify all parts packed in the carton against the parts list. NOTE: Remove all the protective material carefully and DO NOT use a knife to prevent scratching the furniture.
-
Page 21: Assembly
Assembly... - Page 22 Assembly...
- Page 23 Cleaning and Maintenance Clean the furniture with damp cloth, rinse thoroughly. Dry frame parts completely. Do not use bleach, acid or ● other solvents on the wicker or metal parts. We recommend the use of furniture covers to protect the product when not in use. ●...
Need help?
Do you have a question about the THD-E02GS010 and is the answer not in the manual?
Questions and answers