
Subscribe to Our Youtube Channel
Related Manuals for Crane X-Bike

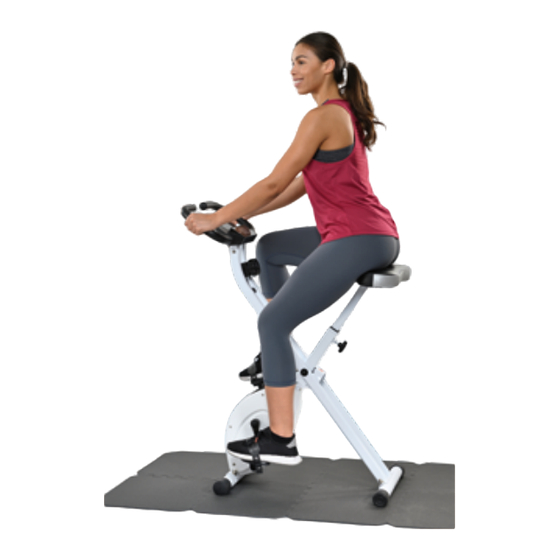
Summary of Contents for Crane X-Bike
- Page 1 User Manual Manual del usuario FOLDABLE EXERCISE BIKE BICICLETA DE EJERCITACIÓN PLEGABLE English ..03 Español ..23...
-
Page 2: Table Of Contents
Proper use ................7 Safety instructions..............8 Safety instructions regarding batteries ......10 First use ................13 Checking the X-Bike and scope of delivery ....... 13 Assambling ..............14 Setting up the X-Bike ............14 Leveling .................16 Using the LCD screen ............16 Inserting and replacing batteries ........16... -
Page 3: Package Contents/Parts
Package contents/parts Package contents/parts Package contents/parts Front main frame Rear main frame Seat pillar Handlebar Front stand Rear stand Saddle Pedal L Pedal R Club knob Safety pin 8x70L Carriage bolt M8x60L Hex head screw M6x12L Spring washer Flat washer 6.5x13x1.5t Flat washer 8.5x16x1.5t Curved washer 8.3x22x1.5t Curved washer 6.5x13x1.5t... -
Page 4: General Information
This symbol indicates that batteries are included in the scope of delivery. injury or damage to the X-Bike. Store the user manual for future use. If you pass the X-Bike on to third parties, please be absolutely sure to include this user manual. -
Page 5: Safety Instructions
Safety instructions Safety instructions Safety instructions ried out by children without supervision. Observe national regulations! WARNING! - Observe applicable national regulations and regulations when using and disposing of the product. Risk of injury and suffocation! When children play with the product or the packaging, Pay attention to ambient conditions! they can injure themselves and suffocate! - The product may not be used at ambient temperatures above... -
Page 6: Safety Instructions Regarding Batteries
Spinning pedals can cause injury. - Excessive or damaged batteries can cause burns when in - This X-Bike does not have a freewheel. The pedal speed must contact with the skin. Do not touch leaking batteries with bare be reduced in a controlled manner. -
Page 7: First Use
2. Check to make sure that all parts are included (see Fig. A). - Disabled people should not use the machine without a quali- 3. Check whether the X-Bike or the individual parts exhibit damage. If this is the case, fied person or the accompaniment of a doctor. -
Page 8: Assambling
Risk of injury! Improper set-up and WARNING! use of the X-Bike may result in injury. Risk of injury! − When setting up the X-Bike, The mark MAX on the seat make sure not to squash pillar must be completely visible your fingers. -
Page 9: Leveling
Functions and Features Leveling 1. SCAN: Press the MODE button until SCAN appears on the screen. Adjust the X-Bike so that is sits The following functions will be displayed for 6 seconds each on the main screen: on the floor without rocking. -
Page 10: Button Functions
They could damage the surfaces. 1. Clean the X-Bike with a dry cloth. In case of persistent dirt, use a slightly wet cloth Setting the difficulty levels and perhaps a mild detergent. -
Page 11: Technical Data
Disposing of the X-Bike − Should the X-Bike no longer be capable of being used at some point in time, dispose of it in accordance with the regulations in force in your city or state. - Page 12 Uso adecuado ...............27 Instrucciones de seguridad ..........28 Advertencias de seguridad sobre las pilas ...... 30 Primer uso ...............33 Comprobación de la X-Bike y alcance de suministro ..33 Montaje ................34 Configuración de la X-Bike ..........34 Nivelación ................37 Funcionamiento de la pantalla LCD .........37...
-
Page 13: Contenido Del Paquete / Piezas
Contenido del paquete / piezas Contenido del paquete / piezas Contenido del paquete / piezas Bastidor principal delantero Bastidor principal trasero Tija del sillín Manillar Soporte delantero Soporte trasero Sillín Pedal izquierdo Pedal derecho Perilla Pasador de seguridad 8x70L Perno M8x60L Tornillo de cabeza hexagonal M6x12L Arandela elástica Arandela plana 6.5x13x1.5t... -
Page 14: Información General
X-Bike. paquete. Guarde el manual del usuario para uso futuro. Si pasa la X-Bike a terceros, asegúrese de incluir este manual del usuario. Estos símbolos indican cómo remover el embalaje y el produc- Explicación de los símbolos... -
Page 15: Instrucciones De Seguridad
Instrucciones de seguridad Instrucciones de seguridad Instrucciones de seguridad dos en el uso seguro del producto para entender los peligros resultantes. - Los niños no deben jugar con el producto. ¡ADVERTENCIA! - Los niños no deben realizar el mantenimiento ni la limpieza del ¡Riesgo de lesiones y asfixia! producto sin ser monitoreados. -
Page 16: Advertencias De Seguridad Sobre Las Pilas
Advertencias de seguridad sobre las pilas Advertencias de seguridad sobre las pilas Advertencias de seguridad sobre las pilas ras en la piel si entran en contacto con ella. No toque las pilas derramadas con las manos sin protección. - En caso de que el electrolito entre en contacto con la piel o los ¡ADVERTENCIA! ojos, enjuague inmediatamente con agua fresca durante al menos 15 minutos y busque atención médica. -
Page 17: Primer Uso
2. Asegúrese de que todas las piezas estén incluidas (consulte la Fig. A). - Antes de usar la X-Bike para entrenar, siempre realice ejercicios 3. Compruebe si la X-Bike o las piezas individuales presentan daños. Si este es el de estiramiento para calentar adecuadamente. -
Page 18: Montaje
2 pernos , 2 arandelas Al hacer ejercicio con su X-Bike, asegúrese de tener suficiente espacio curvadas y 2 tuercas ciegas hexa- para moverse y de que no haya palancas, mecanismos de ajuste, gonales M8 (ver ilustración C). -
Page 19: Nivelación
Configuración de la X-Bike Sensores de pulso de mano La X-Bike ahora está completa- mente ensamblada. ¡AVISO! Es importante ajustar el sillín a ¡AVISO! la altura correcta. Siéntese en el sillín y ponga los pies en los Nivelación pedales. Debe poder dar una Ajuste la bicicleta de ejercitación... -
Page 20: Funciones Y Características
RESET (Reinicio): Cuando la bicicleta no esté en movimien- to, pulse el botón RESET (Reinicio) para borrar o poner a 1. Limpie la X-Bike con un paño seco. En caso de suciedad persistente, use un paño cero los valores de ejercicio. -
Page 21: Almacenamiento
Esto le permite mover la Eliminación de la X-Bike X-Bike cómodamente (ver ilustración - Si la X-Bike ya no se puede usar en algún momento, deséchela de acuerdo con las regulaciones vigentes en su ciudad o estado. - Siempre guarde la X-Bike en un ambiente seco y sin escarcha, inaccesi- - Asegúrese de que su información de reciclado aplique a las normas... - Page 23 Made in China DIST. & SOLD EXCLUSIVELY BY: ALDI BATAVIA, IL 60510 AFTER SALES SUPPORT • SERVICIO POSVENTA 99481 1-866-558-8096 service@801service.net YEARS WARRANTY MODEL / MODELO: AÑOS DE GARANTÍA FLX-XB-01 01/2020...
Need help?
Do you have a question about the X-Bike and is the answer not in the manual?
Questions and answers
I want to know if I can get a replacement 21r crank for my flx-xb-01 exercise bike?
Based on the context, replacement parts for the Crane FLX-XB-01 exercise bike, including the 21R crank, may not be available. One user report states that the manufacturer could not provide parts and offered a refund instead. Therefore, it is unlikely that you can get a replacement 21R crank from the manufacturer.
This answer is automatically generated
I have a Crane foldable exercise bike from Aldi. I have the manual but nowhere does it show or tell where to change batteries. I did not assemble this so I have no idea.
To change the batteries on a Crane foldable exercise bike, locate the center console (LCD display). Open the battery compartment on the back of the console and insert 2 AAA batteries.
This answer is automatically generated