
Related Manuals for Philco PCH/AGI-1500EF


Summary of Contents for Philco PCH/AGI-1500EF
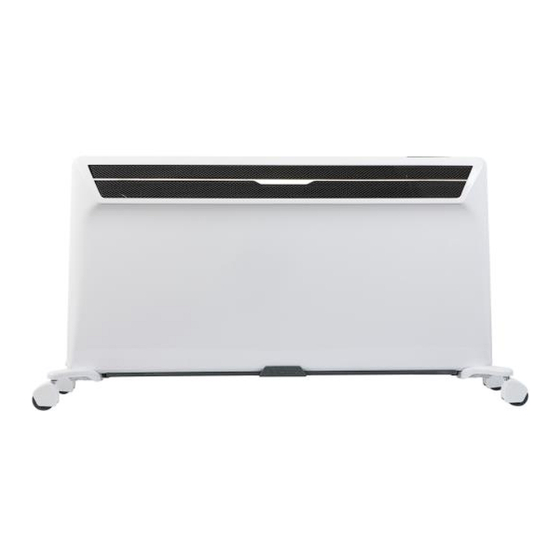
- Page 1 Οδηγίες Χρήσης User Manual Θερμοπομπός Convector heater Μοντέλο: PCH/AGI-1500EF, PCH/AGI-2200EF, PCH/AGI-2500EF...
-
Page 2: Table Of Contents
Περιεχόμενα/Contents Περιεχόμενα/Contents ..........Error! Bookmark not defined. ΣΗΜΑΝΤΙΚΑ ΜΕΤΡΑ ΑΣΦΑΛΕΙΑΣ/ IMPORTANT SAFEGUARDS ......3/14 Λειτουργία ελέγχου/Control function ..............5/16 1.Εισαγωγή λειτουργίας/Function introduction ............ 6/16 2. Ρύθμιση ημέρας και ώρας/Setting the day and time ........7/17 3. Ρύθμιση θερμοκρασίας/Setting temperature ........... 7/18 4. -
Page 3: Σημαντικα Μετρα Ασφαλειασ/ Important Safeguards
ΣΗΜΑΝΤΙΚΑ ΜΕΤΡΑ ΑΣΦΑΛΕΙΑΣ ΠΑΡΑΚΑΛΟΥΜΕ ΔΙΑΒΑΣΤΕ ΟΛΕΣ ΤΙΣ ΟΔΗΓΙΕΣ ΠΡΙΝ ΧΡΗΣΙΜΟΠΟΙΗΣΕΤΕ ΑΥΤΟ ΤΟ ΘΕΡΜΑΝΤΙΚΟ Όταν χρησιμοποιείτε ηλεκτρικές συσκευές, πρέπει να ακολουθούνται τα βασικά μέτρα ασφαλείας για να ελαχιστοποιηθεί ο κίνδυνος φωτιάς, ηλεκτροπληξίας και τραυματισμοί ανθρώπων ή περιουσίας, συμπεριλαμβανομένων των ακόλουθων. Όταν ενεργοποιείτε τη συσκευή για πρώτη φορά αφήστε την να λειτουργήσει στο μέγιστο... - Page 4 11. Μην εισάγετε ή αφήνετε ξένα αντικείμενα να εισέλθουν σε οποιοδήποτε άνοιγμα αερισμού ή εξαγωγής του αέρα, καθώς μπορεί να προκαλέσει ηλεκτροπληξία, πυρκαγιά ή ζημιά στο θερμαντικό. 12. Για να αποφύγετε ενδεχόμενη πυρκαγιά, μην εμποδίζετε με οποιονδήποτε τρόπο τις εισόδους ή εξόδους αέρα. Μην χρησιμοποιείτε το θερμαντικό επάνω...
-
Page 5: Λειτουργία Ελέγχου/Control Function
23. Τα παιδιά να επιβλέπονται ώστε να μην παίζουν με τη συσκευή. 24. Για να αποφύγετε την υπερθέρμανση, μην καλύπτετε το θερμαντικό. Το θερμαντικό να μην τοποθετείται ακριβώς κάτω από την πρίζα. Το θερμαντικό πρέπει να εγκατασταθεί με τέτοιο τρόπο ώστε οι διακόπτες και τα άλλα χειριστήρια... -
Page 6: Εισαγωγή Λειτουργίας/Function Introduction
6. Πλήκτρο λειτουργίας «Ανοιχτό 12. Λυχνία ένδειξης λειτουργίας Παράθυρο» «Άνεσης» 7. Πλήκτρο «Πάνω/Αύξηση» 13. Λυχνία ένδειξης λειτουργίας 8. Πλήκτρο «Κάτω/Μείωση» χρονοδιακόπτη 9. Οθόνη LED 14. Λυχνία ένδειξης λειτουργίας 10. Φωτεινή ένδειξη «User» anti-frost 11. Λυχνία ένδειξης αυτόματης 15. Λυχνία ένδειξης λειτουργίας λειτουργίας... -
Page 7: Ρύθμιση Ημέρας Και Ώρας/Setting The Day And Time
1.5 Ενδεικτική λυχνία «Ανοιχτό Παράθυρο»: όταν το θερμαντικό είναι σε λειτουργία «Ανοιχτό παράθυρο», ανάβει. Η μονάδα είναι εξοπλισμένη με θερμοστάτη ακριβείας. Έχει ενσωματωμένη μνήμη με 6 προγράμματα θέρμανσης, εκ των οποίων τα 5 είναι προκαθορισμένα από το εργοστάσιο και το ένα είναι διαθέσιμο να προγραμματιστεί από το χρήστη. 2. -
Page 8: Ρύθμιση Προγράμματος/Setting The Program
Χώρος εφαρμογής Δευτέρα- Κρεβατοκάμαρα, Διάδρομο, 00:00 06:30- 08:30- 17:00- 22:30- Παρασκε Κουζίνα, Σαλόνι, Τραπεζαρία, 5℃ 08:30 17:00 22:30 24:00 υή Μπάνιο 06:30 00:00 Κρεβατοκάμαρα, Διάδρομο, Σάββατο- 07:30- 10:00- 12:00- 14:00- 17:00- 22:30- Κoυζίνα, Σαλόνι, Τραπεζαρία, 5℃ Κυριακή 10:00 12:00 14:00 17:00 22:30 24:00... -
Page 9: Ρύθμιση Προγράμματος Λειτουργίας "Up"/Set The User Program "Up" Mode
4.2 Ρύθμιση προγράμματος λειτουργίας «UP» Το πρόγραμμα "UP" επιτρέπει τη ρύθμιση του θερμαντικού σε λειτουργία άνεσης σε συγκεκριμένες ώρες και κάθε μέρα της εβδομάδας μπορεί να έχει διαφορετικές ρυθμίσεις. Μπορούν να οριστούν το πολύ τρία χρονικά διαστήματα στη λειτουργία άνεσης. Τις υπόλοιπες ώρες θα δουλεύει σε λειτουργία anti-frost με προκαθορισμένη... -
Page 10: Κλείδωμα Πλήκτρων/Children Lock
ου έναρξης του 2 χρονικού διαστήματος. ου 5)Πιέστε ξανά “Prog”, θα δείξει την ώρα λήξης του 2 χρονικού διαστήματος. 6) Πιέστε το πλήκτρο “Prog”, θα δείξει “3.”, πιέστε ξανά “Prog”, θα δείξει την ώρα ου έναρξης του 3 χρονικού διαστήματος. ου... -
Page 11: Τοποθέτηση Στον Τοίχο/Wall Mounting
Τοποθέτηση στον τοίχο Μην τοποθετείτε τα ροδάκια στη βάση του θερμαντικού. Σιγουρευτείτε ότι το θερμαντικό είναι αποσυνδεδεμένο από την παροχή ρεύματος και ο τοίχος είναι κατάλληλος για να τοποθετηθεί το θερμαντικό και υπάρχουν οι απαιτούμενες αποστάσεις (βλ. εικόνα).Βεβαιωθείτε ότι το θερμαντικό βρίσκεται σε απόσταση μικρότερη... -
Page 12: Τοποθέτηση Στο Πάτωμα/Floor Mounting
Βίδες για κλείδωμα Βίδες τοίχου Ούπα βραχίονα (κοντές) Τοίχος Τοίχος Τρύπες Τοποθέτηση στο πάτωμα Η συσκευή μπορεί να τοποθετηθεί σε ειδικά πόδια τα οποία επιτρέπουν να μετακινηθεί μέσα στο δωμάτιο. Τα πόδια στήριξης συνδέονται ως εξής: Γυρίστε ανάποδα το θερμαντικό, Πάρτε... -
Page 13: Συντηρηση/Maintenance
ΣΥΝΤΗΡΗΣΗ Αυτό το προϊόν περιέχει ανακυκλώσιμα υλικά. Μην πετάτε αυτή τη συσκευή μαζί με τα υπόλοιπα οικιακά απόβλητα. Επικοινωνήστε με τις τοπικές αρχές για κοντινότερο σημείο συλλογής. Το θερμαντικό απαιτεί τακτικό καθαρισμό για την εξασφάλιση λειτουργίας χωρίς προβλήματα. Αποσυνδέστε το θερμαντικό από την παροχή ρεύματος πριν τον καθαρισμό. Βεβαιωθείτε... - Page 14 IMPORTANT SAFEGUARDS PLEASE READ ALL INSTRUCTIONS BEFORE USING THIS HEATER WHEN USING ELECTRICAL APPLIANCES, BASIC PRECAUTIONS SHOULD ALWAYS BE FOLLOWED TO REDUCE RISK OF FIRE, ELECTRICAL SHOCK AND INJURY TO PERSONS OR PROPERTY, INCLUDING THE FOLLOWING When switching on the appliance for the first time, allow it to run at full power for about two hours to get rid of the unpleasant smell.
- Page 15 15.To prevent overload and blown fuses, be sure that no other appliance is plugged into the same outlet (receptacle) or into another outlet (receptacle) wired into the same circuit. 16.It is normal for the heater’s plug and cord to feel warm to the touch. A plug or cord which becomes hot to the touch or becomes distorted in shape may be a result of a worn electrical outlet.
- Page 16 Control function Check the household voltage to ensure it matches the appliance's rated specification. Be sure to plug into a 220-240V, 50-60Hz outlet. 12 13 14 Control panel 1.On/off key 10.User indicator light 2.Mode setting key 11.Auto indicator light 3.Timer key 12.Comfort indicator light 4.Program setting key 13.Timer indicator light...
- Page 17 corresponding power setting which show in the below sheet. When shows in USER power mode, it will not shows AUTO. The user can set the power by their selves. Output power Power setting PCH/AGI 2500 EF PCH/AGI 2200 EF PCH/AGI 1500 EF 2350-2500W 2000-2200W 1350-1500W...
- Page 18 3. Setting temperature LED window display setting temperature, press “Up” or “Down” button to choose the required temperature for high level working period, it’s from 5 ℃ to 35℃. For low level working period, default temperature is 5 ℃, can’t be altered. 4.
- Page 19 4.1 Setting the program To select a program to run: 1)Press the program select button, “mode” key, The current selected program will be displayed, factory default program is “P4”; 2)Continuous press “Mode”, it will display P1-P2-P3-P4-P5-UP-P1… until it display the required program;...
- Page 20 starting hour; 3)Press “Prog” again, it shows the 1 intervalcomfortable finish hour; 4)Press “Prog”, it shows “2.”, press “Prog”, it shows the 2 interval comfortable starting hour; 5)Press “Prog”, it shows the 2 interval comfortable finish hour; 6)Press “Prog”, it shows “3.”, press “Prog”, it shows the 3 interval comfortable starting hour;...
- Page 21 Wall Mounting: Do not fit the castors to the base of the heater. Make sure the heater is unplugged from the mains power and the wall is suitable for mounting the panel heater and there are the correct clearances. Make sure the panel heater is within 1 meter of a power socket.
- Page 22 Floor Mounting: The device can be mounted on special legs enabling to move it in the room. Support foots are attached as follows: Turn the convector upside down; Take one of support foots with rollers; Place the plate of the support foot to the attaching point on the convector so that the dome-shaped part of the plate will be tightly attached to the convector close to its rear panel the screw holes should match;...
- Page 23 MAINTENANCE This product contains recyclable materials. Do not dispose this product as unsorted municipal waste. Please contact your local municipality for the nearest collection point. The heater requires regular cleaning to ensure trouble free operation. Unplug the heater from the mains supply before cleaning. Ensure that the heater has been allowed to cool down completely before cleaning.
- Page 24 ΕΞΟΥΣΙΟΔΟΤΗΜΕΝΟ ΚΕΝΤΡΟ ΠΑΝΕΛΛΑΔΙΚΗΣ ΥΠΟΣΤΗΡΙΞΗΣ www.serviceworld.gr AUTHORISED SERVICE CENTER 210-620.38.38...
Need help?
Do you have a question about the PCH/AGI-1500EF and is the answer not in the manual?
Questions and answers