Advertisement
Quick Links
ASSEMBLY INSTRUCTIONS
REVISION 10-03-14
NOTES
BEFORE COMMENCING SHED ASSEMBLY, CHECK ALL PARTS. IF THERE IS A DISCREPANCY, PLEASE CALL
YARDSAVER (SEE REAR OF INSTRUCTION BOOK)
DO NOT ASSEMBLE IN WINDY CONDITIONS
THE MANUFACTURERS CANNOT BE HELD RESPONSIBLE FOR ANY CONSEQUENCES DUE TO SHEDS THAT ARE NOT
INSTALLED PER INSTRUCTIONS OR FOR DAMAGE DUE TO WEATHER CONDITIONS, ACTS OF GOD OR FOR SHEDS THAT
ARE LEFT PARTIALLY ASSEMBLED OVERNIGHT. PARTS MAY CONTAIN SHARP EDGES & CORNERS. CARE MUST BE TAKEN
WHEN HANDLING VARIOUS PIECES TO AVOID A MISHAP, FOR SAFETY SAKE, PLEASE USE A PAIR OF WORK GLOVES, EYE
PROTECTION & PROTECTIVE CLOTHING WHEN ASSEMBLING OR PERFORMING ANY MAINTENANCE ON THE BUILDING.
Subject to changes © Spanbild Pty. Ltd.
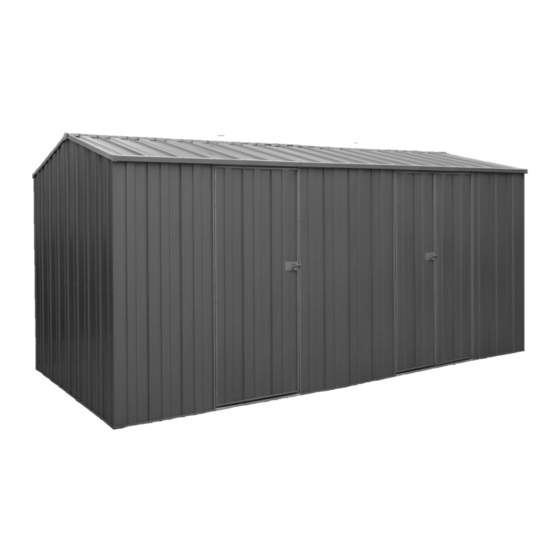
WorkShop 2010
W5915mm x D2800mm x H2085mm
READ INSTRUCTIONS FIRST
1
ST
3 PERSON ASSEMBLY
Advertisement

Summary of Contents for Spanbilt Fasttrak WorkShop 2010
- Page 1 WorkShop 2010 ASSEMBLY INSTRUCTIONS REVISION 10-03-14 W5915mm x D2800mm x H2085mm NOTES BEFORE COMMENCING SHED ASSEMBLY, CHECK ALL PARTS. IF THERE IS A DISCREPANCY, PLEASE CALL YARDSAVER (SEE REAR OF INSTRUCTION BOOK) DO NOT ASSEMBLE IN WINDY CONDITIONS READ INSTRUCTIONS FIRST 3 PERSON ASSEMBLY THE MANUFACTURERS CANNOT BE HELD RESPONSIBLE FOR ANY CONSEQUENCES DUE TO SHEDS THAT ARE NOT INSTALLED PER INSTRUCTIONS OR FOR DAMAGE DUE TO WEATHER CONDITIONS, ACTS OF GOD OR FOR SHEDS THAT...
- Page 2 TOOLS REQUIRED Measuring Tape Electric Drill Cordless Drill Screwdrivers 8mm Masonry Drill Bit 6mm Drill Bit Shifting Spanner Builders Pencil Tin Snips Sturdy Ladder (some models (two if possible) only) Gloves Protective Eyewear Rubber Mallet HANDY HINTS FOR CONSTRUCTION Read instructions and check parts carefully Please wear safety gloves and glasses at all before assembling the shed.
- Page 3 PARTS LIST PRODUCT NUMBERS PRODUCT ID Length 674mm Quantity Quantity (total) Description: Door Frame Top/Bottom Description: Gable Wall Panel PRODUCT NUMBERS PRODUCT ID Length 1008mm Quantity Quantity (total) Description: Door Frame Top/Bottom Description: Gable Wall Panel PRODUCT ID PRODUCT ID Length Length 1800mm...
- Page 4 PARTS LIST PRODUCT ID PRODUCT ID 3267mm Length Length (spliced) 1021mm =(1460 + 1807) Quantity Quantity 4 Sets Description: Description: Top/Bottom Front/Rear Bottom Door Spacer Channel PRODUCT ID PRODUCT ID 2921mm Length (spliced) Length 1367mm =(1460 + 1461) Quantity Quantity 4 Sets Description: Description:...
- Page 5 PARTS LIST PRODUCT ID Length Quantity 1446mm Quantity Description: Nut & Bolt 3/16” Description: Roof Angle Trim PRODUCT ID Length Quantity 1443mm Quantity Description: Ridge Beam Bracket Description: Roof Angle Trim Quantity Quantity Masonry Anchor Description: Plastic Washer and Screw Cap Sheet Quantity Quantity...
- Page 6 PARTS LIST Quantity Quantity Description: Description: 2.5mm Drill Bit Padbolt Quantity Quantity Description: Description: Keeper Hinges (offset) PORTAL FRAME - PARTS LIST PRODUCT ID PRODUCT ID Length (spliced) Length 1728mm 1820mm Quantity Quantity Description: Description: Portal Leg Top Gusset PRODUCT ID PRODUCT ID Length (spliced) Length...
- Page 7 FOUNDATION Recommended edge thickening Recommended slab rebate detail Although not required, it is strongly recommended that, to avoid water leakage around the base of your shed, a rebate be cast into the slab. This will allow the shed to sit below the slab level and prevent water from reaching the upper level of the slab.
- Page 8 PORTAL FRAME ASSEMBLY Mark out with pencil or chalk on the flat ground as shown Roof beam sits on top of leg 2750mm All four Portal Legs are required to be boxed as shown to make 2 legs All four Portal Legs are required to be boxed as shown to make 2 legs Make sure to cut 20mm (L= 1708) off, if you have a rebated slab.
- Page 9 PORTAL FRAME ASSEMBLY Screw the boxed legs together using the Tek Screws (portal) Use bracing channel “X” to temporarily hold it in place. Join the bracing channels to the length of 2710mm. ROOF BEAM All four Roof Beams are required to be boxed as shown ROOF BEAM Bracing “X”...
- Page 10 PORTAL FRAME ASSEMBLY Assemble, lay beams out as shown and fix first side of portal TOP GUSSET ROOF BEAM Bracing “X” ROOF BEAM Attach the Roof Beams to ROOF BEAM ROOF BEAM the Legs using the 100x70 Plate TOP GUSSET TOP GUSSET ROOF BEAM ROOF BEAM...
- Page 11 PORTAL FRAME ASSEMBLY CNR GUSSET CNR GUSSET Bracing “X” ROOF BEAM ROOF BEAM ROOF BEAM CNR GUSSET CNR GUSSET PAGE 11...
- Page 12 PORTAL FRAME ASSEMBLY CNR GUSSET TOP GUSSET CNR GUSSET CNR GUSSET CNR GUSSET ROOF BEAM ROOF BEAM Bracing “X” CNR GUSSET CNR GUSSET Flip portal and repeat steps 5 - 7 Join both sides of the Corner Gussets using the Portal Tek Screws, then remove the top bracing “X”. CNR GUSSET CNR GUSSET Bracing “X”...
- Page 13 PORTAL FRAME ASSEMBLY Stand up the portal frame and position as per the dimension given here. Make sure the distance 3180 from the 2x2 Panel Door side edge of the slab. Portal frame sit 75mm inside the width of the slab over the edge the edge. It is possible to inter change the position of this door (left or right).
- Page 14 PORTAL FRAME ASSEMBLY Place the 55mm Bracket as shown then fix it to the portal leg. Make sure it is square and flat to the slab. Insert and tighten the masonry anchor on Now Pre drill the Dia 8mm hole to a depth all 4 brackets.
- Page 15 REAR WALL PANEL Required to manipulate sheeting panel to align the channel holes “D” - Wall Corner Panel Overlap top and bottom channel by 130mm. Fit the top and bottom Outside channel to the wall panels. Ensure the holes in the channels are inline with holes in the rib of the sheeting.
- Page 16 REAR WALL - TOP & BOTTOM CHANNEL FIXING Join M(1460) & M(1807) =3267 Overlap 130mm and join all the channel and sheeting together 3267-130 = 3137mm Join m(1461) & m(1460) =2921mm Overlap 130mm and join all the channel and 2921-130 = 2791mm sheeting together 15mm Join M(3137) &...
- Page 17 FRONT WALL PANEL Required to manipulate sheeting panel to align the channel holes “D” - Wall Corner Panel “D” - Wall Corner Panel Overlap the top and bottom channels M&M by 130mm similarly m&m. Fit the top and bottom channel and door jambs to the wall panels. Ensure Outside that the positioning of large rib on the sheets are as indicated in the picture.
- Page 18 FRONT WALL PANEL- 2x2 PANEL DOOR Fit the top door spacer and the bottom door spacer to the front wall panel as shown. Some pilot holes may need to be drilled with the included 2.5mm drill bit PAGE 18...
- Page 19 FRONT WALL PANEL- 3 PANEL DOOR Fit the top door spacer and the bottom door spacer to the front wall panel as shown. Some pilot holes may need to be drilled with the included 2.5mm drill bit PAGE 19...
- Page 20 FRONT WALL PANEL PAGE 20...
- Page 21 GABLE WALL PANELS If you are having trouble screwing the channel to the sheets, chock behind the hole . Outside Ensure that the small lip of the channel is to the outside of the shed. Large Rib Small Rib Left Gable Panel Labels, Right Gable Panel Labels Make sure to assemble all panel “A”...
- Page 22 FIT RIDGE BEAM BRACKETS Fix the ridge beam brackets to the top of the gables using six (6) screws as shown below. Secure brackets with six (6) screws as Pre Drill holes from inside the gable wall, then shown on both gable walls. fix from outside with 4 screws.
- Page 23 ASSEMBLE AND FIT RIDGE BEAM RIDGE BEAM ASSEMBLY NOTE: The diagram below shows a 66 gable roof shed. The assembly process is the same for all gable roof sizes. O ver lap two ridge beam by 346mm so that pre drilled holes will align on the side face. Roof holes on top Roof holes...
- Page 24 FIT RIDGE BEAM BRACKETS T his is a picture of workshop 2010, assembly procedure is same for workshop1510. Once the four wall panels are assembled, they can now be placed as shown on the floor close to slab. U se help of minimum of 3 person to lift and hold the panels. Take care not to assemble in windy condition. DO NOT ASSEMBLE IN WINDY CONDITIONS L ift the Rear wall Panel and place on the slab close to the portal leg.
- Page 25 FIT THE REAR WALL 18mm 18mm Bend one end of the strip by 80 as shown. Now Screw the strip to the Rear wall channel as shown, then fix it to the portal. Make sure to fix the portal to the center of the 9th (from 2x2 door side) and 10th. panel ribs join.
- Page 26 FIT THE REAR & SIDE WALL Make sure the panels are perfect square before fixing with bracket Pre drill on channel through the bracket holes Screw the wall panels together at the Fix the Screws through bracket, channel and Remove previously fixed corner screw from both base and top as shown.
- Page 27 FIT THE FRONT WALL Lift the Front Wall panel to position and join it using the corner brackets as shown previously. Also make sure to fix wall panel with portal using the bend Gusset strip as shown on rear wall fixing. Screw 4 corners at the mid pint of the shed using the pre drilled holes.
- Page 28 ASSEMBLE AND FIT RIDGE BEAM Fix ridge beam to the portal as shown. Make sure the pre drilled holes for the roof panel are on top. Roofing Holes Fit the ridge beam to the two brackets using three (3) screws on either side of the bracket. PAGE 28...
- Page 29 FIT ROOF AND TRIMS Screw the door side of the roof on first (do not start the rear side yet). Work from right to left ensuring the large rib is over the small rib. (If you are installing a skylight, please refer to the instructions at the end of this booklet) Screw the bottom of the sheet to the front top frame using one (1) screws...
- Page 30 FIT ROOF AND TRIMS Fix the next two (2) sheets then fit the second ridge cap. Fix this as shown to the right. Finish the roof in the same manner. Now remove the screws from the top gable channel Now screw it back through the previous hole. including one from the edge of the corner bracket, Use combination of “W”...
- Page 31 FIT ROOF AND TRIMS V V V V V V V V V V W V V V V1 V V V V V V V V V V V V1 V V V V V V W V V V V Position the channel as shown here and fix it to the sheeting.
- Page 32 ASSEMBLE DOOR Small Lip Large Lip Both of the door sheets come with one rib h f h d Screw the sheets in the centre. partially slit. Break them off and discard them. Frames slide under the sheet as shown. Ensure Fix door frames with a screw in each corner.
- Page 33 ASSEMBLE DOOR Fix the frame H to the sheeting with screws through the small channel lips into the large sheeting ribs. Door boxing must be fitted to the door frames and a door seal fitted on the second door. The seal fits in between the frame and boxing as shown to the right.
- Page 34 ASSEMBLE DOOR Flip the door assembly’s over and fix the door frames with screws evenly spaced as shown above. Door bracing will also need to be fitted to the doors to ensure sturdiness. Drill pilot hole for top and bottom bracing joint, and fix with self tapping screw.
- Page 35 ASSEMBLE DOOR Flip the door back over to the front side facing up. Using the pilot holes drilled before, fix the door bracing from the front with self tapping screws. Drill a 2.5mm pilot hole through the door plate and into the sheeting and channel at the mid point and secure with self tapping screws...
- Page 36 HANG DOOR NOTE: The diagram below shows a flat roof shed. The assembly process is the same for all sheds. Fit the doors by fixing the hinges to the pre-drilled holes in the door jambs. Fit the padbolt and keeper to the front of the doors.
- Page 37 ASSEMBLE DOOR Small Lip Large Lip Two of the door sheets come with one rib partially Screw the sheets in the centre. slit. Break them off and discard them. Frames slide under the sheet as shown. Ensure Fix door frames with a screw in each corner. the small lip of the frame is to the top.
- Page 38 ASSEMBLE DOOR Fix the frame H to the sheeting with screws through the small channel lips into the large sheeting ribs. Door boxing must be fitted to the door frame. Leave an even gap at both ends of the boxing. Place large lip of J over the small lip of I as shown...
- Page 39 ASSEMBLE DOOR Flip the door assembly over and fix the door frame with screws evenly spaced as shown above. Door bracing will also need to be fitted to the door to ensure sturdiness. Drill pilot hole for top and bottom bracing joint, and fix with self tapping screw.
- Page 40 ASSEMBLE DOOR Flip the door back over to the front side facing up. Using the pilot holes drilled before, fix the door bracing from the front with self tapping screws. Drill a 2.5mm pilot hole through the door plate and into the sheeting and channel at the mid point and secure with self tapping screws...
- Page 41 HANG DOOR NOTE: The diagram below shows a flat roof shed. The assembly process is the same for all sheds. Fit the door to the left or right by fixing the hinges to the pre-drilled holes in the door jambs then fit the padbolt keeper.
- Page 42 BOLT DOWN Bolt the shed down through the four corner brackets as shown. Ensure the shed is square. M8 x 40 PAGE 42...
- Page 43 BOLT DOWN Bolt the shed down through the angle brackets as shown. Drill the hole for the anchor to 50mm depth and then using a 8mm drill bit. Drill the holes through the sheeting with 6mm drill bit to attach bracket to the shed.
- Page 44 NOTES PAGE 44...
- Page 45 FIT SKYLIGHT (OPTIONAL) The skylight must be fitted on top of the two adjacent sheets. Fit the steel roof sheets first then fit the skylight as shown below. The skylight is fixed using two (2) screws at the top and bottom of the sheet.
- Page 46 15 Years Warranty Simple, Strong, Quick & Easy FASTTRAK® Thank you for purchasing system steel storage shed. Spanbilt® FASTTRAK® Your personal warranty is backed by , the manufacturer of system storage sheds, and our proven commitment to quality and customer service.
-
Page 47: Owners Details
You must submit your warranty registration certificate within 60 days of the purchase date of your FASTTRAK ® garden shed. Post your certificate and supporting documentation to: Australia New Zealand Spanbilt Spanbilt PO Box 1581, Browns Plains PO Box 11 - 013,... - Page 48 PO Box 1581 Browns Plains, QLD 4118 Enquiries 07 3827 8000 1800 222 166 Building Advice Line 1800 032 077 www.spanbilt.com.au 112 Waterloo Road PO Box 11 -013 Sockburn, Christchurch TELEPHONE 03 349 3480 0800 772 6245 www.spanbilt.co.nz Anot her Quality Product From...
Need help?
Do you have a question about the Fasttrak WorkShop 2010 and is the answer not in the manual?
Questions and answers