
Subscribe to Our Youtube Channel
Summary of Contents for GADGET:FIT HM01-08VM
- Page 1 BEFORE USING YOUR GADGET:FIT VIBRATION PLATE PLEASE READ THE INSTRUCTIONS CAREFULLY AND KEEP IN A SAFE PLACE FOR FUTURE REFERENCE...
- Page 2 SAFETY TIPS Do not use your Gadget:fit Vibration machine with wet hands. Always turn off the power at the mains socket after use. Not to be used by pregnant woman. DO NOT drink alcohol and then use the Vibration machine.
- Page 3 PRE-ASSEMBLY INSTRUCTIONS. Before starting to assemble your Gadget:fit Vibration Plate, please make sure you have all the parts listed below available: Main base unit Computer unit Centre support tube (incl computer cable) 2x handle sections (incl pulse calbes) ...
- Page 4 ASSEMBLY PLEASE NOTE – All screws are already fitted in the machine and need to be removed before assembly, please make note of where the screws were situated to avoid misplacing them during assembly. 1. Lay the main unit on an even flat surface. 2.
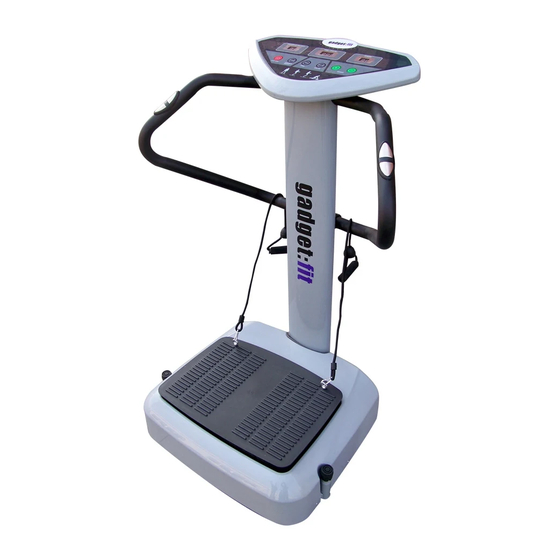
- Page 5 5. The image shows how the main support tube should look like when connected and assembled. 6. Take the 2 handle sections and place the bottom section in position on the centre support column, line the holes up and fix in place using the stainless steel screws M6x10.
- Page 6 9. Fix the 2 top sections of the handles into the top of the centre console using the M8x40 screws and tighten securely. Make sure the pulse wires are treated carefully and look out of top pole. 10. Connect the wires of the control panel to the wires of the main support tube (computer cable + pulse cables).
- Page 7 13. Finally using screws M6x10 at the bottom side of the control panel, securely fix the control panel to the main support column securing the front screw first followed by the remaining screws. 14. Screw the eye hole screws into the provided holes on the base unit and attach the hand bands with aid of the karabiner, when needed for training.
- Page 8 MACHINE FEATURES/OPERATIONS. 1 – 50 Different working speeds. 3 Specifically designed Programs. 3 Digital LED screens. One indicates the Program number (“Program Selection”) the second screen shows the time elapsed and heart pulse (“Time/Pulse”) and the third shows the speed select (“Speed”). DESCRIPTION OF THE DISPLAY PANEL BUTTONS.
- Page 9 INSTRUCTIONS FOR USE. Press the Stop/Start button once to POWER ON. The PROGRAM SELECT display will show ‘HL’ : The TIME/PULSE display will show ‘010’ (timing for 10 minutes) : The SPEED display will show ‘00’. In any status press the TIME/PULSE key to change the time or pulse display in the middle window.
- Page 10 TECHNICAL SPECIFICATIONS. PRODUCT MODEL : HM01-08VM PRODUCT NAME : GADGET:FIT FITNESS MASSAGER RATED VOLTAGE : 220-240V RATED POWER : 600W PRODUCT NET WEIGHT : 27KGS PRODUCT SIZE : 122 x 70 x 60cm BOX SIZE (WHEN SHIPPED): 113 x 75 x 26cm...
- Page 11 CUSTOMER SERVICE HOTLINE UK - +44 (0)1527 598388 CUSTOMER SERVICE HOTLINE USA – 1.800.603.0004 CUSTOMER SERVICE HOTLINE AUSTRALIA – 1300 132 151...
Need help?
Do you have a question about the HM01-08VM and is the answer not in the manual?
Questions and answers
Where can I find reviews for gadget-fit
There are no reviews available for the GADGET HM01-08VM in the provided context.
This answer is automatically generated
loud noise when switching on machine
i love this machine but it is making a very loud noise now so i think something needs fixing