Table of Contents
Advertisement
Contents
Safety and Maintenance ..................................................... 1
Safety Instructions............................................................. 1
Data Security .................................................................. 2
Operating Environment..................................................... 2
Repair............................................................................ 3
Ambient temperature ....................................................... 3
Electromagnetic Compatibility ........................................... 4
Connection ....................................................................... 5
Battery Operation ............................................................ 6
Maintenance...................................................................... 7
Care of the Display............................................................. 7
Transport.......................................................................... 8
Notes on these Operating Instructions .................................. 9
Quality........................................................................... 9
Service .......................................................................... 9
Supplied Items ................................................................ 10
Views ............................................................................... 11
Front Components ........................................................... 11
Back Components ............................................................ 12
Bottom Components......................................................... 13
Top Components.............................................................. 13
Left Components ............................................................. 14
Right Components ........................................................... 15
Initial Set-up.................................................................... 16
I. Charging the battery ..................................................... 16
Car Adapter .................................................................. 17
AC Adapter (optional)..................................................... 17
II. Switching on the navigation system ............................... 18
III. Installing the Navigation software ................................. 19
Operating ......................................................................... 20
Switching on/off the divice ................................................ 20
Working with Memory Cards .............................................. 21
Advertisement
Table of Contents

Related Manuals for Navigon PNA Transonic 6000T


Summary of Contents for Navigon PNA Transonic 6000T
-
Page 1: Table Of Contents
Contents Safety and Maintenance ............. 1 Safety Instructions............. 1 Data Security ..............2 Operating Environment............. 2 Repair................3 Ambient temperature ............3 Electromagnetic Compatibility ........... 4 Connection ............... 5 Battery Operation ............6 Maintenance..............7 Care of the Display............. 7 Transport................ - Page 2 Inserting Memory Cards ..........21 Removing Memory Cards ..........21 Accessing Memory Cards ..........22 Data exchange via card reader ........22 Resetting the navigation system ........23 Soft Reset ..............23 Hard Reset ..............23 Navigation................ 24 Safety Instructions for Navigation ........24 Tips for Navigation............
- Page 3 TMC (Traffic Message Channel) .......... 40 Additional card material ............ 41 Mounting the Navigation Set on a Bicycle ......42 Warranty ................ 43 Liability limitations ............44 Copying this manual ............44 Index ................45...
- Page 4 Device At the end of its life, the appliance must not be disposed of in household rubbish. Enquire about the options for environmentally-friendly disposal Batteries Do not dispose of used batteries in the household rubbish! They must be deposited at a collec- tion point for used batteries.
-
Page 5: Safety And Maintenance
SAFETY AND MAINTENANCE AFETY NSTRUCTIONS Please read this section carefully and follow all the instructions given. This will help ensure reliable operation and extend the ser- vice life for your appliance. Keep the packaging and the user instructions for future reference or inquiries at a later date. -
Page 6: Data Security
Remove the power adapter (optional) from the outlet, switch the appliance off immediately, or do not actually switch it on, and contact Customer Service..if the power adapter or the attached plug become scorched or damaged..if the housing of the appliance or the Power Pack becomes damaged or fluids leak into it. -
Page 7: Repair
Repair • Please contact our Service Center if you encounter techni- cal problems with your appliance. • In the event repair becomes necessary, please use only our authorized Service Partners. You will find the address on the back of your guarantee card. Ambient temperature •... -
Page 8: Electromagnetic Compatibility
Electromagnetic Compatibility • When connecting additional or other components the “Elec- tromagnetic Compatibility Directive” (EMC) must be ad- hered to. Please also note that only screened cable (maxi- mum 10ft) should be used with this appliance. • For optimal performance, maintain a distance of at least 10 ft. -
Page 9: Connection
ONNECTION When connecting your appliance be sure to correctly observe the following instructions: OWER THROUGH DAPTER • The car adapter should only be connected to the lighter so- cket of a car (car battery = DC 12V , truck battery = DC !). -
Page 10: Battery Operation
Battery Operation Your appliance is operated with a removable battery. In order to pro- long the life and efficiency of your battery and to ensure safe opera- tion, follow the instructions below: Caution! Danger of explosion if rechargeable batter- ies are not changed properly. Only replace with the same type of battery or a similar type recommended by the manufacturer. -
Page 11: Maintenance
AINTENANCE Warning: There are no user-serviceable or clean- able parts inside the housing of the appliance. You can prolong the life of the appliance by taking the following simple steps: • Always remove the power plug and all connecting ca- bles before cleaning. -
Page 12: Transport
RANSPORT If you wish to transport the appliance follow the instructions below: • Following transport of the appliance wait until the unit has acclimatized before using it. • In the case of wide fluctuations in temperature or humidity condensation or moisture may form inside the appliance and this can cause an electrical short-circuit. -
Page 13: Notes On These Operating Instructions
OTES ON THESE PERATING NSTRUCTIONS We have structured these Operating Instructions for the installa- tion so that you will be able to look up the necessary subject- related information by means of the Contents List at any time. Note: You will find comprehensive Operating Instruc- tions for navigation on the relevant CDs/DVDs and at the online help of the device. -
Page 14: Supplied Items
UPPLIED TEMS Please check the integrity and completeness of the supplied items and, in the case this is not complete, forward us any possible claims within 14 days from the purchase date. The purchase pa- ckage includes: • Navigation system •... -
Page 15: Views
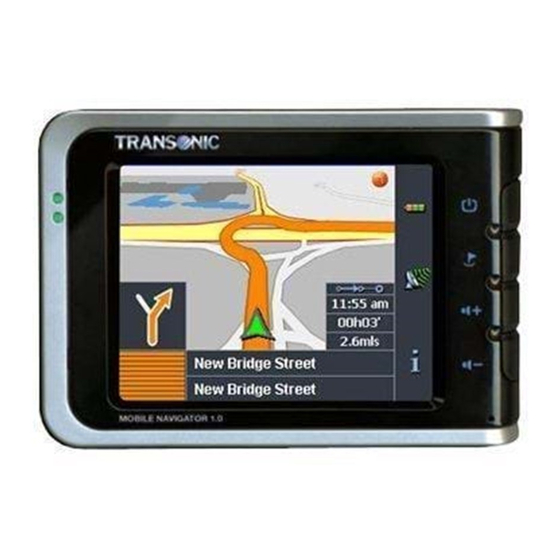
Views RONT OMPONENTS Ref Component Description Battery Charge The loading display will shine orange during Indicator the charging process. It will shine green when the accumulator is completely charged. Touch Screen Displays the output of your appliance. Tap on the screen with your finger, a stylus or a "blunt"... -
Page 16: Back Components
OMPONENTS aerial Ref Component Description Device for attaching the Attachment navigation system to the car support Stylus Take the pen out of its compartment in order to use it, and replace it after use. The pointer pen is required for operating the touch screen. -
Page 17: Bottom Components
OTTOM OMPONENTS Ref Component Description Reset Opening Restarts your appliance. (Soft Reset, see page 23). Mini-USB- Connection for connecting to a PC by means Connector of the USB cable (for data matching) as well as connection to external power supply. Main switch/ Separates the device from the battery Battery button... -
Page 18: Left Components
OMPONENTS Ref Component Description TMC antenna Connector for a TMC dipole antenna. connector Connects to a pair of stereo headphones Earphones (3,5 mm). NGLISH... -
Page 19: Right Components
IGHT OMPONENTS Ref Component Description Hardware On-/Off button buttons Button Options / Destination Increases the volume. Reduces the volume. * Some of the hardware buttons will only be operational after in- stallation of the navigation software. AFETY AND AINTENANCE... -
Page 20: Initial Set-Up
Initial Set-up The following guides you step by step through the initial set up of the navigation system. Firstly, remove the foil for protecting the device during transpor- tation from the display. I. C HARGING THE BATTERY Attention: It can be necessary to recharge the bat- tery for some time initially before it is possible to run through the initial installation, according to the state of charging of the battery installed. -
Page 21: Car Adapter
Car Adapter (similar picture) AC Adapter (optional) Adaptor plug (similar picture) Push the adapter connector into the guide on the back of the AC adapter. Press the push button at the same time, so that the adapter plug can engage. Push the AC adapter ( ) into a power point that is easily accessi- ble. -
Page 22: Switching On The Navigation System
II. S WITCHING ON THE NAVIGATION SYSTEM 1. Switch the main switch at the bottom of the device to ON. Attention: Always leave the main switch in the ON Position, unless you want to carry out a new reinstal- lation. All data will be lost and the initial installation will have to be carried out again if the switch is set to OFF (see page 23). -
Page 23: Installing The Navigation Software
III. I NSTALLING THE AVIGATION SOFTWARE You will be requested to install the Navigation Software during the initial installation. Please proceed as follows: 1. Carefully take the memory card out of its packing. Take care not to touch or dirty the contacts. 2. -
Page 24: Operating
O perating WITCHING ON OFF THE DIVICE Your device will be in its normal operating state after the initial setting up. You will activate and deactivate your device with the On-/Off switch. 1. To start your navigation system press briefly the On-/Off switch Note: Your device will be delivered in a status in which it will not switch off independently. -
Page 25: Working With Memory Cards
ORKING WITH EMORY ARDS Your navigation system supports MMC and SD memory cards. Inserting Memory Cards 1. Carefully take the memory card out of its packing (if in- cluded). Take care not to touch or dirty the contacts. 2. Insert the memory card carefully into the card bay with contacts pointing forward. -
Page 26: Accessing Memory Cards
Accessing Memory Cards • The appliance only supports memory cards in the FAT16/32 file format. If you insert a card prepared with a different for- mat (e.g. in cameras, MP3 players), your navigation system may not recognize it and will ask you to format it again. Warning: Formatting the memory card irretrievably wipes out all data. -
Page 27: Resetting The Navigation System
ESETTING THE NAVIGATION SYSTEM There are two options for resetting the navigation system. Soft Reset This option restarts the navigation system, without reinstallation being necessary. A soft-reset is often used in order to reorganize the memory. In doing so all programs that are running are inter- rupted and the working memory is reinitialized. -
Page 28: Navigation
Navigation AFETY NSTRUCTIONS FOR AVIGATION The bundled product CD/DVD contains a comprehensive instruction manual. Tips for Navigation • Do not manipulate the navigation system while driving to protect yourself and others from accidents! • In the event that you do not understand the voice instruc- tion or if you are in any doubt about what to do at the next intersection, then the map or arrow display will provide you with a quick orientation. -
Page 29: Notes For Use In A Vehicle
Notes for Use in a Vehicle • Take care that the holder does not present any risk to safe- ty, even in the case of an accident, when installing it. • Take care that the cable does not impede any safety com- ponents. -
Page 30: Aerial Orientation
ERIAL RIENTATION The aerial must have unrestricted access to the sky to receive GPS satellite signals. Orient the aerial as horizontally as possible for this reason. Try out aerial and installation possibilities in the vehicle in the case of inadequate reception. It can be necessary to install an external GPS antenna (see page 39) under certain cir- cumstances. -
Page 31: Connecting The Tmc Dipole Antenna
ONNECTING THE DIPOLE ANTENNA Your navigation device is equipped with a TMC receiver fort he purpose of receiving traffic information. However, a reception is only ensured if the supplied TMC dipole antenna is connected. Insert the jack plug of the TMC dipole antenna in the TMC an- ntenna connector at the left side (see page 14) of your naviga- tion system. -
Page 32: Mounting The Car Holder
I. M OUNTING THE CAR HOLDER Attention! Only fix the holder for the navigation sys- tem to the windscreen, if it does not impede the view. Should this not be possible, then mount the holder with the enclosed suction plate in any way that will allow peril-free and safe operation. -
Page 33: Fixing The Suction Plate
1. Remove the protective foil from the sticky side of the suc- tion plate. 2. Fix the suction plate to a suitable location on the dashboard. Take care, that the surface of the dashboard is clean and press the suction plate strongly onto the surface. Note: To obtain a strong and secure hold the suction plate should not be used for 24 hours. -
Page 34: Connecting The Car Adapter
IV. C ONNECTING THE CAR ADAPTER (similar picture) 1. Plug the jack ( ) of the connection cable into the corre- sponding receptor at the bottom of your navigation system (p. 13). 2. Insert the power adapter ( ) now into the cigarette lighter socket and ensure, that it will not lose contact while driv- ing. -
Page 35: Starting The Navigation Software
V. S TARTING THE NAVIGATION SOFTWARE Note: The memory card must always be inserted in the device while the navigation system is being used. It will be necessary to carry out a Soft Reset to re- start the navigation system if the memory card has been removed, only for a short time, while the sys- tem was being used (see page 23). -
Page 36: Faq
Where can I find more informationen on the navigation system? Detailed operating instructions for navigation can be found on the corresponding CDs/DVDs, which accompany your navigation system. Also use the additional Help functions that are available with a single touch of a button (usually F1 on the PC), or by selecting the Help option, as additional assistance. -
Page 37: Customer Service
Customer Service IRST ID IN THE VENT OF ALFUNCTION Error functions can sometimes have trivial causes; however, they can also sometimes be complex in nature and require costly analysis. General guidance Note: The regular running of the Windows® pro- grams “Defrag” and “Scandisk” on the PC can remove sources of error and raise system performance. -
Page 38: Faults And Possible Causes
AULTS AND OSSIBLE AUSES The navigation system no longer reacts or is behaving atypically. • (see page 23). Carry out a soft reset The navigation system is recognized only as a guest by ® ActiveSync • See informationen on page 37. I am receiving error messages from a maintenance pro- ®... -
Page 39: Additional Support
DDITIONAL UPPORT If the suggestions in the above section have not solved your prob- lem, please contact our customer service hotline. However, before you contact your Technology Center, please have the following in- formation available: However, before you contact your Technology Center, please have the following information available: •... -
Page 40: Appendix
Appendix YNCHRONISATION WITH THE ® ® I. Installing Microsoft ActiveSync In order to transfer your data between your PC and your naviga- ® ® tion system you need the Microsoft ActiveSync program. The cost of the navigation system includes a license for this pro- gram which can be found on the Support CD. -
Page 41: Ii. Connecting With The Pc
II. Connecting with the PC 1. Press the On/Off button to start your navigation system. 2. Connect the USB cable to your navigation system. 3. Push the USB connector into a free USB port on your com- puter. 4. The hardware installation assistant recognizes now a new appliance and installs a suitable driver which can take some minutes. -
Page 42: Gps (Global Positioning System)
GPS (G LOBAL OSITIONING YSTEM GPS is a satellite-backed system for determining your position. With the help of 24 satellites revolving around the earth, it is pos- sible to determine your position on earth with the accuracy of a few meters. The satellite signals are received by the antenna of the built-in GPS receiver, which must have a "line of sight"... -
Page 43: External Gps Antenna
External GPS antenna This second optional GPS antenna (only for Model A) makes it possible to receive the signals of satellites better (e. g. in the case of vehicles with a metallized windscreen). 1. The antenna should be pointing upwards. 2. -
Page 44: Tmc (Traffic Message Channel)
TMC (T RAFFIC ESSAGE HANNEL The Traffic Message Channel (TMC) is a digital radio data ser- vice that functions in a similar way to RDS and is used to transmit disruptions to traffic to a suitable reception device. The traffic information is continuously transmitted across FM. The user is less dependent on the half-hourly broadcast traffic information, because the signal is continuously transmitted. -
Page 45: Additional Card Material
DDITIONAL CARD MATERIAL There is an already digitalized card for your country on the optional the memory card. Depending on the configuration, addi- tional maps may be included on your navigation CDs/DVDs. You will be able to transfer these cards to a memory card immedi- ately. -
Page 46: Mounting The Navigation Set On A Bicycle
OUNTING THE AVIGATION ET ON A ICYCLE You can attach your navigation system to a bicycle as an op- tional additional feature. A special holder is needed to do this. The installation is explained in the following. Screws Hexagon key Clamp Holding plate (similar picture) -
Page 47: Warranty
ARRANTY The receipt serves as proof of first purchase and should be kept in a safe place. Your legal rights are not limited by these warranty con- ditions. It is required should you need to make use of the guarantee. We guarantee that this equipment is in perfect working order. -
Page 48: Liability Limitations
IABILITY LIMITATIONS The contents of this manual are subject to unannounced changes caused by technical progress. Manufacturer and sales shall not be responsible for any damages which have been caused as a result of omissions or errors in the information provided in this manual. Under no circumstances shall we be liable for any of the following: Claims made against you by third parties based on loss or damage. -
Page 49: Index
INDEX External GPS antenna......39 Charging the battery ......16 Installing the navigation software..19 Switching on the navigation system 18 NDEX... - Page 50 Soft Reset ........23 Navigation ........24 Connection ........5 Data security........2 ® ® ® ® Operating environment ......2 Repair ..........3 Power supply ........5 Cabling ..........5 Battery operation .......6 Maintenance ........7 Safety instructions......24 Care of the display......7 Transport ...........8 Switching on/off the divice ..... 20 Working with memory cards...
- Page 51 Right components......15 Back components ......12 Bottom components ......13 Front components......11 Left components......14 NDEX...
- Page 52 NGLISH...
Need help?
Do you have a question about the PNA Transonic 6000T and is the answer not in the manual?
Questions and answers