Table of Contents
Advertisement
Quick Links
Advertisement
Table of Contents

Related Manuals for Landauer microSTAR ii

Summary of Contents for Landauer microSTAR ii
- Page 1 USER MANUAL v1.3 | 12/16/2019...
- Page 2 Use of the contents of this guide for any purpose other than that for which it was provided is prohibited. LANDAUER® does not warrant or guarantee the contents of this user manual. LANDAUER®, nanoDot™, and microSTAR®ii are registered trademarks of LANDAUER® in the United States and other countries.
-
Page 3: Table Of Contents
Table of Contents Chapter 1 Introduction & Background ....................1 Limitations of Product Scope ......................2 1.1.1 Indications For Use ........................2 1.1.2 Manufacturer ..........................2 Best Practices ............................. 3 Conventions and Standards ......................4 Chapter 2 System Overview ........................5 Hardware ............................ - Page 4 Advanced Configuration ........................ 20 4.2.1 Configuring Organization Information ................21 4.2.2 Configuring User Defined Fields ..................21 4.2.3 Setting the Reading Parameters .................... 23 4.2.4 Changing Daily QC Limits ....................23 4.2.5 System Compliance Checks ....................24 Chapter 5 Reader Quality Assurance ...................... 26 Reader Daily QC Tests ........................
- Page 5 8.2.3 Advanced Filters ........................56 8.2.4 Data Template ......................... 57 Chapter 9 Advanced Operations ......................59 Changing Read Type (Linear and Non-Linear) ................59 Measurement Calibration ....................... 60 9.2.1 Calibration Considerations ....................62 9.2.2 Performing a System Calibration ..................62 Simulated Calibrations ........................
- Page 6 Chapter 12 Troubleshooting ........................83 12.1 Technical Support ........................... 83 12.2 Event Logs ............................84 12.2.1 Usage Information ........................85 12.2.2 Exporting the Event Log ....................... 85 12.3 System Version Information ......................86 12.4 Hardware Issues ..........................86 12.5 Error Messages ..........................89 12.6 Failed QC Tests ..........................
-
Page 7: Chapter 1 Introduction & Background
It includes useful information pertaining to quality assurance and compliance checks, system configuration updates, measurement procedures, reporting, system administration, and troubleshooting for the system. Related documentation can be found at http://landauer.com/microstarii. This includes: • microSTARii Installation & Configuration Guide for detailed instructions on how to setup, configure, and test your system at installation. -
Page 8: Limitations Of Product Scope
Table 2 of Section 2.1.3. Due to the potential for changes in dosimeter performance with accumulating life-time dose, LANDAUER® and its affiliates do not support reuse of the nanoDot dosimeter for use with patients. -
Page 9: Best Practices
Best Practices To achieve the best results using the microSTAR®ii Medical Dosimetry System, comply with the best practice operating principles listed below. The contents of this manual provide the instructions and guidance to support these standards. Implement the microSTARii QA program and monitor reader performance trends. Do not perform readings if the Daily QA test has failed. -
Page 10: Conventions And Standards
• Do not alter the Reader and use only as specified or the protection provided by the Reader can be compromised. • Use only a LANDAUER-approved power supply to power the Reader. • Use the Reader indoors only. • Do not use the Reader if it has been altered or is damaged. -
Page 11: Chapter 2 System Overview
CHAPTER 2 SYSTEM OVERVIEW Figure 2-1: Full microSTAR®ii System The microSTAR®ii Medical Dosimetry System includes both hardware and software components. The hardware is used to scan and read the nanoDot™ dosimeter. The software provides the tools necessary to manage the reader, view stored measurement data, generate reports, manage patient assignment, and manage inventory. -
Page 12: Hardware
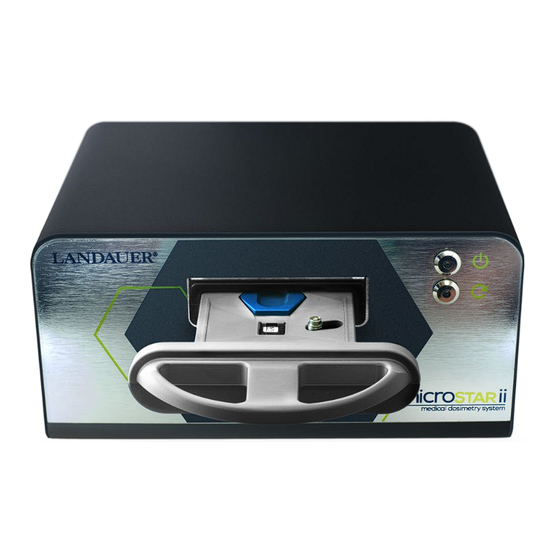
Hardware The microSTARii Medical Dosimetry System consists of the microSTARii reader, a laptop or all-in- one computer with installed software, and associated peripherals (including a mouse, keyboard, and barcode scanner). 2.1.1 Reader The microSTARii reader includes a drawer and two LED indicators. The indicators show if the reader is powered on and it is performing a readout. -
Page 13: Computer
2.1.2 Computer LANDAUER will supply the computer hardware (all-in-one or laptop) required for use with this system. The computer provided should be used in conjunction with the microSTARii reader. It will run a Windows Operating System and will be loaded with the microSTARii application and supporting programs. - Page 14 Figure 2-5: nanoDot Dosimeter CAUTION: If the nanoDot is incorrectly positioned in the reader drawer (e.g., not set in completely or put in with barcode facing down) the reader may be significantly damaged. (See Figure 3-2 for correct nanoDot positioning.) The nanoDot label includes the following information: •...
- Page 15 The nanoDot is not intended for independent use as an occupational or standalone dosimeter. The nominal dose levels for the 80 kVp and Cs-137 (662 keV) NIST-traceable LANDAUER Calibration, QC, and Consistency Sets are summarized in the following table. The actual dose level is listed on the LANDAUER Calibration Certificate issued with the set.
-
Page 16: Software
Software The microSTARii Medical Dosimetry System includes: 1. Embedded software within the reader (firmware) 2. Reader device driver that controls the reader (sending commands or data to and from the reader firmware) 3. Software application used to operate the reader, manage data, and report dosimetry results 4. -
Page 17: User Interface Overview
2.2.2 User Interface Overview The user interface includes view buttons at the top of the window and session status information at the bottom of the window. Figure 2-6 outlines key areas on the user interface. Figure 2-6: User Interface Overview ABEL ESCRIPTION Button to minimize the application window to Microsoft taskbar... - Page 18 The user interface has eleven main user screens. The screens are visible based on permissions level and profile assigned. (For a full listing of profile permission and permissions for default profiles, see Appendix A: Profile Permissions Listing.) CREEN HORT ESCRIPTION microSTARii system information: user software version, the SQL database version, the reader device driver version, the connected About...
- Page 19 CREEN HORT ESCRIPTION The toolset used to assess a population of nanoDots, validate the accuracy of labeled sensitivity, complete on-screen and structured Sensitivity Assessment sensitivity assessment reporting, and input a sensitivity correction using a Sensitivity Adjustment Factor (SAF). microSTAR®ii User Manual v1.3...
-
Page 20: Chapter 3 System Operations
CHAPTER 3 SYSTEM OPERATIONS Startup The microSTARii Medical Dosimetry System startup sequence is outlined in the following flowchart. Figure 3-1: Startup Sequence STEP 1: Verify Connections Check the physical connections from the reader to the computer. Ensure they match the setup instructions in the installation guide. STEP 2: Turn on the Reader Press the power button on the back of the device (Figure 2-4) to turn the reader on. - Page 21 STEP 4: Log on to the Computer Log on to the computer operating system. This information will be unique to your facility, because the default computer logon credentials should have been changed by your System Administrator at installation. If you do not know the computer logon information, contact your System Administrator for assistance.
-
Page 22: Shutdown
Shutdown The system can be partially or fully shut down. A partial shutdown involves shutting down the software and computer only. A full shutdown is a shutdown of the whole system: software, computer, and reader. 3.2.1 Partial Shutdown A partial shutdown should be performed at the end of each user session to prevent unauthorized access to the system. -
Page 23: Ejecting The Nanodot
If the drawer does not easily close, do not try to force it to close. If the drawer will not close, see section 12.4 Hardware Issues for troubleshooting guidance. Ejecting the nanoDot To eject the nanoDot, pull the blue ejector toward the nanoDot. If the nanoDot does not properly eject, see section 12.4 Hardware Issues for troubleshooting guidance. -
Page 24: Chapter 4 Configuration
CHAPTER 4 CONFIGURATION General and advanced configuration options are available on the Configuration tab. Permissions to change configuration options are based on the profile associated with your account. (See Appendix A: Profile Permissions Listing for default access information.) The following subsections define configuration options for both general operations and advanced configuration of the microSTARii Medical Dosimetry System. -
Page 25: Dosimetry Use Type
• Generic: Typically used for QA or phantom dosimetry applications. It does not require assignment to a specific patient with a detailed patient record. • Patient: Typically used for medical dosimetry applications. This category includes enhanced database and reporting features (e.g., patient assignment, exposure information tracking, individualized dosimeter reports). -
Page 26: Dose Unit
The system can be set up in one of two configurations: 1. Automatic The reader automatically switches between the strong and weak LED levels when reading dosimeters, based on the pretest counts obtained prior to initiating a normal photomultiplier tube (PMT) count reading. This ensures that the LED stimulation level is always optimized for the selected dose level. -
Page 27: Configuring Organization Information
4.2.1 Configuring Organization Information The following organization information is used in the dosimetry reading database records and Structured Dose Reports generated for patient dosimetry: • Organization • Department • Division • Location To change the organization information, complete the following steps: STEP 1: Log on to the microSTARii application under an Administrator account. - Page 28 STEP 4: Click the Save button at the bottom of the Configuration tab. Some examples of Patient UDF include: • Height • • Anterior-Posterior Chest Thickness • Primary Physician • Emergency Contact Phone Number • Blood Type • Allergies Figure 4-3: UDF Examples NOTE: Once established, only new UDFs should be added.
-
Page 29: Setting The Reading Parameters
4.2.3 Setting the Reading Parameters The Reading Parameters should be set at the time of installation. The system has three reading parameters: 1. Read Interval The time (in milliseconds) between successive readings. During installation it is set to the minimum interval necessary for accurate and efficient readings. 2. -
Page 30: System Compliance Checks
STEP 3: Update the Daily QC Control Limits fields. STEP 4: Click the Save button at the bottom of the Configuration tab. Figure 4-5: Daily QC Control Limits 4.2.5 System Compliance Checks The microSTARii application has a set of built-in compliance checks designed to ensure quality tests are completed, the dosimetry selections and validations are completed, and the settings are correct. - Page 31 Current hardware settings must match the hardware Match settings for the selected calibration in order to perform a dosimeter read. This setting is recommended for all dosimetry applications. It should only be turned off if directed by LANDAUER personnel during troubleshooting. microSTAR®ii User Manual v1.3...
-
Page 32: Chapter 5 Reader Quality Assurance
CHAPTER 5 READER QUALITY ASSURANCE The microSTARii Quality Assurance (QA) program is designed to ensure optimal reader performance for the medical dosimetry application. In addition to manufacturing QA tests of reader and screened nanoDots and verification of reader performance at installation, routine Quality Control and Preventive Maintenance tests should be completed on an on-going basis. -
Page 33: Reader Daily Qc Tests
Routine QA tests support the two main types of microSTARii readings: 1. Intrinsic Readings generated in Self-Test mode without a dosimeter. These readings are used to characterize the reader performance and monitor stability. They assess the stability of the PMT and LED output using a sentinel Photodiode (P-Diode). - Page 34 (CV) across all readings should be < 1.0%. NOTE: Two high-dose consistency nanoDots were included with the microSTARii shipment. If you need replacement nanoDots contact LANDAUER Technical Support. (See Section 12.1 for contact details.) To run the Reader Daily QC Tests, complete the following steps:...
-
Page 35: Reader Qc Tests
This test should be run post-installation to define new control limits in the following cases: The reader has undergone preventive maintenance. The reader has undergone repair. You have been instructed by LANDAUER Technical Support to re-establish your limits. microSTAR®ii User Manual v1.3... - Page 36 In order to pass the Reader QC tests, the following criteria must be met: 1. Dark Count MAX: ≤ 20 2. PMT Count CV: ≤0.05 (5%) 3. P-Diode Count CV: ≤0.05 (5%) To verify QC Control Limits meet the criteria, complete the following steps: STEP 1: Log on to the microSTARii application with an Operator or Advanced Operator account.
- Page 37 STEP 7: If the test passed, click the Complete button to complete and exit the test. a. To maintain the system control limits, ensure the Update Control Limits check box is unchecked (Figure 5-4) prior to clicking the Complete button. b.
-
Page 38: Chapter 6 Dosimeter Verification & Pre-Assignment
CHAPTER 6 DOSIMETER VERIFICATION & PRE-ASSIGNMENT Dosimeter dose verification measurements are used to record the amount of background dose (if any) present on a dosimeter prior to usage. This dose information is recorded and can be factored into the measurement calculations. This verification can be used for the following: ... -
Page 39: General Background Using Reference Dosimeter
b. Verify Dosimeters Using Population Background Reference Once the lot has a representative background radiation dose established from the previous reading, this verification is run to apply the background dose information to each nanoDot in the lot based serial number. This verification can only be run if the Population Background Reference has been determined for the lot. - Page 40 a. Select dosimeter type: screened or unscreened. (Yes or No in the Screened field.) b. Click to put the cursor in the Dosimeter # field. Scan or enter dosimeter serial number. c. Place the nanoDot in the reader drawer with the barcode facing up. Ensure the nanoDot is sitting flat.
- Page 41 Complete the following steps to run the Verify Dosimeters Using Population Background Reference process: STEP 1: Log on to the microSTARii application with an Operator or Advanced Operator account. STEP 2: Navigate to the QA tab. STEP 3: Verify the Population Background Dosimeter section on the QA tab has valid reference information.
-
Page 42: Verify Dosimeters Using Individual Background Readings
Verify Dosimeters Using Individual Background Readings Complete the following steps to run the Verify Dosimeters Using Individual Background Readings process: STEP 1: Log on to the microSTARii application with an Operator or Advanced Operator account. STEP 2: Navigate to the QA tab. STEP 3: Click the Start button next to Verify Dosimeters Using Individual Background Readings. -
Page 43: Chapter 7 Dosimetry Reads
CHAPTER 7 DOSIMETRY READS microSTARii is used to measure the dose for two main categories: Generic (unscreened nanoDots) and Patient (screened nanoDots). Each category includes different reading criteria. • Generic: Typically used for QA or phantom dosimetry applications. • Patient: Typically used for medical dosimetry applications. This category includes enhanced database and reporting features. -
Page 44: Generic Dosimetry
Generic Dosimetry Generic Dosimetry follows the basic process flow outlined in Figure 7-1 and is not associated with use with patients (refer instead to Section 7.2 Patient Dosimetry). Figure 7-1: Generic Dosimetry Process STEP 1: Verify Dosimeter a. Navigate to the QA tab. b. - Page 45 c. Click the Save button to update the parameters. STEP 4: Select Calibration a. Navigate to the Calibration tab. b. Click the check box in the Select column for the calibration that matches the measurement condition. c. Click the Save button to update the calibration used. STEP 5: Read Dosimeter a.
- Page 46 Figure 7-2 shows the Reading tab when the system is configured for a Generic read. Figure 7-2: Reading Tab (Generic) microSTAR®ii User Manual v1.3...
-
Page 47: Patient Dosimetry
Patient Dosimetry Patient dosimetry can be broken into two main methods: 1. Radiation Therapy 2. Diagnostic Imaging Each method has the same process steps, but they differ in the sequence of the process. Figure 7-4 shows the full process flow for both patient dosimetry methods. The Assign Dosimeter step occurs at different points based on the method used. -
Page 48: Radiation Therapy
Figure 7-4: Patient Dosimetry 7.2.1 Radiation Therapy STEP 1: Verify Dosimeter a. Navigate to the QA tab. b. Run the Dosimeter Verification Pre-Assignment (if necessary). See Chapter 5 for details. c. Perform Reader Daily QC tests (if necessary). See section 5.1 for more information. - Page 49 b. Update the following fields: ONFIGURATION ETTING ONFIGURATION ALUE Dosimetry Category Patient Dosimetry Use Type Therapy or Other (as applicable) Dose Reading Mode Average Beam Use Mode Automatic or Force Weak Reading Repetitions Four (4) minimum recommended Other Fill in all other options as required for the dosimetry application and dose range studied (i.e., Non Linear Calibration) c.
-
Page 50: Diagnostic Imaging
h. Click the Read button to initiate the reading. A number of sequential readings will be completed (based on your Reading Repetitions configuration). Unselect the Used check box for Outlier Reads, as necessary (see section 7.2.5 for more information). Verify that the CV value is below 0.05 and that the average dose displayed is within the expected range for the type of nanoDot (General Purpose or Screened) and Dose Unit selection. - Page 51 b. Update the following fields: ONFIGURATION ETTING ONFIGURATION ALUE Dosimetry Category Patient Dosimetry Use Type Diagnostic or Other (as applicable) Dose Reading Mode Average Beam Use Mode Automatic or Force Weak Reading Repetitions Four (4) minimum recommended Other Fill in all other options as required for the dosimetry application and dose range studied (i.e., Non Linear Calibration) c.
-
Page 52: Patient Account Management
h. Click the Read button to initiate the reading. A number of sequential readings will be completed (based on your Reading Repetitions configuration). Unselect the Used check box for Outlier Reads, as necessary (see section 7.2.5 for more information). Verify that the CV value is below 0.05 and that the average dose displayed is within the expected range for the type of nanoDot (General Purpose or Screened) and Dose Unit selection. - Page 53 Figure 7-5: Patient Info Dialog Box STEP 5: Click OK to save the patient record. Editing Patient Information Patient data can be changed at any time for future reporting. Complete the following steps to edit an existing patient record: STEP 1: Log on to the microSTARii application with an Operator or Advanced Operator account.
-
Page 54: Dosimeter Assignment
7.2.4 Dosimeter Assignment Dosimeter patient assignments are managed on the Dosimeter Assignment tab. Figure 7-6: Dosimeter Assignment Assigning a Dosimeter to a Patient STEP 1: Log on to the microSTARii application with an Operator or Advanced Operator account. STEP 2: Navigate to the Dosimeter Assignment tab. STEP 3: Click to highlight the patient row. - Page 55 STEP 6: Enter in the Required Dosimeter Count (number of dosimeters that will be assigned to this patient). STEP 7: Click to put the cursor in the Enter Dosimeter Serial Number field. Enter in the serial number or scan in each dosimeter. The dosimeters will be listed as Assignment Pending.
-
Page 56: Modifying Results
STEP 2: Navigate to the Dosimeter Assignment tab. STEP 3: Click to highlight the row for the patient. STEP 4: Click the Select Patient button. The Dosimeter ID section will be displayed (Figure 7-7). STEP 5: Click to highlight the dosimeter, and click the Remove Assignment button. STEP 6: Click OK on the confirmation prompt. -
Page 57: Chapter 8 Reporting
CHAPTER 8 REPORTING Available Reports EPORT ESCRIPTION Assignment Worklist Listing of all unread assigned dosimeters (PDF, XLS, and XML) Calibration Data Spreadsheet containing an export of the calibration information from the Calibration tab microSTARii Control Output from the Reader QC Test – Verify/Establish QC Control Limits Limit Test Report (PDF, XLS, and XML) microSTARii Daily... -
Page 58: Calibration Data Export
8.1.2 Calibration Data Export The calibration data from the Calibration tab can be exported into a spreadsheet to support calibration documentation and provide verification. To export the calibration data, complete the instructions below: STEP 1: Log on to the microSTARii application as an Operator or Advanced Operator. STEP 2: Navigate to the Calibration tab (Figure 9-2). -
Page 59: Microstarii Daily Qc Test Report
8.1.4 microSTARii Daily QC Test Report After both steps for the Reader Daily QC Tests are run, the microSTARii Daily QC Test Report (PDF, XML and XLS versions) is saved to C:\Program Files\LandauerInc\microSTARii Reader\Reports. It includes the results for all cycles/reads, the final values, and the test results (pass/fail). -
Page 60: Structured Dose Report
Selected nanoDot Data • • Serial Number New SAF* • • Labeled Sensitivity SAF* Lookup (current SAF if custom value saved) • Adjusted Sensitivity • % Difference Figure 8-4: Selected nanoDot Data Additional nanoDot Information • • Case Serial Number E1_Counts_Corrected •... - Page 61 • • Organization Information Exposure Conditions • • Date/Time of Report Results • • Patient Information Comments • • Dosimeter Information Signature Field This report is generated during the Patient Dosimetry reading. When the read is complete, click the Complete and Report button on the Complete confirmation prompt to generate the report. (For more information, see section 7.2 Patient Dosimetry.) Figure 8-7: Example SDR This report can be used to support third-party reimbursement for dosimetry services.
-
Page 62: Report Filtering
Report Filtering 8.2.1 General Information Table data on each tab can be sorted in ascending and descending order by clicking on the column header. Columns can be arranged by clicking and dragging the column to the desired location. 8.2.2 Icons ESCRIPTION The Column Picker allows you to customize the columns visible in the table. -
Page 63: Data Template
Figure 8-8: Text Filter Menu 8.2.4 Data Template On the Data tab, you can save a report template for custom column order/visibility, filters, and other settings. Figure 8-9: Data Report Template To create a template, complete the following steps: STEP 1: Log on to the microSTARii application as an Operator or Advanced Operator. - Page 64 To delete a template, complete the following steps: STEP 1: Log on to the microSTARii application as an Operator or Advanced Operator. STEP 2: Navigate to the Data tab. STEP 3: Select the template in the Templates dropdown menu. STEP 4: Click the Delete button and confirm deletion. microSTAR®ii User Manual v1.3...
-
Page 65: Chapter 9 Advanced Operations
CHAPTER 9 ADVANCED OPERATIONS The following subsections provide information on advanced operations of microSTARii. This includes information about Linear/Non-Linear ranges, general calibration, creating simulated calibrations, and calculating and applying Sensitivity Adjustment factors. These procedures should only be completed by advanced users. The associated permissions must be assigned in order to complete these operational tasks. -
Page 66: Measurement Calibration
Calibrations are performed using one of the two types of calibration dosimeters (calsets): 1. LANDAUER-Manufactured LANDAUER ships a calset with the microSTARii that includes common dose ranges (80 kVp or 662 keV, or other non-standard energies depending on customer application). This set is primarily used for system performance monitoring. - Page 67 NOTE: All LANDAUER-manufactured calsets provide a baseline for 80 kVp, 662 keV, or other exposure conditions. A custom calset will mirror the conditions in your facility. To create a custom calset, irradiate screened nanoDots using the exposure conditions in your environment.
-
Page 68: Calibration Considerations
To perform a new calibration, use the following procedure. The general procedure is the same for all calibrations (LANDAUER-manufactured calsets, custom calsets, Linear, and Non-Linear). The configuration settings defined in Step 2 determine the type of calibration being performed (e.g., Dose Units and Linear vs. - Page 69 (It should match the number printed on the top of the nanoDot, DN###.) See section 2.1.3 for label information. b. Fill in Exposed Dose Field (if not automatically populated). LANDAUER-Manufactured: Enter the dose value from the LANDAUER Calibration Certificate into the Exposed Dose field. NOTE: Do not enter the nominal dose value reflected on the dosimeter clear plastic bag label;...
-
Page 70: Simulated Calibrations
Simulated calibrations are pairs of strong and weak beam calibrations created based on existing calibrations that were created using the LANDAUER-provided NIST-traceable sets or customer- manufactured sets. Simulated calibrations can be created if you do not have a full calibration set with the desired exposure properties. -
Page 71: Sensitivity Adjustment Factor Values
CAUTION: The implementation of the SAF is a custom feature and is not recommended for routine medical dosimetry applications. LANDAUER precisely determines the sensitivity value in controlled conditions. If the SAF is implemented, the LANDAUER-determined sensitivity assignment is voided. NOTES: The SAF correction factor is only supported in Linear dose calculations. -
Page 72: Test Conditions
If you are experiencing an issue with the sensitivity of your nanoDots, contact LANDAUER for assistance (See section 12.1 for contact information). The Sensitivity Assessment tab features are used to assess the sensitivity for each nanoDot in a test population that has been exposed to a precisely known dose. The re-computed sensitivity is referred... - Page 73 If there is a significant difference in values and the interval of time between the calibration used to read the dosimeter, the test was very short, and the reader performance was stable, the difference may be a result of uncertainty in labeled sensitivity of the nanoDot. If the difference between these measurements is assessed for the whole population of nanoDots, symmetry in the distribution would be expected.
-
Page 74: Running A Sensitivity Assessment
���� − ���� % �������� ���� ���� = ���� ���� ���� ���������������� ���� ���� ���� ���� 9.4.3 Running a Sensitivity Assessment Running a Sensitivity Assessment provides statistics of a pre-read population of nanoDots for both the full population of dosimeters (nanoDot Population Statistics) and each individual dosimeter (Selected nanoDot data). -
Page 75: Saving A New Saf Value
STEP 7: Review the result for each dosimeter by selecting the dosimeter serial number in the listing on the left-hand menu (under the Process ID). If necessary, omit any inconsistent or outlier readings by unselecting the Used check box for that result. STEP 8: Click the Export button to export the report as a XLS file. -
Page 76: Chapter 10 System Administration
CHAPTER 10 SYSTEM ADMINISTRATION 10.1 Profile Management (Security) NOTE: We highly recommend that you install and maintain anti-virus software, firewalls, and other security tools onto the microSTARii laptop per the polices, guidelines, and recommendations provided by the IT and/or Information Security teams within your business. All profile administration is completed on the Security tab of the microSTARii software application. -
Page 77: Adding New Profiles
10.1.2 Adding New Profiles To add a profile, complete the following steps: STEP 1: Click the Add button under the Profiles table. STEP 2: Fill in the Name field and select the boxes next to the desired permissions for each category. -
Page 78: User Access Management (Security)
10.2 User Access Management (Security) All user account administration is completed on the Security tab of the microSTARii software application (Figure 10-1). This tab is only visible to Administrators. 10.2.1 Reviewing User Account The Users table provides user account information. From this table, you can see the following user account configurations: •... -
Page 79: Editing Existing User Account
Figure 10-3: New User Form 10.2.3 Editing Existing User Account User accounts can be edited in two ways: 1. In the Users Table a. Double-click on the user account row in the Users table. b. Edit information in the Edit User dialog box. 2. -
Page 80: Deleting A User Account
10.2.4 Deleting a User Account Complete the following steps to delete a user account: STEP 1: In the Users table, click to highlight the row for the user account you want to delete. STEP 2: Click the Delete button under the Users table. STEP 3: Click Yes on the confirmation prompt. -
Page 81: System Backup
Figure 10-6: Configuration - Adding New Reader 10.4 System Backup On the Backup tab, Advanced and Administrator default profiles can access the system back up information to complete the following tasks: • Review of backup files and frequency • Perform a manual backup as needed •... - Page 82 Figure 10-7: Backup Tab In addition, Administrators can perform more advanced backup management from the Backup tab: 1. Configure Automatic Daily Backups Select the Automatic Daily Backups check box to enable this feature. Unselect to turn it off. NOTE: When enabled, the database will be backed up at just past midnight each day unless the software is not running at that time.
-
Page 83: Database Management
3. Restore Backup NOTE: You will lose all data recorded after the point of the backup file selected. This includes measurement data, user account information, configuration, and calibration information. a. Click the row to select the backup file to restore. b. - Page 84 STEP 6: Click OK to update the configuration. Figure 10-9: Database Management microSTAR®ii User Manual v1.3...
-
Page 85: Chapter 11 Cleaning Procedures
The drawer can also develop sharp edges over time due to normal wear and tear. We recommend inspecting the bottom of your drawer for sharp edges before each cleaning. If sharp edges are found, please contact LANDAUER InLight® Customer Service to order a replacement drawer (Telephone: 800-561-2708, email: inlightcustserv@landauer.com). -
Page 86: Cleaning The Drawer
11.2 Cleaning the Drawer 4. Use a compressed gas duster to clean the drawer with pressurized air. Direct the duster: • to the center of the nanodot holder while pushing the sled bushing away to expose and clean the sled and inside of the drawer. •... -
Page 87: Cleaning The Reader
11.3 Cleaning the Reader 5. Clean the inside of the reader sleeves • Use a mini desktop vacuum cleaner to remove the dust and debris from inside the reader sleeves • Use the gas duster on both of the ball plungers while pressing the ball down. Wear safety goggles when doing the cleaning task. - Page 88 6. Replace the reader drawer. 7. Power on the reader. Note: make sure the reader has been powered for at least 60 minutes before performing the next reading session. 8. Perform reader QC test (“Intrinsic Measurement Test,” following Chapter 7.1.1 of Installation &...
-
Page 89: Chapter 12 Troubleshooting
Email inlightcustserv@landauerinc.com Operating Hours Monday–Friday: 8:00 am to 4:30 pm Central Time When calling LANDAUER, please provide the representative with the following information: • Your contact Information (Name, Phone #, Email Address, and Organization/Facility) • Type of Call (Informational or System Failure) •... -
Page 90: Event Logs
12.2 Event Logs The event log provides a detailed listing of all user actions and software events on the microSTARii software with the following record information: • LogID • Date/Time • Application Name • Module Name • Routine • Log Type •... -
Page 91: Usage Information
Figure 12-1: Event Log 12.2.1 Usage Information • Events are reported in a descending time sequence from most to least recent. • The range of events displayed can be adjusted by specifying a start and end date for reporting and clicking the Update button. •... -
Page 92: System Version Information
12.3 System Version Information When contacting LANDAUER Technical Support or during other troubleshooting scenarios, you may need to provide the version number for microSTARii system components. Log on under any user account and navigate to the About tab. This tab contains the version numbers for system, database, reader communication, and firmware. - Page 93 The bent pin prevents the closing mechanism from functioning properly. Sensitivity The sensitivity Barcode Scanner is Contact LANDAUER Readings Vary readings are different failing. Technical Support for for Same for the same nanoDot. replacement hardware. nanoDot...
- Page 94 If the nanoDot label is worn, manually enter the serial number. Reader Door is After closing the Door closed magnetic Contact LANDAUER Open Error drawer and ensuring it sensor has failed. Technical Support for When Drawer is seated correctly, the replacement hardware.
-
Page 95: Error Messages
LANDAUER Technical Support for further troubleshooting. (See section 12.1 Technical Support for contact information). Some of the corrective actions may require assistance from your local IT support. - Page 96 SQL Server service is running as well. The application will be closed now. XML Report could Contact LANDAUER Changes to the SQL not be translated Technical Support. (See table column names. Errors (e.g., XML section 12.1 Technical...
-
Page 97: Failed Qc Tests
Use the information in the following table to diagnose failures in the Reader Daily QC Tests. After the corrective action is taken, rerun the test. If the test continues to fail after corrective action, contact LANDAUER Technical Support for further troubleshooting. (See section 12.1 Technical Support for contact information). -
Page 98: Reader Qc Tests Failure
Verify/Establish QC Control Limits test. After the corrective action is taken, rerun the test. If the test continues to fail after corrective action, contact LANDAUER Technical Support for further troubleshooting. (See section 12.1 Technical Support for contact information). - Page 99 SSUE NDICATIONS ORRECTIVE CTION LANDAUER-manufactured calset and the results are not matching expectations, you should create a custom calset for your environment. Cannot remove When sliding the This could be caused by one of the following: nanoDot from ejector, the nanoDot...
-
Page 100: Profile Permissions Listing
Profile Permissions Listing DVANCED ATEGORY ERMISSION PERATOR DMINISTRATOR PERATOR Backup Screen: Backup Groupbox: Reset Backup Database Backup Button: Backup Backup Button: Restore Backup Button: Delete Checkbox: Automatic Backup Daily Backup Calibration Screen: Calibration Groupbox: Operational... - Page 101 DVANCED ATEGORY ERMISSION PERATOR DMINISTRATOR PERATOR Configuration Screen: Configuration Checkbox: Apply Configuration Sensitivity Adjustment Factor Value Checkbox: User Configuration Dosimeter Background Correction Checkbox: Non Linear Configuration Calibration ...
- Page 102 DVANCED ATEGORY ERMISSION PERATOR DMINISTRATOR PERATOR Groupbox: User Configuration Defined Fields Configuration Textbox: Read Interval Groupbox: Dosimetry Configuration Category Groupbox: Dosimetry Configuration Use Type Groupbox: Dose Configuration Reading Mode Textbox: Reading ...
- Page 103 DVANCED ATEGORY ERMISSION PERATOR DMINISTRATOR PERATOR Dosimeter Button: Edit Patient Assignment Dosimeter Button: Delete Patient Assignment Dosimeter Button: Edit Assignment Assignment Dosimeter Button: Remove Assignment Assignment Dosimeter Textbox: Serial Number Assignment ...
-
Page 104: Reader Daily Quality Control
Reader Daily Quality Control microSTAR®ii User Manual v1.3... -
Page 105: Standard Database Values
Standard Database Values microSTAR®ii User Manual v1.3... -
Page 106: Glossary
Aluminum Oxide is a ceramic metal manufactured from bauxite. Al represents the pure form whereas Al :C represents carbon-doped aluminum oxide, which is the form used in LANDAUER dosimeters. annealing (optical): The physical process in which dosimeters are exposed to visible light source with UV filtered out designed to liberate electrons from dosimetric traps. - Page 107 PMT counts / S; where S = Sensitivity of the nanoDot) and dose. The Linear dose calculation formula ���� is the following: ���������������� = �������� When the dose calculation is based upon a Non-Linear calibration where the dose calculation takes the form of a quadratic formula, the calibration factors are the coefficients A, B, and C in the dose calculation formula of the form: ����������������...
- Page 108 (J/Kg) or Gray. dosimeter (passive): A passive radiation measuring device used to measure dose. LANDAUER dosimeters are used in a variety of applications including: occupational, environmental and medical. The dosimeter used in the microSTARii Medical Dosimetry System is the nanoDot.
- Page 109 OSDL material. microSTARii: An OSLD reader distributed by LANDAUER. The original microSTAR reader employed Optically- Stimulated Luminescence (CW-OSL) technology. The microSTARii reader employs Pulsed Optically- Stimulated Luminescence (POSL) technology.
- Page 110 Pulsed Optically Stimulated Luminescence (POSL): A mode of Optically-Stimulated Luminescence in which the optical stimulation and measurement of luminescence emission are separated in time. Optical stimulation is applied by cycling or pulsing the LED on and off and the emitted luminescence light is collected in the intervals between stimulation, i.e., when the LED pulse is turned off.
- Page 111 Standard deviation (STDEV): A measure of dispersion in a frequency distribution, equal to the square root of the mean of the squares of the deviations from the arithmetic mean of the distribution. strong beam: A mode of LED illumination employed in the microSTARii reader wherein the LED is operated with a longer pulse duration to achieve better stimulation efficiency for low dose applications requiring higher statistical accuracy.
Need help?
Do you have a question about the microSTAR ii and is the answer not in the manual?
Questions and answers