Table of Contents
Advertisement
Quick Links
Advertisement
Table of Contents
Troubleshooting

Related Manuals for APS APSG-3-5.5K-IN


Summary of Contents for APS APSG-3-5.5K-IN
-
Page 2: Table Of Contents
Catalogue 1. Introduction....................- 1 - 1.1 Appearence introduction..............- 1 - 1.2 Parts list....................- 2 - 2. Safety warnings and instructions..............- 3 - 2.1 Safety signs................... - 3 - 2.2 Safety instructions................- 4 - 2.3 Using notes................... - 6 - 3. -
Page 3: Introduction
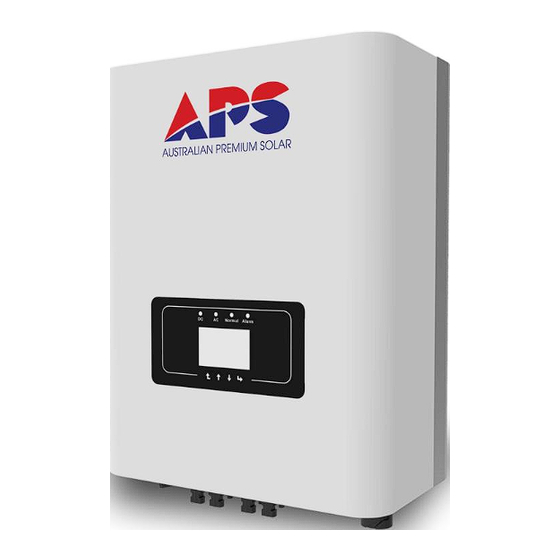
1. Introduction 1.1 Appearance Introduction Pic1.1 Front view Pic1.2 Bottom view... -
Page 4: Parts List
1.2 Parts list Please check according to following table, to see whether all the parts are included in the packaging: Pic1.3 Accessories Map Description PV grid tie Inverter Wall mounting bracket Installation screws M4*20 AC power connectors Expansion anchor bolt M6*80 DC power connectors 4 pairs Instruction book... -
Page 5: Safety Warnings And Instructions
2. Safety warnings and instructions Improper use of the inverter will cause electric shock and burn. During the installation and maintain, please operate the unit in strict accordance with the user manual. Please read the user manual carefully before using the inverter. And please take care of the manual for afterwards use. -
Page 6: Using Notes
Warning: Inverter is non-isolated topology structure, hence must insure dc input and ac output are electrical isolated before operating the inverter. Strictly prohibit grinding the input positive and negative. Otherwise it will cause inverter malfunction. Shock Hazard: Prohibit disassembling inverter case, existing shock hazard, because severe injury or death, please ask qualified person to maintenance. - Page 7 2. Must disconnect the AC side first, then disconnect DC side while doing installation and maintenance, after disconnecting, please wait at least 5 minutes to avoid getting shocked. 3. Local temperature of the inverter may exceed 80 ℃ while under operating. Do not touch to avoid getting injured.
-
Page 8: Operation Interface
3. Operation Interface 3.1 Interface View Pic3.1 Interface View 3.2 Status Indicator The inverter panel has 4 indicators, the left one is DC output indicator, green indicates normal DC input. Beside is the AC indicator, green indicates normal AC connecting. Next is the operating indicator, green indicates normal output. The right indicator is alarm, red indicates alarming Indicator status... -
Page 9: Buttons
3.3 Buttons There are four buttons on the inverter panel:Above is Up and increase button (UP), below is down and decrease button (DOWN), left is ESC button (ESC), right is Enter button (ENTER). Achieving below functions by the four buttons: Page Turning (Use UP and DOWN Button) ●... - Page 10 Pic4.1 Recommended installation place Please select the wall with certain bearing capacity. ● ● When do the installation, vertical slope cannot exceed +/-15°, make sure no lateral tilt. Otherwise will affect the function of the heat sink and cause the output power lower than expected.
- Page 11 Pic4.2 Installation angle Pic4.3 Installation gap...
-
Page 12: Inverter Installation
4.2 Inverter installation Pic4.4 Dimensions of hanging plates (5.5-12KW) Pic4.5 Dimensions of hanging plates (15-25KW) The inverter should be mounted in a vertical position. The steps of mounting are as follows: 1. For brick walls, the position of the holes should be suitable for the expansion bolts. - Page 13 2. Make sure the bracket is horizontal and the mounting holes are in the correct points. Drilling the holes on the wall according the marks. 3. Using the expansion bolts to fix the bracket to the wall. Pic4.6 Inverter Installation 1.
-
Page 14: Electrical Connections
2. Ensure that the location of the mounting holes on the wall is consistent with the mounting plate holes ( Picture 4.7 ) and that the mounting bracket is horizontal. 3. Hang the inverter on the upper part of the mounting bracket and lock the inverter using the M4 screw in the fitting (Picture 4.8). - Page 15 The steps of assembling the DC connector are listed as follows: 1)Strip off the DC wire about 7mm, disassemble the connector cap nut (see Picture 5.3). Pic5.3 Disassemble the connector cap nut 2)Crimp the contact pin to the wire using a proper wire crimp tool as shown in Picture 5.4.
- Page 16 Traverse area(mm²) Outside diameter Cable type Recommended of cable(mm) Range value Industry generic 4.0-6.0 PV cable 4.0(12AWG) 5.5-9.0 (12-10AWG) (model;PV1-F) Table5.1 Specs of AC cable 4) Connect the finished DC cable to the inverter. Pic5.6 DC input connection NOTE: Panels will generate high voltage, after series connection can lead to life-threatening conditions.
-
Page 17: Ac Input Terminal Connection
5.2 AC input terminal connection After the DC terminal is connected, do not close the DC switch first. Connect the AC terminal to the AC terminal of the inverter; the AC terminal is equipped with three-phase AC terminals that can be conveniently connected. Flexible cords are recommended for ease of installation. - Page 18 Step 2: Use strippers to strip the protective sheath and insulation layer of the AC cable to the right length, as shown in Picture 5.8. pic5.8 Strip AC cable Warning: Be careful to distinguish the L1, L2, L3 and PE of the AC cables. The APSG-3-(5.5-25K)-IN doesn't involve N lines.
-
Page 19: Other Connections
Safety Hints: The AC cable line L1 is connected to socket 1; L2 is connected to socket 2; L3 is connected to socket 3; the PE line is connected to the earth , and does not involve N wire connections, please do not insert N lines into the socket of N. - Page 20 5.3.2 Inverter monitoring connection APS inverter has the function of wireless remote monitoring. The inverter has Wifi function and Wifi Plug in the accessories are used to realize the connection between the inverter and the network. The operation, installation, networking, APP download are detailed in the WIFI PLUG instructions.
-
Page 21: Startup And Shutdown
Pic5.12 Internet monitoring solution 6. Startup and Shutdown Before starting the inverter need to ensure that meet the following conditions, otherwise may cause fire or damage to the inverter without quality assurance at the same time the situation on our company does not undertake any responsibility. -
Page 22: Start Up The Inverter
6.1 Start up the inverter When start up the inverter should follow below steps: 1. First switch on the AC breaker. 2. Turn on the dc switch of the PV module, and if the panel provides sufficient starting voltage and power, the inverter will start. 3. -
Page 23: General Operation
Warning: When cleaning any part of the inverter, no solvent, abrasive materials or corrosive materials shall be used for cleaning. 8. General Operation During normal operation, the LCD shows the current status of the inverter, including the current power, total generation, a bar chart of power operation and inverter ID,etc. - Page 24 Pic8.2 The initial interface Press UP or Down you can check inverter DC voltage, DC current, AC voltage, AC current, inverter temperature, software version information. Pic8.3 PV input and DC current information You can check the PV information, the number of strings input, MPPT voltage and MPPT current.
- Page 25 Pic8.4 AC running state information You can check the three phase voltage, current, and grid currency. Pic8.5 Temperature and software version You can check the inverter inside temp, LCD software Ver137 and inverter software Ver1400. There are two black dots in the bottom right corner. The first flash means inverter is communicating with LCD.
-
Page 26: Statistics Information
8.1.1 Main Menu There are four sub-menus in the Main Menu. Pic8.6 Main Menu 8.2 Statistics information There are five sub-menus in the statistics. Pic8.7 Statistics Into each sub-menu through cursor... - Page 27 Pic8.8 E-Day Pic8.9 E-Month This information is for technician’s reference Pic8.10 Information...
-
Page 28: Fault Record
8.3 Fault Record Only can keep four fault record in the menu include time, customer can deal with it depends on the error code. Pic8.11 Fault Record 8.4 Parameter setting Setting include system param, run param, protect param, comm. param. All of these information for maintenance reference. - Page 29 8.4.1 System Param System Param includes time set, language set, display set and factory date reset. Pic8.13 System Param 8.4.1.2 Time set Pic8.14 Time set...
- Page 30 8.4.1.3 Language set Pic8.15 Language set 8.4.2 Running Param Note: Engineer only. Un-authorized access may avoid the warranty. The initial password is 1234. Pic8.16 Password...
- Page 31 Pic8.17 Running Param 8.4.3 Protect Param Note: Engineer Only. We will set the param depends on the safety requirements, so customers don’t need to reset it. The password is same as 8.4.2 Running param. Pic8.18 Protect Param...
-
Page 32: Troubleshooting
Note: Engineer only. Pic8.19 “CUSTOM” 8.4.4 Comm. Param Pic8.20 Communication param 9. Troubleshooting Inverter has been designed in accordance with international grid tied standards... - Page 33 for safety, and electromagnetic compatibility requirements. Before delivering to the customer the inverter has been subjected to several tests to ensure its optimal operation and reliability. In the case of failure the LCD screen will display an alarm message. In this case the inverter may stop feeding energy into the grid.
- Page 34 Crash stop (if there is a stop button) AC leakage current is transient over current DC insulation impedance failure DC reverse irrigation failure The DC busbar is unbalanced DC end insulation error Inverter 1 DC high fault AC load switch failure AC main contactor failure AC secondary contactor failure Inverter 2 DC high fault...
-
Page 35: Troubleshooting
W phase grid current dc over current AC inductor A, phase current dc current high AC inductor B, phase current dc current high AC inductor C, phase current dc current high DC busbar voltage is too high DC busbar voltage is too low AC reverse irrigation AC grid U over current AC grid V over current... -
Page 36: Specification
2. The distributor / dealer of the inverter (if available) ; 3. Installation date; 4. The description of problem (include LCD’s error code and LED status indicator lights); 5. Your contact details. 10. Specification Model APSG-3-5.5K-IN Max DC voltage input 900Vdc MPPT operation range 200--800Vdc Max DC input current 10A+10A... - Page 37 Size 385*453.4*184mm Weight 15Kg Topology Transformerless Operating temperature <1W(Night) Operating temperature -25--60℃ Ingress protection IP65 Interface RS485 RS232 WIFI Certification standard IEC 60068,IEC 61683,IEC 62116,IEC 61727,IEC 62109-1/2 Operation surrounding humidity 0--95% EN61000-6-1,EN61000-6-3 Model APSG-3-6.6K-IN Max DC voltage input 900Vdc MPPT operation range 200--800Vdc Max DC input current 10A+10A...
- Page 38 Size 385*453.4*184mm Weight 15Kg Topology Transformerless Operating temperature <1W(Night) Operating temperature -25--60℃ Ingress protection IP65 Interface RS485 RS232 WIFI Certification standard IEC 60068,IEC 61683,IEC 62116,IEC 61727,IEC 62109-1/2 Operation surrounding humidity 0--95% EN61000-6-1,EN61000-6-3 Model APSG-3-7K-IN Max DC voltage input 900Vdc MPPT operation range 200--800Vdc Max DC input current 10A+10A...
- Page 39 Size 385*453.4*184mm Weight 15Kg Topology Transformerless Operating temperature <1W(Night) Operating temperature -25--60℃ Ingress protection IP65 Interface RS485 RS232 WIFI Certification standard IEC 60068,IEC 61683,IEC 62116,IEC 61727,IEC 62109-1/2 Operation surrounding humidity 0--95% EN61000-6-1,EN61000-6-3 Model APSG-3-8K-IN Max DC voltage input 900Vdc MPPT operation range 200--800Vdc Max DC input current 10A+10A...
- Page 40 Size 385*453.4*184mm Weight 15Kg Topology Transformerless Operating temperature <1W(Night) Operating temperature -25-60℃ Ingress protection IP65 Interface RS485 RS232 WIFI Certification standard IEC 60068,IEC 61683,IEC 62116,IEC 61727,IEC 62109-1/2 Operation surrounding humidity 0--95% EN61000-6-1,EN61000-6-3 Model APSG-3-10K-IN Max DC voltage input 900Vdc MPPT operation range 200--800Vdc Max DC input current 10A+10A...
- Page 41 Size 385*453.4*184mm Weight 15Kg Topology Transformerless Operating temperature <1W(Night) Operating temperature -25--60℃ Ingress protection IP65 Interface RS485 RS232 WIFI Certification standard IEC 60068,IEC 61683,IEC 62116,IEC 61727,IEC 62109-1/2 Operation surrounding humidity 0--95% EN61000-6-1,EN61000-6-3 Model APSG-3-12K-IN Max DC voltage input 900Vdc MPPT operation range 200--800Vdc Max DC input current 10A+10A...
- Page 42 Size 385*453.4*184mm Weight 18Kg Topology Transformerless Operating temperature <1W(Night) Operating temperature -25--60℃ Ingress protection IP65 Interface RS485 RS232 WIFI Certification standard IEC 60068,IEC 61683,IEC 62116,IEC 61727,IEC 62109-1/2 Operation surrounding humidity 0--95% EN61000-6-1,EN61000-6-3 Model APSG-3-15K-IN Max DC voltage input 1000Vdc MPPT operation range 200--800Vdc Max DC input current 20A+20A...
- Page 43 protection Size 455*550*240.5mm Weight 28Kg Topology Transformerless Operating temperature <1W(Night) Operating temperature -25-60℃ Ingress protection IP65 Interface RS485 RS232 WIFI Certification standard IEC 60068,IEC 61683,IEC 62116,IEC 61727,IEC 62109-1/2 Operation surrounding humidity 0--95% EN61000-6-1,EN61000-6-3 Model APSG-3-20K-IN Max DC voltage input 1000Vdc MPPT operation range 200--800Vdc Max DC input current...
- Page 44 Size 455*550*240.5mm Weight 28Kg Topology Transformerless Operating temperature <1W(Night) Operating temperature -25-60℃ Ingress protection IP65 Interface RS485 RS232 WIFI Certification standard IEC 60068,IEC 61683,IEC 62116,IEC 61727,IEC 62109-1/2 Operation surrounding humidity 0--95% EN61000-6-1,EN61000-6-3 Model APSG-3-25K-IN Max DC voltage input 1000Vdc MPPT operation range 200--800Vdc Max DC input current 20A+20A...
- Page 45 DC reverse polarity;AC short circuit protection;temperature protection; Protection Lightning protection;islanding protection Size 455*550*263.5mm Weight 28Kg Topology Transformerless Operating temperature <1W(Night) Operating temperature -25-60℃ Ingress protection IP65 Operating temperature -25-60℃ Ingress protection IP65 Interface RS485 RS232 WIFI Certification standard IEC 60068,IEC 61683,IEC 62116,IEC Operation surrounding humidity 0--95% EN61000-6-1,EN61000-6-3...
- Page 46 • Please read safety and installation instructions before using the product. • Subject to Ahmedabad Jurisdiction. *Warranty: Please read APS India warranty documents thoroughly on http://australianpremiumsolar.co.in/warranty/ Copyright Declaration: The copyright of this manual belongs to Australian Premium Solar (India) Pvt. Ltd. Any corporation or individual should not plagiarize, partially or fully copy (including software, etc.), and no reproduction or distribution of it in any means.
Need help?
Do you have a question about the APSG-3-5.5K-IN and is the answer not in the manual?
Questions and answers