Advertisement
Table of Contents
- 1 Table of Contents
- 2 Introduction
- 3 Included
- 4 Table of Spare Parts
- 5 Main Features
- 6 Technical Specifications
- 7 Know the Radio
- 8 Preparation for Use
- 9 Menu Contents
- 10 Operation Guide
- 11 Auxiliary Functions Description
- 12 Programming Functions
- 13 Maintenance
- 14 Troubleshooting
- 15 Appendix:ctcss/Dcs List
- Download this manual
Contents
Introduction.......................................................................................................1
Included..........................................................................................................................2
Table of Spare Parts .............................................................................................2
Main Features ....................................................................................................3
Technical Specifications........................................................................................4
Know The Radio.......................................................................................................5
Preparation for Use ................................................................................................8
Menu Contents.....................................................................................................12
Operation Guide................................................................................................20
Auxiliary Functions Description............................................................................28
Programming Functions......................................................................................33
Maintenance.......................................................................................................36
Troubleshooting ..............................................................................................37
Appendix:CTCSS/DCS List.................................................................................38
Advertisement
Table of Contents

Subscribe to Our Youtube Channel
Related Manuals for Zastone ZT-V9

Summary of Contents for Zastone ZT-V9
-
Page 1: Table Of Contents
Contents Introduction…………………………..........………………………1 Included.………………....................…2 Table of Spare Parts ……………………………………..........…2 Main Features …………………………………………..........……3 Technical Specifications………………….........…..…………………4 Know The Radio………………….........…………....…....5 Preparation for Use ……………………….........………..…....8 Menu Contents………………………….........………....……12 Operation Guide…………………………..........…………………20 Auxiliary Functions Description…………….........………..………28 Programming Functions…………………….........………..….……33 Maintenance…………………….........…………..……….……36 Troubleshooting ……………………........……………………………37 Appendix:CTCSS/DCS List………..........…………………………38... -
Page 2: Introduction
It offers you a normal communication when you are in the rural area, forest zone, pasturing area or sea area. The fine appearance of ZT-V9 meets your needs of personality. Thank you for your support and interest in... -
Page 3: Included
Included Please take the transceiver from the carton carefully. Please check if the package including the spare parts as below. If there are any items lost or damaged during moving,please submit claim immediately to the delivery. Table of Spare Parts Spare Parts Unit quantity... -
Page 4: Main Features
Features 15. Free Setting V/U Band 1. Frequency:VHF(136MHz-174MHz) and UHF(400MHz-470MHz) 16. DW 2. LCD Menu Display 17. OFF SET 3. Battery: Chargeable 7.4V 1500mAh 18. CTCSS/CDCSS 4. Wide/Narrow Selectable 25K/12.5K 19. STEP5/6.25/10/12.5/15/20/25K 5. High/Low power Selectable:5w/1w 20. Scan: VFO/Channel Scanning 21. -
Page 5: Technical Specifications
Specification General 136-174MHz Receive Frequency 400-470MHz ≤-122dBm(12dB Sensitivity Channels SINAD) Channel Space 12.5kHz or 25kHz ≤0.16uV Temperature Inter-modulation -20℃~+60℃ 60dB Voltage Rejection 7.4V Standby Current about 15mA Audio Power ≥500mW Mission ≤140mA Transmit Standby Current 15mA Output Power VHF≤5W UHF≤4W Current HI≤1.6A Modulation... -
Page 6: Know The Radio
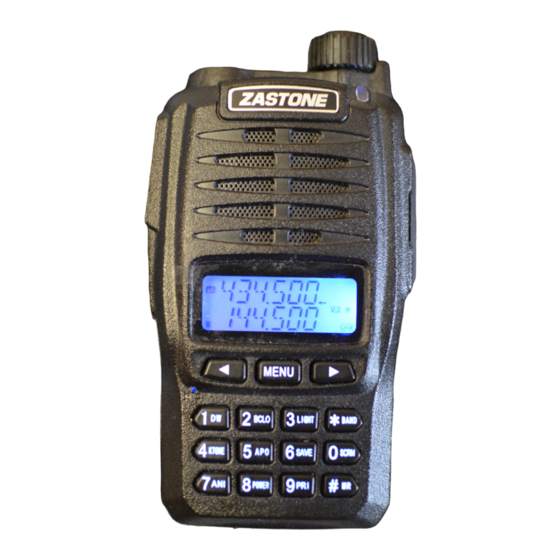
Know The Radio LCD Definition 1.Wide/Narrow Band 6.High Power 12.Frequency Offset Selectable 7.Frequency Group A 13.Low Battery alert 2.Keypad Lock 8.DCS Setting /CTCSS Setting 14.Priority Channel Scan 3.Scrambler Function 9.CTCSS Indicator 15.APO 4.Power Save 10.Vox 16.Using Frequency Group 5.Low power 11.Tone Setting 17.Frequency Group B... - Page 7 1.Antenna 2.PTT 3.Monitor/FM 4.Emergency Call 5.Down 6.MIC 7.MENU 8.Battery Buckle 9.Battery Pack 10.Number Keypad 11.Up 12.LCD 13.MIC/SP Waterproof Cover 14.Indicator light 15.Volume Knob 16.Belt clip 17.Hand strap hole...
- Page 8 Key Instruction 1. [PTT]: Press to Transmit ,Release to Receive. 2. [MONI/FM]:Press FM for 1.5 Seconds to turn on FM short press to turn on moni. 3. [CALL]:Press for 1.5 Seconds to Call ;No use for Short press. 4. [MENU]: Menu/Confirm 5.
-
Page 9: Preparation For Use
Preparation For Using Install the Antenna Install the battery Install the antenna as picture shows and Install the batter along the rear case of radio rotate it clockwise till tight. properly as following pictures show: Note: Don’t hold the antenna or hang the keys or Note: external mic on the Antenna ,in case of destroying the performance of radio . - Page 10 Disassembling of battery Install and take off the belt clip Press the fixed buckle of the battery(P1),then If necessary ,fix the belt clip with two push down the battery off the transceiver(P2) screws (3*6) as picture shows: Assembly Taking Off Note:1.When installing the belt clip , do not use any glue to fix screws,otherwise, it will damage the housing.
- Page 11 Install external microphone Install the microphone as picture shows, Charging The battery pack is not fully charger when finished,and please charge it before using. The battery can not reach the normal capacity for the first time charging after purchasing or storing it more than two months.However,it will return the normal capacity after charging and discharging repeatedly 3-5 times.
- Page 12 Charging steps as below: 1. Insert the AC adaptor line to the charging hole of desk-top . 2. Connect the power with AC adaptor. 3. Put Li-ion battery or Radio with battery on the desk top. As following pictures show . Note: 1.Please make sure the battery connect with the touching piece of the charging terminal.
-
Page 13: Menu Contents
Menu Contents 1.Keypad Combination Buttons( Silkprinting) Instruction Display [MENU]+[0] Scrambler On/Off “S” Flashes [MENU]+[1] DW On/Off [MENU]+[2] BCLO On/Off BCLO [MENU]+[3] Backlight On/Off LIGHT [MENU]+[4] Key Tone On/Off KTONE [MENU]+[5] APO On/Off [MENU]+[6] Power Save On/Off [MENU]+[7] ANI On/Off [MENU]+[8] Power HIGH/LOW POWER [MENU]+[9]... - Page 14 Press [#/MR] More than 1s Channel Storing/FM Channel Storing Press [*/BAND] More than 1s Main Frequency Switch A/B Press [MENU] Enter MENU Press [#/MR]On Switch working mode :VFO/Channel Short Press [*/BAND] Quit 1.1 SCRM When turn on this function ,the information has been encrypted .Only same setting radio can get the information .If not ,others can not be done.
- Page 15 Off. Each Operation action would change status. It is useful under Channel Mode. ★ 1.3 BCLO Setting BCLO can inhibit radios working when other Signal comes in, in case of stopping other communication . Press [MENU],“Menu” display on the Screen ,next line would be blank . ★...
- Page 16 turning off ,no voice prompts. Press [MENU],“Menu” display on the Screen ,next line would be blank . ★ Press[4], “KTONE”display on the Screen ,corresponding status would show next line :On or ★ Off. Each Operation action would change status. It is no use under Channel Mode. ★...
- Page 17 Press[6], “SAVE”display on the Screen ,corresponding status would show next line :On or ★ Off. Each Operation action would change status. It is no use under Channel Mode. ★ 1.8 ANI The steps for setting ANI on /off: Press [MENU],“Menu” display on the Screen ,next line would be blank . ★...
- Page 18 Press[9], “PRI”display on the Screen ,status would show next line :On or Off. Each ★ Operation action would change status. Turning on PRI ,supposed Priority Channel is 1 under Channel Mode,then scanning is 1-2-1-3-1-4……. 1.11 SCAN Turn on this function to scan VFO and Channel: Press [MENU],“Menu”...
- Page 19 Storing the Channels under VFO mode: Under VFO Mode, Select frequency needed to store,then press [#/MR] more than 1 second, ★ “MEMORY”would display on the screen ,next line would be “01”. Press [UP]/[DOWN],you can store channels (01-09).Or type in two digits as the channel ★...
- Page 20 2.Menu Contents Item Instruction Contents “RX QT” Main Fre. RX QT “TX QT” Main Fre. TX QT “SQL” 0-9(Separately setting on A/B ,Corresponding setting) “TOT” OFF/15--600S 5/6.25/10/12.5/20/25K(Separately setting on A/B, “STEP” Corresponding setting) WIDE/NARROW(Separately setting on A/B, “WN” Corresponding setting) 0.0MHz~69.9MHz(Separately setting on A/B,...
-
Page 21: Operation Guide
“PRI SET” 01-99 Channel Selection “ANI CODE” Display Using Radio ID “ANI SET” Edit ANI 3.Menu Instruction Note: The following features are set separately between Frequency Group A and B. That means ,it is useful for Frequency Group A when operating tips display on the Group A .The same with Group B . - Page 22 Setting as following steps:: 1) Press [MENU], [MENU] would display on the screen ,next line is blank .Then Press [UP]or [DOWN] to select“TX QT”. 2) Press [MENU] enter into setting ,first line is “TX QT”,next line shows the status. 3) Press [#/MR] to select OFF/67.0HZ/D023N/D023I ,then press [UP]or[DOWN] to set the frequency for CTCSS /DCS.
- Page 23 TOT protects radio from being damaged or any caller occupied the channel overtime while using the radio.Radio would stop transmitting and send the emergency call if radio keeps transmitting and over the set time (Longest :10 minutes). 1) Press [MENU], [MENU] would display on the screen ,next line is blank .Then Press [UP]or [DOWN] to select“TOT”.
- Page 24 It requests narrow channel spacing in Channel-intensive areas.Therefore it needs to reduce bandwidth when transmitting so as to avoid some interruption between adjacent channels. Select Wide/Narrow as following steps: 1) Press [MENU], [MENU] would display on the screen ,next line is blank .Then Press [UP]or [DOWN] to select“WN”.
- Page 25 4) Press [MENU] to confirm storing the settings and return ,or press [*/BAND] to exit and back to standby ,but it can not store the settings. 3.8 SHIFT Shift Direction would be set as more than or less than receiving frequency . 1) Press [MENU], [MENU] would display on the screen ,next line is blank .Then Press [UP]or [DOWN] to select“SHIFT”.
- Page 26 (SE)Searching Opeartion ★ Radios stop in the frequency which has checked out signal and then quit scanning . Setting steps as following: 1) Press [MENU], [MENU] would display on the screen ,next line is blank .Then Press [UP]or [DOWN] to select“SCAN M”. 2) Press [MENU] enter into setting ,first line is “SCAN”,next line shows the status.
- Page 27 Note:5= High Sensitivity ,used in low noise condition. 1= Low Sensitivity ,used in high noise condition. Note: VOX :1/2/3/4/5 ,display on LCD. 3.11 Emergency Call Channel 01 is emergency call . 1) Press [MENU],then press [UP]or [DOWN] to select “CALL”. 2) Press [MENU] enter into setting ,first line is “CALL”,next line shows the status.
- Page 28 Note: Choose “BUSY”, users answer this call from the present frequency directly .Choose “ MASTER” ,no matter what signals radio receives from any channels, user only answer to Main Frequency . 3.13 PRI SET 1)Press [MENU],then press [UP]or [DOWN] to select “PRI SE”. 2)Press [MENU] enter into setting ,first line is “PRI SET”,next line shows the status.
-
Page 29: Auxiliary Functions Description
1)Press [MENU],then press [UP]or [DOWN] to select “ANI SET”. 2)Press [MENU] enter setting ,first line is “ANI SET”,next line shows ANI code and the first code flashes. 3)First digit is group number ,then press [UP]or [DOWN] to select 0-9. 4)After editing first digit ,then press [#] to editing second and third digit as ID .The number range is 01-80 (For example ,ID is 01 ,second digit is 0 ,third digit is 1 ). - Page 30 2)Press [MR] for 2 second ,LCD shows channel 01-100 flashes ,Press [UP]or [DOWN] to select one channel from 01-100. 3)Press [MENU] again to store the frequency . 4)Still working under VFO mode ,and do again the above operations and type in other frequency to store channels.
- Page 31 Press PTT to withdraw the emergency call. ▲ It is good and quick method to ask for help when outgoing for some activities . Emergency call can be used repeater radios and transfer information ,but need about 1 second 1750 signal and turn on this function first .
- Page 32 FM Channel Storing Radio can store 16 channels maximum ,from 01-16 . Steps following : A. Under FM full screen Mode ,choose channel which have received . B. Press [MR] for 2 second ,LCD shows 01-16 and flashes ,then press [UP]or [DOWN] to select one from 01-16 .
- Page 33 4.7 Wired Cloned Press turn on the radio till hear“Di”tips ,then release . Now LCD shows 和 MONI “ CLONE” . Ready to cloning when Orange indicator flash . Connect the host radio with the assistant radio by transfer cable and turn on the power of assistant radio.
-
Page 34: Programming Functions
3. Squelch level setting The dealer or manufacturer can use ZT-V9 software to program the squelch level from 0- 9. 4. Battery save If the transceiver is set battery save function, the LCD will show “S”. The transceiver will into power save state after stopping communication within 10 seconds. - Page 35 One clock symbol displays on the LCD when "Beep" sound is on, indicator sounds for pressing keypad each time.Otherwise,no indicator sound heard while turning on the radio and pressing the keypad. 6. Power selection You can select power transmit for every channel, when you select high power, the LCD will display “HI”, when you select low power, the LCD will show “LO”...
- Page 36 ,there is “Di Di” sound from speaker when press PTT ,also “BCLO” would display on the screen . 9. ANI Distributors and factory can set the ANI code by ZT-V9 software , the code can be set 3 digits at most to identify the ANI code of current radio. 10.Scrambler Distributors and factory can program scrambler to avoid interruption from other radios or confidential calls .Radio can receive clear information when setting same scrambler.
-
Page 37: Maintenance
Maintenance Transceiver ZT-V9 you purchased is an exactitude design electronic products and please use it carefully. Following maintenance ways may help extend its lifetime. 1.Please don’t try to disassemble the transceiver because non-technicians’ processing may cause damage to the device. -
Page 38: Troubleshooting
Troubleshooting Trouble Solution ●The battery pack has been exhausted. Please change a new battery or recharge No reaction when power-on the battery. ● The battery pack may be not installed correctly. Please install it again. ● Please check the frequency and CTCSS/DCS you use are the same as other Unable to talk with other members use in the same group. -
Page 39: Appendix:ctcss/Dcs List
Appendix: CTCSS/ DCS List CTCSS 50 107.2 136.5 165.5 186.2 210.7 67.0 85.4 254.1 141.3 167.9 189.9 218.1 69.3 88.5 110.9 146.2 171.3 192.8 225.7 71.9 91.5 114.8 151.4 173.8 196.6 229.1 74.4 94.8 118.8 156.7 177.3 199.5 233.6 77.0 97.4 123.0 159.8...
Need help?
Do you have a question about the ZT-V9 and is the answer not in the manual?
Questions and answers