Table of Contents
Advertisement
User's Manual
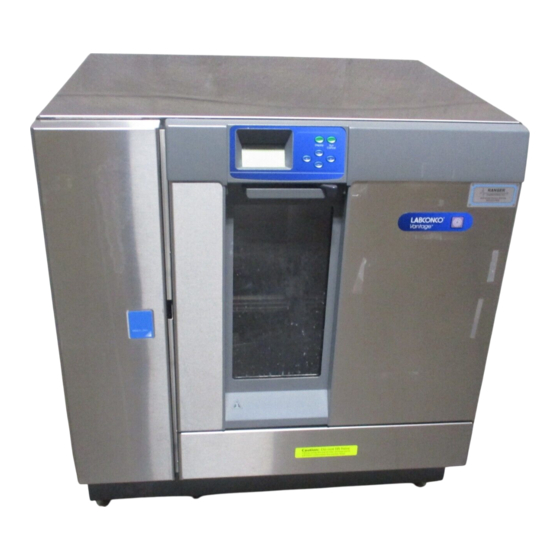
FlaskScrubber
Glassware Washers
Model
4540031
To receive important product updates,
complete your product registration card
Please read the User's Manual before operating the equipment.
®
Vantage
online at register.labconco.com
®
Series
Labconco Corporation
8811 Prospect Avenue
Kansas City, MO 64132-2696
800-821-5525, 816-333-8811
FAX 816-363-0130
E-MAIL
labconco@labconco.com
HOME PAGE www.labconco.com
Advertisement
Table of Contents

Related Manuals for Labconco FlaskScrubber Vantage Series

Summary of Contents for Labconco FlaskScrubber Vantage Series
- Page 1 ® FlaskScrubber Vantage Series Glassware Washers Model 4540031 To receive important product updates, complete your product registration card online at register.labconco.com Labconco Corporation 8811 Prospect Avenue Kansas City, MO 64132-2696 800-821-5525, 816-333-8811 FAX 816-363-0130 E-MAIL labconco@labconco.com HOME PAGE www.labconco.com Please read the User’s Manual before operating the equipment.
- Page 2 The warranty for all Labconco products will expire one year from date of installation or two years from date of shipment from Labconco, whichever is sooner, except the following;...
-
Page 3: Table Of Contents
CHAPTER 1: INTRODUCTION Safety Symbols CHAPTER 2: PREREQUISITES Hot Water Requirements Purified Water Requirements Electrical Requirements Drain Requirements Space Requirements CHAPTER 3: GETTING STARTED Unpacking Your Glassware Washer Washer Components Removing the Shipping Skid Washer Installation Installing the Leveling Feet Leveling the Washer Centering the Washer Door Connecting the Water Services... - Page 4 The Detergent Dispenser Filling the Neutralizing Acid Dispenser Selecting an Operating Cycle Programming and Starting a Wash Cycle Interrupting a Wash Cycle Alarms RS-232 Computer Connection CHAPTER 5: MAINTAINING YOUR WASHER Maintaining the Stainless Steel Interior Maintaining the Air Gap in Drain Maintaining the Water Fill Valve Replacing the Washer Light Bulb Cleaning the Sump Filter Screen...
-
Page 5: Safety Symbols
Glassware Washer. It is configured to be a freestanding model but may be easily modified for undercounter installations. Your Labconco Glassware Washer is designed and manufactured to thoroughly clean your laboratory glassware and accessories and complies with NSF/ANSI 3 standards for sanitization. You can select pre-programmed wash cycles or program customized wash cycles to meet your requirements. -
Page 6: Chapter 1: Introduction
Chapter 1: Introduction Throughout this manual potentially hazardous conditions are identified using the following words and symbols. It is important that you understand the warnings listed throughout this manual before you operate the Glassware Washer. Product Service 1-800-522-7658... -
Page 7: Chapter 2: Prerequisites
Before you install the Glassware Washer, prepare your site for installation. Carefully examine the location where you intend to install the Glassware Washer. You must be certain that the area is level and of solid construction. In addition, a hot water source, a drain, a purified water source (if applicable), and an electrical source must be located near the installation site. -
Page 8: Electrical Requirements
Rigid plastic, tin-lined, or stainless steel tubing and fitting can be connected to the washer fitting. An optional Connection Kit (Labconco P/N 4592200) is available for connecting .375" (9.53mm) OD plastic tubing to the purified water inlet valve. The purified water system connections must be airtight to prevent the washer pump from pulling air instead of water. -
Page 9: Space Requirements
Chapter 2: Prerequisites Space Requirements If your Glassware Washer will be installed undercounter, you must ensure the undercounter opening is the proper size to accommodate the washer. The dimensions are shown in Appendix B. Product Service 1-800-522-7658... - Page 10 Now that the site for your Glassware Washer is properly prepared, you are ready to unpack, inspect, install, and test your washer. You may need common plumbing and electrical installation tools in addition to a 9/16" wrench, a flat-blade screwdriver, a Phillips screwdriver, and a carpenter level to complete the instructions in this chapter.
-
Page 11: Chapter 3: Getting Started
Glassware Washer. NOTE: Do not return goods without the prior authorization of Labconco. Unauthorized returns will not be accepted. If your Glassware Washer was damaged in transit, you must file a claim directly with the freight carrier. -
Page 12: Removing The Shipping Skid
Chapter 3: Getting Started If you did not receive one or more of the components listed for your washer, or if any of the components are damaged, contact Labconco Corporation immediately for further instructions. Removing the Shipping Skid After you verify the washer components, move your washer to the location where you want to install it. -
Page 13: Leveling The Washer
Chapter 3: Getting Started Leveling the Washer After you have installed the leveling feet, level the washer by adjusting the leveling feet. 1. Position the washer in its final installed location. 2. Place a carpenter level on the washer in the positions shown. 3. -
Page 14: Centering The Washer Door
Chapter 3: Getting Started If the Glassware Washer is installed undercounter, level it side-to-side by placing a short level on the inside top edge of the door. See the figure below for the placement of the level on the washer. Check the level front to back by placing a level on the rail that the lower rack slides on. -
Page 15: Connecting The Purified Water Supply
Chapter 3: Getting Started To connect the hot water supply: 1. Be certain the hot water supply piping has been thoroughly flushed prior to connecting it to the washer. Debris in the piping can clog the washer valve. 2. Make the necessary plumbing connections to properly connect the hot water supply to the washer. - Page 16 Chapter 3: Getting Started To connect the purified water supply: 1. Make certain the purified water supply piping has been thoroughly flushed prior to connecting it to the washer. 2. Make the necessary plumbing connections to properly connect the purified water supply to the washer.
-
Page 17: Connecting The Drain Hose
Chapter 3: Getting Started Example of a Top Feed Connection Connecting the Drain Hose Before continuing with this section, be certain that your drain meets the requirements detailed in Drain Requirements in Chapter 2: Prerequisites. Be certain you conform to all local plumbing codes when you route and connect the drain. - Page 18 Chapter 3: Getting Started The drain piping can be routed to either a sink or a floor drain. If you route the drain piping to a sink drain without using an air gap, the highest point of the drain pipe must be above the highest water level in the sink, as shown below. If an air gap is not used, the drain line must be elevated...
-
Page 19: Connecting The Power Supply
Chapter 3: Getting Started If you route the drain piping to a floor drain, refer to the figure below for placement of the drain tubing and trap. Drain trap Connecting the Power Supply Before continuing with this section, be certain your power supply meets the requirements specified on the washer data plate and in Electrical Requirements in Chapter 2: Prerequisites Washers should be hard-wired directly into a junction... - Page 20 Chapter 3: Getting Started To connect the electrical supply: 1. Remove the lower panel on the washer front by removing the two screws located at the bottom of the panel. 2. Remove 2 screws on each side of the middle panel. 3.
-
Page 21: Connecting A Cable For Monitoring Washer Operation
Chapter 3: Getting Started 5. Make sure electrical power is turned off before making any connections. 6. Attach customer-supplied power wires to the brown and blue wires, using wire connectors. Customer-supplied wires must be clamped to the hole where they pass through the rear of the junction box, if prescribed by local codes. If it is necessary to use a bushing with an integral clamp at the inlet to the junction box, remove the plastic bushing supplied with the washer before installing the new customer supplied bushing. -
Page 22: Testing Your Washer
Chapter 3: Getting Started 6. Press the ▼ button and DI PUMP ENABLE will highlight. 7. Press ◄ or ► buttons to YES or NO. This allows the pure water valve and pump to be disabled if pure water will not be used for rinse cycles and prevents inadvertently programming a cycle to have pure rinses. - Page 23 Chapter 3: Getting Started To run the diagnostics test: 1. Press the ▲ button on the control panel and close the door and slide the door latch to the right. Hold for 5 seconds. 2. The display will show the Diagnostics screen and the indicator on the left side will point to TAP WATER VALVE.
-
Page 24: Acid Rinse Dispense Systems
• Grasp the plug and remove the plug with the tube and float switch attached. • Replace the empty container with a full container of LabSolutions Liquid Detergent (Labconco P/N 4522000) or refill the old container. b. Acid Neutralizing Container •... - Page 25 Chapter 3: Getting Started 4. There are two methods which can be followed for filling the system with detergent and neutralizing acid rinse. Method 1: Run a wash cycle with no glassware in the washer. Set the detergent dispense rate to 30 ml and the rinse aid dispense to 6 ml. Method 2: Run a diagnostics test.
-
Page 26: Chapter 4: Using Your Washer
Two sizes of spindles are provided with the washer: thirty-six .25" (6.35 mm) OD and ten .125" (3.18mm ) OD spindles. The optional Forty-Eight Pin Insert (Labconco P/N 4591601) may be positioned directly over spindles or spindles can be removed with a screw driver and replaced with the plugs included with the washer. -
Page 27: Loading Glassware Into The Flaskscrubber
Chapter 4: Using Your Washer Loading Glassware into the FlaskScrubber Glassware Holders are supplied with each FlaskScrubber. These holders enable you to position glassware onto the FlaskScrubber spindles. To use a Glassware Holder: 1. Press the glassware into the holder; the clamps should spring out and grip the glassware. -
Page 28: The Detergent Dispenser
Chapter 4: Using Your Washer The Detergent Dispenser in the Door In addition to the bulk liquid detergent and neutralizing acid rinse dispense systems, your Glassware Washer is equipped with a detergent dispenser in the door that contains a main wash cavity and a neutralizing solution port. This dispenser in the door is active only if the liquid detergent dispensed from the bulk container is programmed to 0 ml. - Page 29 Non-foaming powder or liquid detergent formulated for labware washers, in conjunction with adequate hot water, is essential for clean glassware. Labconco LabSolutions Detergents are recommended. See Appendix A for ordering information. Use detergents sparingly. Too much detergent, particularly with softened water may cause etching of the glassware.
-
Page 30: Filling The Neutralizing Acid Dispenser
1. Twist and pull up on the cap to remove the round cover on the neutralizing solution port. 2. Fill the cavity with LabSolutions Neutralizing Acid Rinse (Labconco P/N 4522200) 1M citric acid or 10% phosphoric acid until the level of the liquid rises and is visible in the port. -
Page 31: Programming And Starting A Wash Cycle
Chapter 4: Using Your Washer Programming and Starting a Wash Cycle Refer to Appendix C: Glassware Washer Specifications for complete details on the various factory-set programs and the options available for customizing programs. After you have decided which washer program to use, follow the instructions below to start the washer. - Page 32 Chapter 4: Using Your Washer 4. Press the ▲ or ▼ buttons until the desired program is indicated by the arrow on the left side. The arrow on the lower right side means that there are additional program selections that will be shown on the display if the ▼ button is pressed.
-
Page 33: Interrupting A Wash Cycle
Chapter 4: Using Your Washer Interrupting a Wash Cycle To temporarily pause a wash cycle, simply unlatch the washer door. After the door is unlatched, wait 4 to 5 seconds before opening the door to prevent water from splashing out of the washer. To resume the wash cycle, close and re-latch the washer door. -
Page 34: Rs-232 Computer Connection
1. Computers with a 25 pin D-sub male serial connector should use Connect Cable (Labconco P/N 7537801) to connect from the user’s computer to the Glassware Washer. Product Service 1-800-522-7658... - Page 35 Chapter 4: Using Your Washer 2. Computers with a 9 pin D-sub male serial connector should use Connect Cable (Labconco P/N 7537800) to connect the computer to the Glassware Washer. The purpose of the RS-232 interface is to send data to a data collection computer to monitor the state and activity of the Glassware Washer.
- Page 36 Chapter 4: Using Your Washer 19 = Final Rinse Delay 20 = Rinse 21 = Drain After Rinses 22 = Dry 23 = Cool 24 = Done Columns 31-33 Raw data from temperature sensor #1 Columns 35-37 Raw data from temperature sensor #2 Columns 39-60 Shows alarms LW = Low water level...
- Page 37 Chapter 4: Using Your Washer 4. The “Connect To” dialogue box will open. Using the down arrow selection button, select the communication port to which the cable has been connected. Press “OK.” 5. Depending on the COM port selected (COM1, COM2, COM3 or COM4), the “Com X Properties”...
- Page 38 Go to the following web site for distributors: http://www.seikoprinters.com/htm/salesreps.htm To connect to the Labconco RS-232 connector, use a 6-wire telephone cable connection such as a Radio Shack #279-422. Simply insert one end into the washer RJ-25 connector (labeled RS-232) and connect the other end to the printer.
-
Page 39: Chapter 5: Maintaining Your Washer
Under normal operation, your Glassware Washer will require little routine maintenance to keep it functioning properly. Maintaining the Stainless Steel Interior The interior of your Glassware Washer is type 304 stainless steel. Never use metal scouring pads on the stainless steel interior. Metal scouring pads can scratch or leave metal chips that will rust. -
Page 40: Maintaining The Air Gap In Drain
Chapter 5: Maintaining Your Washer 5. When the washer fills the second time, open the washer and add two cups of 4-8% acetic acid (or white vinegar) to the bottom of the tank. 6. Close the washer door and allow the unit to wash and drain without further interruption. -
Page 41: Replacing The Washer Light Bulb
Chapter 5: Maintaining Your Washer Replacing the Washer Light Bulb If your Glassware Washer is equipped with a window, you will need to periodically replace the light bulb. Refer to the figure below and follow the instructions below to replace the washer light bulb. To replace the washer light bulb: 1. -
Page 42: Cleaning The Sump Filter Screen
Chapter 5: Maintaining Your Washer Cleaning the Sump Filter Screen If debris accumulates on the filter screen that is located in the washer sump, you can remove and clean the screen. To clean the sump filter screen, refer to the figure below and follow the instructions below. -
Page 43: Replacing The Hepa Filter
Chapter 5: Maintaining Your Washer Replacing the HEPA Filter After an extended period of time, dirt and debris may block the air flow through the HEPA filter. The filter may be replaced by following the instructions below: To replace the HEPA filter: 1. -
Page 44: Maintaining The Conductivity Sensor
Chapter 5: Maintaining Your Washer Maintaining the Conductivity Sensor The operation of the Conductivity Sensor may degrade if it becomes contaminated with soil from glassware that has not been rinsed prior to being placed into the washer or if it becomes coated with minerals from the water supplied to the washer. -
Page 45: Installing The Optional Upper Spindle Rack
The configuration of your washer may be changed to accommodate your needs. For example, you may want to install pipet inserts, install an optional top rack, or install an optional Cool Drain Water Kit. Spindle racks can be replaced with racks without spindles for washing wide mouth glassware. -
Page 46: Chapter 6: Modifying Your Washer
Chapter 6: Modifying Your Washer 2. Position brackets on slides over the studs on the sides. The position of the rack mounting plates must be fully extended as shown. Secure the slide assemblies using lockwashers and acorn nuts removed in Step 1. It may be necessary to synchronize the travel of the two slides. -
Page 47: Removing The Optional Upper Rack
Chapter 6: Modifying Your Washer When the Upper Spindle Rack is in place, it limits the height of the glassware that can be washed. If very tall glassware or long pipets are to be washed, remove the Upper Spindle Rack. Removing the Optional Upper Rack The upper rack may be easily removed from the Glassware Washer to facilitiate loading the rack outside the washer or to allow very tall glassware to be loaded... -
Page 48: Adjusting The Height Of The Optional Upper Rack
Chapter 6: Modifying Your Washer Adjusting the Height of the Optional Upper Rack The height of the upper rack may be varied to suit the heights of glassware that will be washed in the upper and lower racks. To adjust the height of the upper rack: 1. - Page 49 Chapter 6: Modifying Your Washer The 16-place Pipet Insert, shown below accommodates 1 ml to 50 ml pipets. Two of these inserts may be installed, if desired. Refer to the figure and follow the instructions below to install a 16-place Pipet Insert. To install a 16-place Pipet Insert: 1.
-
Page 50: Installing Small Spindles
Chapter 6: Modifying Your Washer Installing Small Spindles Ten small spindles are included with each Spindle Rack. Since the large volume of water which flows through the standard spindles may be great enough to force the glassware off the spindle, small spindles should be used when small pieces of glassware will be washed. -
Page 51: Installing The Optional Cool Drain Water Kit
Chapter 6: Modifying Your Washer Installing the Optional Cool Drain Water Kit An optional Cool Drain Water Kit is available to reduce the water temperature of the drain water in installations where hot drain water is not permitted. A supply of cold water must be available. - Page 52 Chapter 6: Modifying Your Washer 9. Attach the outlet of the Air-gap to the building drain. 10. Turn on the electrical power. Product Service 1-800-522-7658...
- Page 53 Refer to the following table if your Glassware Washer fails to operate properly. If the suggested corrective actions do not solve your problem, contact Labconco Product Service for additional assistance. PROBLEM CAUSE CORRECTIVE ACTION Detergent cup in Malfunction of cup Replace cup.
-
Page 54: Chapter 7: Troubleshooting
Chapter 7: Troubleshooting PROBLEM CAUSE CORRECTIVE ACTION Poor drying Dry temperature too Program warmer dry temperature. Flask, beaker, or Tilt these articles when loading so that water labware with concave drains off. bottoms not loaded correctly Recondensation If clean labware is left in the washer, recondensation may occur. - Page 55 Chapter 7: Troubleshooting PROBLEM CAUSE CORRECTIVE ACTION Purified water does Crimp in supply hose Refer to installation instructions for proper not fill purified water piping installation. Motor wires Reconnect wires. disconnected Tank and inner Glassware is Pre-rinse glassware. Clean with stainless steel contaminated with cleaner and soft cloth.
- Page 56 Chapter 7: Troubleshooting PROBLEM CAUSE CORRECTIVE ACTION Washer will not Clogged drain Clean out drain. drain Blockage of air gap Clean the air gap by lifting the cover, unscrewing the cap, and removing any accumulated material. See Chapter 5. Kink in drain hose Check for a kink in the drain hose.
- Page 57 Check for clogged drain. Filter screen clogged Clean screen in bottom of washer. Defective fill level Contact Labconco Product Service. switch Defective controller Check output from PCB to drain valve and pump. Replace PCB. Contact Labconco Product Service. Product Service 1-800-522-7658...
- Page 58 Contact Labconco Product Service. too small Defective hose to fill Check for splits. switch Check for loose clamps. Defective fill level Recalibrate switch. Contact Labconco Product switch Service. Replace switch. Holes in filter screen Contact Labconco Product Service. too small...
- Page 59 Check voltage to heater. Check resistance of heater. If open circuit, replace heater. Defective controller Check output from PCB to heater. Replace PCB. Contact Labconco Product Service. Defective Check electrical connections. temperature probe Contact Labconco Product Service. Replace if necessary.
-
Page 60: Appendix A: Glassware Washer Accessories
PART # DESCRIPTION 4595600 Upper Spindle Rack – Stainless Steel. Contains one upper spindle rack with 30 spindles, 30 glassware holders and 2 slides. 4595800 Same as above except without slides. 4494200 8-Place Pipet Washer – Stainless Steel. Holds 1 ml to 10 ml pipets. Product Service 1-800-522-7658... - Page 61 Appendix A: Glassware Washer Accessories PART # DESCRIPTION 4595200 16-Place Pipet Washer – Stainless Steel. Holds 1 ml to 50 ml pipets. 4424600 Glassware Holder – Small. Grips wide-mouth glassware over spindles. Vinyl coated stainless steel 4424800 wires. Glassware Holder – Large.
- Page 62 Appendix A: Glassware Washer Accessories PART # DESCRIPTION 4402001 Culture Tube/Test Tube Insert – Stainless Steel. Insert for 15 mm to 18 mm tubes. 4402101 Culture Tube/Test Tube Insert – Stainless Steel. Insert for 20 mm to 25 mm tubes. 4401301 Culture tube/Test Tube Insert –...
- Page 63 Appendix A: Glassware Washer Accessories PART # DESCRIPTION 4401801 32-Pin Insert – Stainless Steel. For use with beakers, Erlenmeyer flasks, and other wide- mouth glassware. 4401901 Retainer Top – Stainless Steel. To keep lightweight flasks in place under water pressure. For use with 4401801 or 4401501.
- Page 64 Appendix A: Glassware Washer Accessories PART # DESCRIPTION 4402201 Utensil Basket – Stainless Steel. For miscellaneous labware such as stoppers, spatulas, small beakers, etc. Furnished with drop-in cover (part number 4403801). 4591601 48-Pin Insert – Stainless Steel. For use with beakers, Erlenmeyer flasks, and wide-mouth glassware.
- Page 65 Appendix A: Glassware Washer Accessories PART # DESCRIPTION 4588500 Bottom Rack without spindles – Stainless Steel. 4591500 DNA Sequencing Plate Insert. For electrophoresis plates 10.0 x 16.6 inches (25.4 x 42.1 cm). Holds 6 plates. 4542500 Utensil Holder. For spatulas, spoons, scoops &...
- Page 66 Appendix A: Glassware Washer Accessories PART # DESCRIPTION 4542100 Bulk Tube Insert. For vertically positioning test tubes. 4595500 Stand. Raises washer approximately 17 inches (43 cm). Front opens to provide storage underneath washer. 4591901 Cool Drain Water Kit. (230V) Provides cool water to the drain plumbing.
-
Page 67: Consumables
Appendix A: Glassware Washer Accessories PART # DESCRIPTION 4592200 Connection Kit. D.I. water inlet valve to plastic tubing. 1233700 Power Boost Transformer. For 208V operation. CONSUMABLES PART # DESCRIPTION 4422000 10-lb. (4.5 kg) LabSolutions Powder Detergent 4422100 27.5-lb. (12.5 kg) LabSolutions Powder Detergent 4522000 1 gallon (3.8L) LabSolutions Liquid Detergent 4522200... -
Page 68: Appendix B: Glassware Washer Dimensions
Product Service 1-800-522-7658... - Page 69 Appendix B: Glassware Washer Dimensions Interior – Racks Without Spindles Interior – Racks with Spindles Product Service 1-800-522-7658...
-
Page 70: Appendix C: Glassware Washer Specifications
This Appendix contains various specifications for the Glassware Washer, including program times and water consumption. Glassware Washer Specifications • Minimum fill water temperature: 120°F (49°C) • Water consumption per fill: 3.4 gallons (13 liters) • Minimum feed water pressure: 20 psi (138 kPa) •... - Page 71 Appendix C: Glassware Washer Specifications Environmental Conditions • Indoor use only. • Maximum altitude: 6562 feet (2000 meters). • Ambient temperature range: 41° to 104°F (5° to 40°C). • Maximum relative humidity: 80% for temperatures up to 88°F (31°C), decreasing linearly to 50% relative humidity at 104°F (40°C). •...
- Page 72 Appendix C: Glassware Washer Specifications Program Times & Water Consumption Product Service 1-800-522-7658...
- Page 73 Appendix C: Glassware Washer Specifications Product Service 1-800-522-7658...
-
Page 74: Declaration Of Conformity
I, the undersigned, hereby declare that the equipment specified above conforms to the above Directive(s) and Standard(s). See individual Declaration of Conformity which will be signed by the importer for your country. Place: _______________________________________ (Signature) Date: _______________________________________ (Full Name) _______________________________________ (Position) Labconco P/N 36960-61, REV. A, ECO E402 Product Service 1-800-522-7658...
Need help?
Do you have a question about the FlaskScrubber Vantage Series and is the answer not in the manual?
Questions and answers