Advertisement
Quick Links
Advertisement

Related Manuals for Vision Fitness T9200 (TM186)


Summary of Contents for Vision Fitness T9200 (TM186)
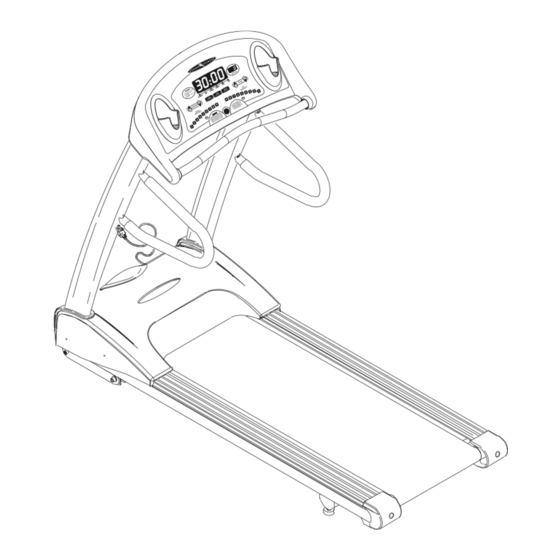
- Page 1 A s s e m b l y G u i d e T9200, T9500, T9600, T9700 PLATFORM TREADMILLS...
- Page 2 T9200, T9500, T9600, AND T9700 To avoid possible damage to this Platform Treadmill, please follow these assembly steps in the correct order. Before proceeding though, find your new Platform Treadmill’s 2 serial numbers, located on the underside of the main frame, and on the bottom of the console, and enter here: Frame Serial Number Refer to these numbers when calling for service, and also enter these serial numbers on your Warranty Card and in your own...
- Page 3 TOOLS, HARDWARE, & PARTS INCLUDED 5mm L-Shaped Wrench 8mm Allen Wrench Screwdriver PARTS BOX Water Bottle, Qty: 1 Safety Magnet Key, Qty: 1 (except T9700 ) Color-coded Hardware Bags...
-
Page 4: Hardware Included
HARDWARE INCLUDED BLUE BAG ORANGE BAG M8 x 15L Bolts M8 x 20L Bolts Quantity: 4 Quantity: 2 M8 x 55L Flathead Bolts Quantity: 4 YELLOW BAG M4 x 12L Panhead Screws Quantity: 4 M8 x 135L Bolts Quantity: 4... - Page 5 ORANGE BAG STEP • Slide the rubber covers on to the left & right console supports, making sure that the lower cutout is facing inward. T9700: Slide the data cable down the right console support using the white wire tie as a guide. Make sure that the data (1 large ribbon cable) goes through the large hole in the lower part of the console upright.
-
Page 6: Data Cables
STEP • Mount the console to the console mast using four bolts (M8 x 15L) and tighten with the 5mm Allen wrench. NOTE: Push all extra data cable into the console mast. Make sure not to pinch or cut the data cable. STEP •... - Page 7 MODEL CONFIGURATION & AUTO-CALIBRATION STEP Once the Treadmill is plugged in, you need to configure the Treadmill and perform an auto-calibration to assure maximum performance. T9700S & T9700HRT CONSOLES: DO NOT STAND ON THE BELT WHEN PERFORMING THE AUTO-CALIBRATION Once the treadmill is plugged in, you will need to configure and run auto-calibration. With the safety key in place, turn the treadmill on.
-
Page 8: Belt Tension
STEP 500 South CP Avenue • P.O. Box 280 • Lake Mills, WI 53551 toll free 1.800.335.4348 • phone 1.920.648.4090 • fax 1.920.648.3373 www.visionfitness.com ©2005 Vision Fitness. All Rights Reserved. 5.05 Part #Z92TM186-AG AG18.12PRD REV8 BELT TENSION • If the running belt slips when used,...