Advertisement
Quick Links
Advertisement

Related Manuals for LOUQE GHOST S1 Mk III


Summary of Contents for LOUQE GHOST S1 Mk III
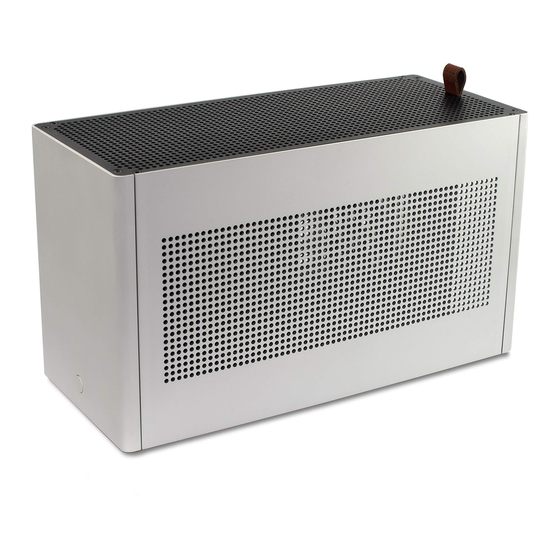
- Page 1 GHOST S1 Mk III LQ-GHS103-CA USER MANUAL (ENG)
-
Page 3: Box Content
GHOST S1 Mk III USER MANUAL BOX CONTENT Ghost S1 Mk III case Top Plate / mounting platform (for use with TopHat) T10 torx key 8x M3x6 countersunk 4x M3x6 button head 8x M3x4 button head 4x #6-32 UNC LOUQE AB Designed in Sweden hello@louqe.com www.louqe.com... - Page 4 GHOST S1 Mk III USER MANUAL ILLUSTRATION ASSEMBLY STEPS SCREWS • Unscrew the 8 countersunk screws that hold the grill • Lift the grill away by pulling the rag tag in the back LOUQE AB Designed in Sweden hello@louqe.com www.louqe.com...
- Page 5 GHOST S1 Mk III USER MANUAL ILLUSTRATION ASSEMBLY STEPS SCREWS • Unscrew the 4 bottom screws that are holding down the side panels LOUQE AB Designed in Sweden hello@louqe.com www.louqe.com...
- Page 6 GHOST S1 Mk III USER MANUAL ILLUSTRATION ASSEMBLY STEPS SCREWS • Pull the side panels straight up and put them aside LOUQE AB Designed in Sweden hello@louqe.com www.louqe.com...
- Page 7 GHOST S1 Mk III USER MANUAL ILLUSTRATION ASSEMBLY STEPS SCREWS • Unscrew the PSU bracket LOUQE AB Designed in Sweden hello@louqe.com www.louqe.com...
- Page 8 GHOST S1 Mk III USER MANUAL ILLUSTRATION ASSEMBLY STEPS SCREWS • Screw the PSU bracket onto the PSU using 4 #6-32 UNC screws • Put the mounted PSU and bracket aside LOUQE AB Designed in Sweden hello@louqe.com www.louqe.com...
- Page 9 GHOST S1 Mk III USER MANUAL ILLUSTRATION ASSEMBLY STEPS SCREWS • Install the motherboard I/O shield (optional) LOUQE AB Designed in Sweden hello@louqe.com www.louqe.com...
- Page 10 GHOST S1 Mk III USER MANUAL ILLUSTRATION ASSEMBLY STEPS SCREWS • Install the motherboard and screw it in place • Push the Riser cable connector into the PCI-e port on the motherboard LOUQE AB Designed in Sweden hello@louqe.com www.louqe.com...
- Page 11 GHOST S1 Mk III USER MANUAL ILLUSTRATION LED+ LED- PWR SW PWR SW ASSEMBLY STEPS SCREWS • Connect the LED and power switch cables LOUQE AB Designed in Sweden hello@louqe.com www.louqe.com...
- Page 12 GHOST S1 Mk III USER MANUAL ILLUSTRATION ASSEMBLY STEPS SCREWS • Connect the power cables needed to the PSU and feed them to the approximate position • Screw the PSU bracket back in place • Connect the 24-pin power cable to the...
- Page 13 GHOST S1 Mk III USER MANUAL ILLUSTRATION ASSEMBLY STEPS SCREWS • Unscrew the GPU cover plate • Remove the bottom flat nut LOUQE AB Designed in Sweden hello@louqe.com www.louqe.com...
- Page 14 GHOST S1 Mk III USER MANUAL ILLUSTRATION ASSEMBLY STEPS SCREWS • Mount the GPU and fixate it by screwing the bottom flat nut in place • Slide in the GPU cover plate in place and screw it tight with the top flat nut •...
- Page 15 GHOST S1 Mk III USER MANUAL ILLUSTRATION ASSEMBLY STEPS SCREWS • Slide down the side panels LOUQE AB Designed in Sweden hello@louqe.com www.louqe.com...
- Page 16 GHOST S1 Mk III USER MANUAL ILLUSTRATION ASSEMBLY STEPS SCREWS • Fix the side panels to the case with countersunk screws from the bottom LOUQE AB Designed in Sweden hello@louqe.com www.louqe.com...
- Page 17 GHOST S1 Mk III USER MANUAL ILLUSTRATION ASSEMBLY STEPS SCREWS • Screw the grill onto the case using 8 countersunk screws LOUQE AB Designed in Sweden hello@louqe.com www.louqe.com...
- Page 18 LOUQE AB Designed in Sweden hello@louqe.com www.louqe.com...
Need help?
Do you have a question about the GHOST S1 Mk III and is the answer not in the manual?
Questions and answers