
Subscribe to Our Youtube Channel
Related Manuals for NUTRIBULLET NUTRICOOK SMART POT EKO


Summary of Contents for NUTRIBULLET NUTRICOOK SMART POT EKO
- Page 1 SMART POT EKO User guide. Please make sure to read this User Guide prior to using your unit.
- Page 4 Find delicious recipes online at: nutricookworld.com nutricookworld...
- Page 5 Contents. Welcome. Before you begin. Important safeguards & cautionary information. What's included. Cooker parts overview. Getting started. Venting methods. How to use. Initial test run. Smart programs. Care & maintenance. Troubleshooting. Warranty. Thank you for purchasing the NutriCook.
- Page 6 Find delicious recipes online at: nutricookworld.com nutricookworld...
- Page 7 Welcome to team NutriCook ™ Life is complicated. Eating healthy doesn’t have to be. There’s really no easier way to streamline your healthy lifestyle than with this mighty appliance. We are constantly working to create recipes that are EASY. DELICIOUS. NUTRITIOUS. nutricookworld.com We can’t wait to see how you make NutriCook...
- Page 8 Find delicious recipes online at: nutricookworld.com nutricookworld...
- Page 9 Before you begin. • Remove all packaging materials from in and around the cooker and verify that all parts are accounted for. • Place the cooker on a stable, level surface, away from external heat sources. • Read all Important safeguards and cautionary information in this User guide.
- Page 10 Building a smoothie. Find delicious recipes online at: nutricookworld.com nutricookworld...
- Page 11 Important safeguards & cautionary information. Warning! This appliance cooks with pressure. To avoid the risk of serious injury, carefully read all instructions before operating this appliance. When using any electrical appliance, basic safety precautions should always be observed, including the following critical information. GENERAL SAFETY •...
- Page 12 • line. When cooking foods that expand during cooking such as rice may cause a risk of clogging the pressure release hole and developing excess pressure. • Be aware that certain foods, such as applesauce, cranberries, pearl barley, oatmeal and other cereals, split peas, noodles, macaroni, rhubarb, and spaghetti can foam, froth, spatter, and clog the pressure release hole.
- Page 13 WARNING: Never deep fry or pressure fry in the unit with oil. DO NOT lean over or place hands or face over the pressure has residual pressure. Do not touch the metal portion of the lid when the appliance is in operation as this could result in serious injury and burns.
- Page 14 ELECTRICAL SAFETY CAUTION: To avoid risk of electric shock, never immerse the cord, plug, or cooker base of this unit in water or other liquids. • plug adapter or voltage converter device, as these may cause damage. • DO NOT modify the plug in any way, as doing so will void the warranty.
- Page 15 ELECTRICAL INFORMATION: For safety reasons, the cord length of this appliance was selected to reduce Safety Hazards that may occur with a long cord. Extension cords are available and may be used if care is exercised in their use. If an extension cord is used: (1) the marked electrical rating of the extension cord should be at least as great as the electrical rating of it does not drape over the counter or table top where it could be Save these instructions!
- Page 16 What's included. 1000 WATT COOKER BASE STAINLESS STEEL COOKING POT STEAM RACK SOUP SPOON RICE PADDLE MEASURING CUP USER GUIDE MODEL CAPACITY POWER VOLTAGE WEIGHT DIMENSION SMART POT AC 220-240 V 1000 watts 5.4 kg 32.5x32.3x37.36 cm 50/60 Hz NC-SPGD6...
- Page 18 Cooker parts overview. top of lid pressure release valve lid handle lid marker bottom of lid sealing ring rack sealing ring locking pin silicone cap anti-block shield *NOTE: Images are for visual representations only. Always refer to actual product.
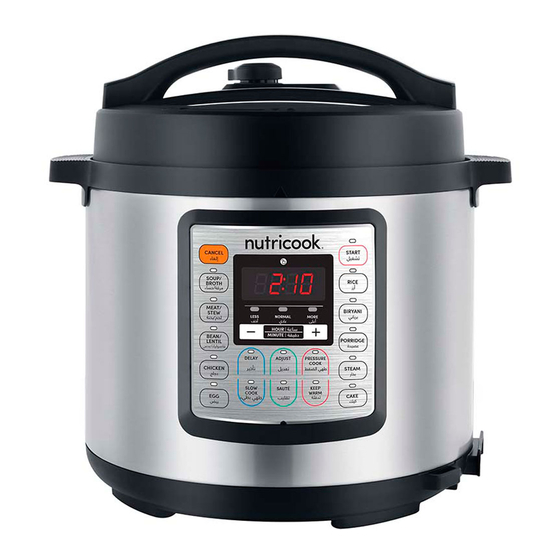
- Page 19 inner pot stainless steel inner pot cooker base handle cooker base rim control panel rice spoon holder *NOTE: Images are for visual representations only. Always refer to actual product. 17 17...
- Page 20 Find delicious recipes online at: nutricookworld.com nutricookworld...
- Page 21 Getting started.
- Page 22 Open and close lid. Open: Grip handle and turn lid in counter-clockwise until ( symbol on lid is aligned with ( ) symbol on cooker base rim. Lift the lid vertically from the cooker base. NOTE: open in opening and closing the lid, refer to the Troubleshooting section of the user manual.
- Page 23 Lid safety lock system. *Note: This unit has a built-in safety feature that prevents all functions from secured into place. The display will show Lid and continuously beep until the Lid is properly closed. You will not be able to select a cooking function.
- Page 24 Install and remove sealing ring. Install: Place the sealing ring inside the sealing ring rack and press into place. Ensure entire sealing is snug behind sealing ring rack. Sealing ring must be installed before use. After closing lid, the sealing ring install creates an airtight seal between lid and cooker base.
- Page 25 Install and remove pressure release valve. Install: Position pressure release valve on pressure release hole and press down. *NOTE: The pressure release valve automatically releases pressure excessive pressure builds up inside your cooker. install Remove: Pull pressure release valve up from pressure release hole.
- Page 26 Install and remove When pressure builds up inside your indicates the cooker is pressurized and prevents you from opening the lid. When the cooker is depressurized, Note: this user guide to safely release pressure. Remove: part of the lid) and turn lid over. top of lid.
- Page 27 Install and remove anti-block shield The anti-block shield safely prevents food from entering the pressure release hole to avoid blockage and assist in proper pressure regulation. Remove: against side of anti-block shield, pressing towards side of lid and up Note: The anti-block shield must be cleaned frequently to remove dried food debris.
- Page 28 Install condensation collector. Install: On back of cooker base , align grooves of the condensation collector over tabs and push condensation collector until it locks into place. The condensation collector collects excess water in the cooker rim produced during the cooking process to prevent from interfering with other protection features.
- Page 29 Remove & clean inner pot. *Note: Always check inner pot for dents or deformations prior to cooking. Remove inner pot from cooker base and wash with hot water and dish Wipe outer surfaces of inner pot and heating element to ensure they are dry and free of food debris.
- Page 30 Venting methods. Once cooking completes, Sealing pressure: Quick Release (QR): Turn pressure release valve from sealing Sealing to Venting position, after Venting cooking program is completed Sealing hot surface until the float valve drops into the lid. If the food contents inside spatters during this process, venting turn the pressure release valve...
- Page 31 Natural Release (NR): Leave the pressure release valve in the Sealing position. The cooker dissipates heat so pressure releases naturally overtime. Allow cooker to cool down naturally until t he float valve drops down. This may take 10 to 15 minutes or even longer, depending on the amount of food inside your cooker.
- Page 32 Find delicious recipes online at: nutricookworld.com nutricookworld...
- Page 33 How to use. Selecting a Function Press any of the Smart Cooking Programs according to your recipe. Setting the Cooking Mode and Time COOKING MODE – LESS/NORMAL/MORE: Your Smart Pot has three cooking modes with default timings for each except for Sauté, Slow Cook and Rice. Refer to the Smart Programs Table for the description of each mode under the di erent cooking programs.
- Page 34 How to use. COOKING TIME Although your Smart Pot has pre-programmed cooking time for each cooking mode, you can still manually adjust the time depending on your recipe except for Rice function which is fully automatic and Sauté. After selecting the desired cooking function, use + key to increase or - key to decrease cooking time.
- Page 35 Starting a function After selecting the desired cooking function and setting the required cooking mode and cooking time according to your recipe, press the Start button to begin cooking. The Smart Pot will sound three audible beeps and enters the pre-heating cycle. If the Start button is not pressed, the cooker automatically starts after 10 seconds.
- Page 36 More Controls CANCEL Press anytime to stop a Smart Program or when error is made during program selection. The cooker will return in standby mode and LED display shows OFF. START Press to start a Smart Program after setting up. The cooker will begin pre-heating and the LED display shows ON.
- Page 37 Initial test run. In order to familiarize yourself with the Smart Pot and start cooking with your favorite recipe, it is highly recommended for first time users to do a test run. This optional, but recommended, test run will complete in about 15 minutes. Insert inner pot into cooker base.
- Page 38 9. When the Smart Program completes, cooker begins Keep Warm. 10. Turn pressure release valve to Venting position. Steam will release through top of pressure release valve. Float valve will drop when pressure has been fully released. 11. To open, turn the lid counter-clockwise. Discard water and dry inner pot.
- Page 39 Smart programs. Cooking Cooking Suggested Use Notes Programs Modes Liquid remains clear due to lack of boiling motion. Less Soup without meat If you need the food content to be fully broken down, stir and mix the soup before serving. Soup/ Broth Normal Soup with meat...
- Page 40 Smart programs. Cooking Cooking Suggested Use Notes Programs Modes When using the Rice program, you cannot manually adjust the time settings. Use Quick Release method to vent out pressure after cooking cycle is completed to avoid over Rice Automatic rice cooking cooking.
- Page 41 Cooking Cooking Suggested Use Notes Programs Modes Less Moist cake Press the Adjust button repeatedly to set the Cake cooking mode. Adjust time using + and - keys for Normal Denser moist cake desired result according to your recipe. New York style More cheesecake For safety reasons, the maximum operation time...
- Page 42 Care & maintenance. WARNING: To avoid electric shock or damage to your cooker, always press the Cancel button and unplug the power cord from the power supply outlet before cleaning. Make sure that all parts of your cooker have cooled down completely CAUTION: Do not immerse the power cord or your cooker in water or any other liquids.
- Page 43 Cleaning Methods Part Cleaning Tip Dishwasher Hand Wash Wipe Clean Safe (submerged) (damp cloth) • These items are all top rack dishwasher safe. We recommend rinsing them and giving them a Accessories. quick brush using a dish brush to remove any dried food debris before washing them in the •...
- Page 44 Troubleshooting. Issue Possible Cause Solution The sealing ring is not properly Check the position of the sealing ring and ensure installed it is properly installed in the sealing ring rack. position. long utensil. Release pressure by turning the pressure release valve in Venting valve dropped down before opening the lid.
- Page 45 Issue Possible Cause Solution The pressure release valve is not Turn the pressure release valve properly to Steam escapes from properly seated Sealing position. the pressure release valve while it is in Pressure sensor control is not Sealing position Contact Customer Service. working The power switching and expanding pressure while...
- Page 46 Warranty. LIMITED WARRANTY FOR NUTRICOOK forth below: Nutricook warrants this product against defects in materials and workmanship for a period of two years from the date of original retail purchase. This limited warranty is valid only in the country in which the product is purchased and comes with the product at no extra charge, however shipping and processing fees will be incurred for returns, replacements and or refunds.
- Page 47 Normal wear and tear is not covered by this limited warranty. This limited warranty applies to consumer use only, and is void when the product is used in a commercial or institutional setting. This limited warranty extends only to the original consumer purchaser and is not transferable.
- Page 52 NutriCook | www.nutricookworld.com | All rights reserved. contained herein are subject to change without notice.
Need help?
Do you have a question about the NUTRICOOK SMART POT EKO and is the answer not in the manual?
Questions and answers
Why i **** having lid error when lid is properly closed
The lid error on the Nutribullet Nutricook Smart Pot EKO may occur if the lid is not properly positioned or securely locked for pressure cooking programs. Additionally, if the SAUTÉ function is being used, the lid should not be locked. Ensuring the lid is correctly placed and locked can help resolve the issue.
This answer is automatically generated