Table of Contents
Advertisement
I. Reference..............................................................
1.1 General Features...................................................4
1.2 Accessories.............................................................4
2.2 Rear Panel..............................................................5
2.3 Remote Control Unit (RCU)................................. 6
III. STB.......................................................................
Ⅳ. Installation.........................................................
4.1 Antenna Setting......................................................7
4.2 USALS Setup......................................................... 8
4.3 Factory Default.......................................................8
V. Edit Channels.....................................................
5.1 Edit Channels......................................................... 9
5.2 Edit Favorites....................................................... 10
5.3 Sort Channels.......................................................10
5.4 Delete Satellite Channels...................................10
5.6 User channel list.................................................. 12
VI.System Setting................................................
6.1 System.................................................................. 13
6.2 OSD....................................................................... 14
6.3 Parental control....................................................15
Content
1
4
7
7
9
3
1
Advertisement
Table of Contents

Subscribe to Our Youtube Channel
Related Manuals for Revolution Galaxy 70/70

Summary of Contents for Revolution Galaxy 70/70
-
Page 1: Table Of Contents
Content I. Reference.............. 1.1 General Features...........4 1.2 Accessories.............4 2.2 Rear Panel..............5 2.3 Remote Control Unit (RCU)......... 6 III. STB............... Ⅳ. Installation............4.1 Antenna Setting............7 4.2 USALS Setup............8 4.3 Factory Default............8 V. Edit Channels............. 5.1 Edit Channels............9 5.2 Edit Favorites............10 5.3 Sort Channels............10 5.4 Delete Satellite Channels........10 5.6 User channel list.......... - Page 2 6.4 Timer Adjust............16 6.4.1. Time Setup..........16 6.4.2 Event Timer..........17 6.4.3 Sleep Timer..........17 6.5 About STB............18 VII.USB Control............. 7.1 USB Menu............18 7.2 USB Manage............19 VIII.Network Setting..........8.1 Network Setting........... 20 8.1.1 IP Setting............ 21 8.1.2 SMB Menu..........21 8.1.3 3G Setup.............21 ........
- Page 3 9.7 INFO..............23 9.8 Subtitle..............23 9.9 Teletext..............9.10 MULTIPIC............9.11 Recording............24 9.12 Timeshift............. 24...
-
Page 4: Reference
I. Reference 1.1 General Features DVB-S/DVB-S2 Satellite Compliant (MPEG-II/ MPEG-IV/ H.264) SCPC & MCPC receivable from Ku and C band satellites Universal, Single, Single S & C Band Wideband LNB Sensitive Tuner with Loop-Through DiSEqC1.0/1.1/1.2/1.3 (USALS) Blind search supported Auto DiSEqC Search PAL/NTSC Conversion True full Color (32 bits) on screen display (OSD) 8 favorite group and parental lock supported... -
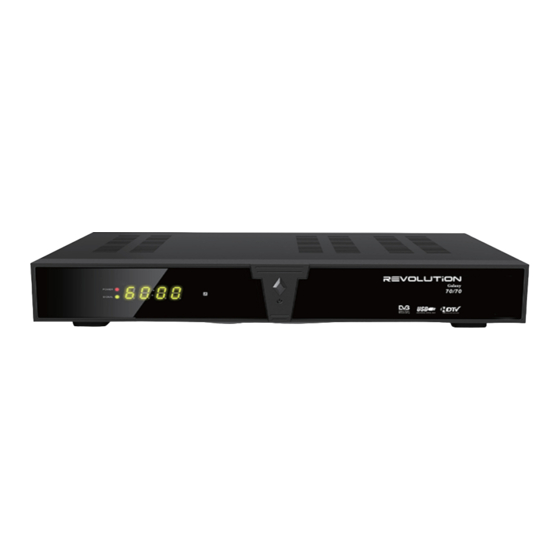
Page 5: Rear Panel
II. Product Overview 2.1 Front Panel 1. POWER Switch between operation and standby modes. 2. POWER LED Power Indicator. 3. SIGNAL LED Signal Indicator. 4. DISPLAY It displays channel number. In standby mode it displays local time. 2.2 Rear Panel 1.TUNER Connect the satellite antenna cable. - Page 6 4. PAUSE: Freeze the picture. 5. ZOOM: Picture zooming function. 6. INFO : Display the programme information. 7.: Back Backward . 8. : Fast Forward. 9. I I: Play/Pause/time shift. 10. ■/USB: Stop the Music or Movie and Enter USB menu.
-
Page 7: Stb
III. STB You should installation the receiver when powering on your product for the first time after purchase. Note: The default password is 0000. Main menu Press the MENU button to enter the main menu. Ⅳ. Installation Press the OK button to enter into the installation menu. 4.1 Antenna Setting Antenna Setting allows you to configure the antenna setting parameters. -
Page 8: Usals Setup
change the TP, then press CH+/CH- button to Add/Delete/Edit TP. 3. Motor Mode: Press the VOL+/VOL- button to select motor mode(DiSEqC 1.2 or USALS) input. 4. LNB Freq: Press the VOL+/- button to change the LNB frequency. 5. DiSEqC Type: It used to set DiSEqC1.0 port ,press the VOL+/VOL- button to select the required . -
Page 9: Edit Channels
Highlight the option you want and press the OK button to execute it. All: All data and settings will be deleted. Channels List only: All channels data will be deleted. Radio Channel only: All radio channels data will be deleted. Scramble Channels only : All scramble channels data will be deleted. -
Page 10: Edit Favorites
1. Delete Channels: Press the RED button, and press the EXIT button, here, select Yes will delete the chosen channels. 2. Move Channels: Press the BLUE button, and press the OK button to select the channel. Press the CH+/- button or press the NUMERIC(0-9) buttons to the destination in the channel list and press the OK button. -
Page 11: Sort Channels
5.3 Sort Channels You can sort the channels list. 5.4 Delete Satellite Channels Menu->Channel Manager->Delete Satellite Channels... -
Page 12: User Channel List
5.6 User channel list You can save or load the channel list you want. VI.System Setting In this menu you can make some system settings... -
Page 13: System
6.1 System Menu-> System Setting-> System 1. Menu Language: Set the menu language. 2. Audio1: Set the preferred audio language. 3. Audio2: Set the sub-prime audio language. 4.EPG Language:Set the preferred EPG language. 5.Auto Chanel Selection : If you set ON, in the channel list will play automatically when you highlight the channel. -
Page 14: Osd
6.2 OSD 1. OSD Transparency: Set the transparency of all menus. 2. TXT Transparency: Set the transparency of teletext. 3. Time Out: Set the display time of the programme information. 4. TV System: Set the TV system mode. 5. HDMI Mode: Set the HDMI output mode. 6. -
Page 15: Parental Control
6.3 Parental control Parental Control allows you to set limits for each programme or change your previous password. -
Page 16: Timer Adjust
6.4 Timer Adjust 6.4.1. Time Setup Menu->System Setting->Timer Adjust->Timer Setup You can setup the system time. Note: The time you set will be shown on the front panel when you set receiver to standby mode. 6.4.2 Event Timer Go to Menu->System Setting->Timer Adjust->Event Timer. It will record or play the programme automatically according to the timer event list that you set. -
Page 17: Sleep Timer
Press the GREEN button to setup a timer, press the RED button will delete this timer and press the YELLOW button can go to edit this timer. Source: Switch TV and radio. Channel: Press the VOL+/- button to display the channel list and press the OK button to select the channel. -
Page 18: About Stb
6.5 About STB In this menu, you can get the information about the STB, such as Model ID, Hardware Version, Software version and so on. When you need service from the dealer you need to submit this information in order to get the correct and fast after sales service. -
Page 19: Usb Manage
Press the VOL+/- to select the file type. Press the CH+/- to change the folder or file and press the OK button to open the folder or play the file.Press the colourful button to do some other operations. USB menu support play Movie/Music/Picture/Software and so on. 7.2 USB Manage Menu->USB Control->... -
Page 20: Viii.network Setting
8.1 Network Setting 8.1.1 IP Setting In this menu,you can see the LAN IP Situation, and connect WIFI hotpoint... -
Page 21: Smb Menu
8.1.2 SMB Menu You can visit the sharing folder on the computer. You can play the files in this folder and you can also record a programme to save in this folder. 8.1.3 3G Setup You can get to 3G net when you plug the 3G net card. -
Page 22: Network Application
8.2 Network Application Network application includes VFTP/Youtube/Weather Forcast/Stock View and so on. IX. Basic Operation 9.1 RECALL Press the recall button ,you can see some programs you have watched recently.If you set OFF in the system menu,press it you can go back to the last program you have selected. -
Page 23: Fav
9.4 FAV Press this button to watch your favorite programmes.You can press VOL+/- to switch the classification. 9.5 Audio You can select the language you prefer in Audio if the current programme is available in multiple audio languages. 9.6 Zoom You can zoom in the current video picture. - Page 24 9.11 Recording Press the ● button to start. Press the ■ /exit button to stop . If you have set the timer, it will start /stop automatically according to the start /stop time of the timer. If the free space on the USB HDD or USB disk is insufficient, recording will stop.
Need help?
Do you have a question about the Galaxy 70/70 and is the answer not in the manual?
Questions and answers