Advertisement
Quick Links
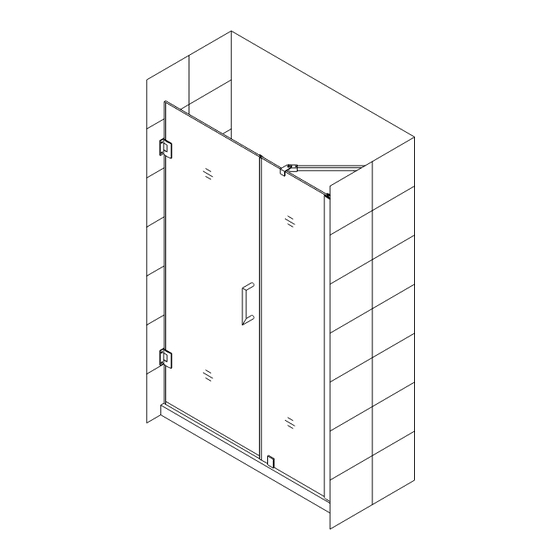
UNIDOOR Shower Door Installation Instruction
IMPORTANT
Please read carefully the following instructions before installing your shower door. If you have any
questions regarding shower door installation, please call our technical support specialists Monday
through Friday 9:00AM – 5:00PM EST at 1-866-731-8378, ext. 3 or e-mail our technical support
group at
support@BathAuthority.com
DreamLine
TM
reserves the right to alter, modify or redesign products at
any time without prior notice. For the latest up-to-date technical
drawings, manuals or any other details please refer to the
BathAuthority.com
web page.
Rev 2.1
1
Advertisement

Subscribe to Our Youtube Channel
Related Manuals for Dreamline UNIDOOR

Summary of Contents for Dreamline UNIDOOR
- Page 1 UNIDOOR Shower Door Installation Instruction IMPORTANT Please read carefully the following instructions before installing your shower door. If you have any questions regarding shower door installation, please call our technical support specialists Monday through Friday 9:00AM – 5:00PM EST at 1-866-731-8378, ext. 3 or e-mail our technical support group at support@BathAuthority.com...
-
Page 2: Tools Required
Shower Enclosure Components”. Examine boxes and packages for shipping damage. If the unit has been damaged, has a finishing defect, or has missing parts, please contact our customer support department within 3 business days of the delivery date. Please note that DreamLine will not replace any damaged products or missing parts free of charge after 3 business days or if the product has been installed. - Page 3 Before discarding the carton, check for small hardware bags that tend to fall to the bottom of the box. If any parts are damaged or missing, please contact DreamLine for replacement.
- Page 4 Shower Door Installation 1. Attach the Hinges (05) to the Glass door (01). See Fig. 1 for details. 2. Place a piece of flat timber (5/8” thick) on the threshold or the shower base. Take the Glass door (01) and place it on the flat timber. Butt up the door with hinged side against the wall, adjust its position and level it.
- Page 5 timber and attach both hinges to the wall with the Countersunk screws ST5×50 (04). See Fig. 3 for details. PLEASE NOTE: The manufacturer strongly recommends to attach this heavy door to the studs or to preinstalled 2x6 wood reinforcement behind the wall. 4.
- Page 6 NOTE: If your shower door is up to 30” in width and you don’t have the Stationary glass, you only need to assemble parts from Packing List A and your installation is finished. See Fig. 6 for details. NOTE: If your door is more than 30” in width, you will need to add Stationary glass panel (11): a) For installation of the Stationary Glass...
- Page 7 Stationary Glass Installation 7. Apply clear silicone along the inner channel of the Glass profile (10) and push the Stationary glass (11) inside the channel. NOTE: If you have difficulty sliding the Glass profile over the Stationary glass, you can slightly tap on the Glass profile with a rubber hammer and a piece of wood.
- Page 8 the wall and insert the Wall anchors (13) into the holes. Apply silicone along the Wall profile and around the holes. Fasten the Wall profile to the wall with the Round head Screw ST4.2×30 (15). Then push the Stationary glass and Glass profile assembly into the Wall profile.
- Page 9 . 12 If the Stationary Panel width is 6”, the installation is finished. If the Stationary Glass width is 12” and over you will need to continue your installation from: a) Step 13 for Support Bar installation. b) Step 15 for Glass Shelves installation. .
- Page 10 See Fig. 15 for details. Caulk . 15 Rev 2.1...
- Page 11 Glass shelves installation 15. Mark the Glass shelf (12) position on the wall. According to the measurements in Fig. 16.1, mark the drilling holes for the shelf brackets. Drill the holes using Ø 5/16” drill bit and insert the Wall anchors (13). Attach the Shelf brackets (without nut) (22) to the wall using the Countersunk screw ST4.2×25 (23) and attach the Shelf brackets (with nut) (21)
-
Page 12: Maintenance
. 18 Maintenance To insure long lasting life for your acrylic back walls, wipe them off after each use with a soft cloth. To clean the acrylic back walls use non-abrasive sprays or cream based cleaners. Never use abrasive cleansers, metal brushes or scrapers that could scratch or dull the surface. To insure long lasting life for your glass shower products, wipe them off after each use with a soft cloth. - Page 13 SHOWER CABINS (JETTED & STEAM) DreamLine™ warrants glass, acrylic and finish to be free from defects in workmanship for a period of five (5) years from initial date of purchase by the owner/end-user, contractor or builder from an authorized dealer; and plumbing, electrical and steam generator components for a period of one (1) year from the initial date of purchase by the owner/end-user, contractor or builder from an authorized dealer.
Need help?
Do you have a question about the UNIDOOR and is the answer not in the manual?
Questions and answers