Advertisement
HSPA ePort G9 Quickstart Guide
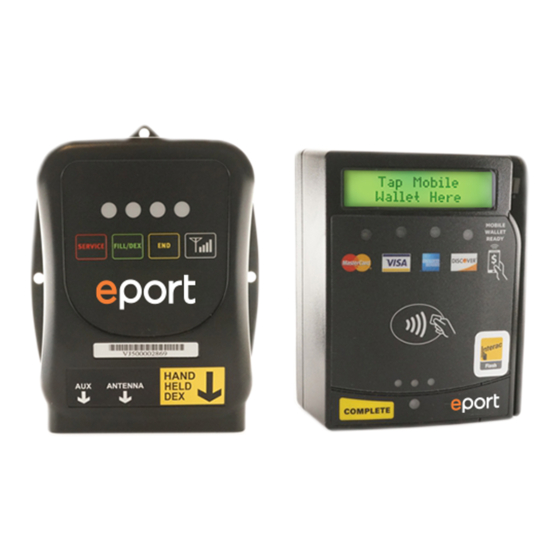
G9 Telemeter
Thank you for your purchase. Before you start, please read these instructions thoroughly,
and then take a few moments to plan your installation.
You must have a signed ePort Connect Services Contract and a bank account assigned to
this device for it to be able to accept credit card transactions. Please call USA Technologies
Customer Care at 1.888.561.4748, if you need activation documents.
11/32" Socket
1/4" Socket
12" Extension
Ratchet
USA TECHNOLOGIES
TOOLS REQUIRED FOR INSTALLATION
Phillips Screwdriver
Wire Cutters
Power Drill*
3/16" & 3/8" Drill Bit*
* Required for surface-mount installations
#VVXUD0101911
Card Reader
Multi-diameter Step Drill Bit,
1/4"-3/4"*
Advertisement
Table of Contents

Related Manuals for USA Technologies ePort G9


Summary of Contents for USA Technologies ePort G9
- Page 1 You must have a signed ePort Connect Services Contract and a bank account assigned to this device for it to be able to accept credit card transactions. Please call USA Technologies Customer Care at 1.888.561.4748, if you need activation documents.
- Page 2 INSTALLATION PROCEDURES FOR THE G9 EPORT The G9 ePort® works in vending machines with one or two full bill acceptor openings, allowing the acceptance of credit/debit transactions by using Card Swipe or RF technol- ogy payments. The G9 ePort solution works with the MDB vending interface. Addition- ally, the G9 has interfaces for Coin Pulse systems, along with a serial interface for PC based systems.
- Page 3 1. RSSI SIGNAL STRENGTH TESTING PROCEDURE Parts Required for RSSI Test: G9 Telemeter and a Magnetic Base Antenna Optional: A Card Reader and a High Gain Antenna (see note) of 4’ or 8’ cable length VXWUP1101284 or # VXWUP3101284 , respectively) An RSSI test is done to determine if there is acceptable signal strength at a location be- fore installing.
- Page 4 2. RF/CARD SWIPE READER INSTALLATION Install the Card Reader according to the design of the vending machine: Machine has a second opening for a bill acceptor - take note of screw sizes. Machine does not have a second opening for a bill acceptor. Machine has a POS window above the bill acceptor.
- Page 5 Some machines may require a spacer for the Card Reader to provide proper clearance for card swipes. If this is the case, a spacer and four, 8-32 x 1” long screws are available from USA Technologies by contact- FIGURE 4 ing Customer Service at 888-561-4748.
- Page 6 3. INSTALL THE G9 TELEMETER Follow these steps to install the G9 Telemeter in a vending machine: 1. Decide whether to mount the Telemeter using FIGURE 5 the three supplied self-tapping screws (Figure 5), or with a strip of Velcro attached to the back of the Telemeter.
- Page 7 2. Once the Telemeter has initialized the HSPA Modem and connected to the wire- less network, the Card Reader’s display should read “Swipe or Tap To Begin. “ 3. At this point you can perform a test vend with a USA Technologies Pass Card or credit card.
- Page 8 3103 Phoenixville Pike Malvern, PA 19355 USA TECHNOLOGIES CUSTOMER CARE Contact USA Technologies Customer Care for technical support and to request additional parts, information, and pre-authorization forms. Phone: 888.561.4748 FAX: 610.989.9695 Email: customersupport@usatech.com Online Store: http://store.usatech.com USA TECHNOLOGIES WEBSITE ADDRESSES...
Need help?
Do you have a question about the ePort G9 and is the answer not in the manual?
Questions and answers