Table of Contents
Advertisement
Quick Links
Advertisement
Table of Contents

Subscribe to Our Youtube Channel
Summary of Contents for Plum PLUM
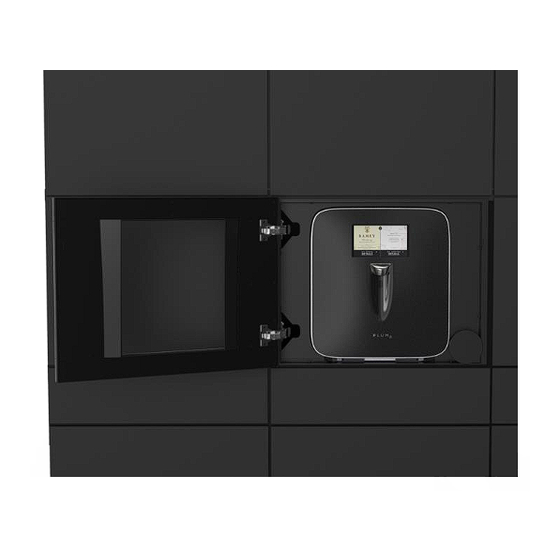
- Page 1 Serving wine, just as the winemaker intended...
- Page 2 PLUM Trim Kit Installation Manual STRICTLY CONFIDENTIAL - ALL RIGHTS RESERVED...
-
Page 3: Table Of Contents
Section 9 - Plum Mounting Plate Assembly…..…………………………………………………………………………….…...Page 15 Section 10 - Panel Assembly Mounting Screw hole location transfer..…………..…………………..………………….…...Page 16 Section 11 - Sliding PLUM (with mounting plate) into Cabinet Mounting Brackets.……………………………...………...Page 17 Section 12 - Panel Assembly………………………………..……………………………………………………………….…...Page 18 Section 13 - Door Hinge Assembly……..………………..………………………………………………………………...…...Page 19 Section 14 - Door Assembly……………..………………..………………………………………………………………...…...Page 20... -
Page 4: Section 1 - Exploded View
Trim Kit - Assembly Process Section 1 - Exploded View PLUM Argon Hose Item A Housing Assembly Item H Mounting Bracket Stop (2x) Item D Argon Tank Housing Assembly Mounting Bracket Argon Door / Hinges / Item G Item C... -
Page 5: Section 2 - Bill Of Materials
Trim Kit - Assembly Process Section 2 - Bill of Materials... -
Page 6: Section 3 - Cabinet / Plum / Trimkit
Trim Kit - Assembly Process Section 3 - Cabinet / Plum / TrimKit... -
Page 7: Section 4 - Cabinet Ventilation Requirements
Trim Kit - Assembly Process Section 4 - Cabinet Ventilation Requirements... -
Page 8: Section 5 - Trim-Kit Location Requirement (When Placed Near Wall)
Trim Kit - Assembly Process Section 5 - Trim-Kit Location Requirement (when placed near wall) -
Page 9: Section 6 - Tools Required
Trim Kit - Assembly Process Section 6 - Tools Required Philips Screw Driver Hex Screw Driver Scissors Center Punch Hammer (Little) Tape Measure Scotch Tape Dremel with 1.5mm Drill Bit (taped to Dremel) “Door Open” Thumb Drive Tool bag... -
Page 10: Section 7 - Stop Washer Assembly (Item C, D, L And T)
Trim Kit - Assembly Process Section 7 - Stop Washer assembly (Item C, D, L and T) Step 1... -
Page 11: Section 5 - Hinge Plate Assembly
Trim Kit - Assembly Process Section 7 - Stop Washer assembly (Item C, D, L and T) Step 2... -
Page 12: Section 8 - Plum Mounting Bracket Install (Item C)
Trim Kit - Assembly Process Section 8 - PLUM Mounting Bracket install (Item C) Step 1... -
Page 13: Section 8 - Assembled Plates And Fans
Trim Kit - Assembly Process Section 7 - PLUM Argon Tank Housing (Item G) Step 1... - Page 14 Trim Kit - Assembly Process Section 7 - PLUM Door, Panel and Hinges (Item E, B, J and K) Step 1...
- Page 15 Trim Kit - Assembly Process Section 7 - Remove Mounting Bracket Assembly (Item C) Step 1...
-
Page 16: Section 9 - Plum Mounting Plate Assembly
Trim Kit - Assembly Process Mounting Bracket Assembly (Item C and L) Step 2... -
Page 17: Section 10 - Panel Assembly Mounting Screw Hole Location Transfer
Trim Kit - Assembly Process Section 11 - Sliding PLUM (with mounting plate) to engage into Cabinet Stop Washers Step 1... -
Page 18: Section 11 - Sliding Plum (With Mounting Plate) Into Cabinet Mounting Brackets
Trim Kit - Assembly Process Section 7 - PLUM Door, Panel and Hinges (Item E, B, J and K) Step 1... -
Page 19: Section 12 - Panel Assembly
Trim Kit - Assembly Process Section 14 - Door Assembly and Adjustment Step 1- Door Mounting... -
Page 20: Section 13 - Door Hinge Assembly
Trim Kit - Assembly Process Section 7 - PLUM Door, Panel and Hinges (Item E, B, J and K) Step 2 - Door/Hinge Screw Adjustment... -
Page 21: Section 14 - Door Assembly
Trim Kit - Assembly Process Section 14 - Door Assembly and Adjustment Step 1- Door Mounting...


Need help?
Do you have a question about the PLUM and is the answer not in the manual?
Questions and answers