Advertisement
Quick Links
INSTALACIÓN DEL AHUMADOR
ADVERTENCIA
· NO INTENTE LEVANTAR EL AHUMADOR SIN AYUDA. PÍDALE A ALGUIEN QUE
LO AYUDE ANTES DE EMPEZAR A INSTALAR EL AHUMADOR.
· NO LEVANTE LA UNIDAD POR EL ASA TRASERA.
PASO
1
Con cuidado, coloque el ahumador de costado como
se ilustra.
Retire las patas delanteras (E) y las patas traseras (F).
Reserve las patas (E) y (F) para usarlas en el Paso 3.
Nota: Los herrajes (E) y (F) no están en el paquete de
herrajes. Estos vienen con la unidad del ahumador.
F
E
PASO
3
Introduzca las patas delanteras (E) dentro del cuerpo del ahu-
mador, a través de la parte inferior de la base del ahumador.
Quite la tuerca de tensión de la pata trasera (F). Introduz-
ca la pata trasera (F) dentro del cuerpo del ahumador, a
través de la parte inferior de la base del ahumador. Repita
el paso del lado opuesto.
Nota: Apriete primero las patas delanteras (E), antes de
apretar las traseras (F).
TUERCA DE
TENSIÓN
F
E
Masterbuilt Manufacturing, Inc. · 1 Masterbuilt Ct. Columbus, GA 31907 · Servicio al cliente: 1-800-489-1581 · www.masterbuilt.com
PASO
2
Pídale a alguien que lo ayude a levantar y colocar el
ahumador sobre la base, como se muestra abajo.
4
PASO
Apriete todos los herrajes. La instalación
está completa.
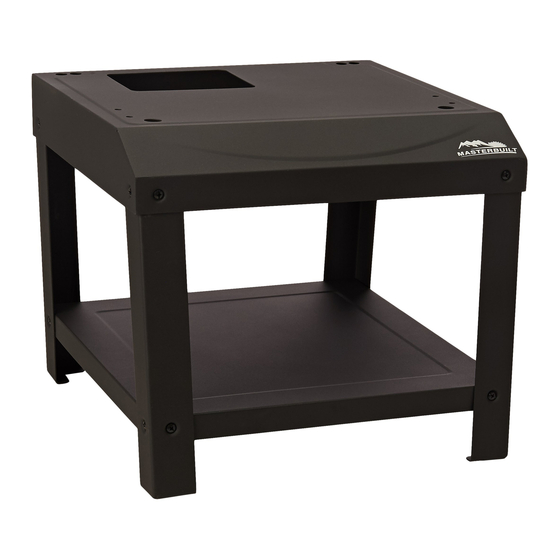
ELECTRIC SMOKER STAND
Models 20101113, 20101213
1
2
3
PART NO
QTY
DESCRIPTION
1
1
Tabletop
2
4
Leg
3
1
Bottom Shelf
Tools needed for assembly (not included): Phillips Head Screw Driver, Adjustable Wrench
STEP
1
Place bottom shelf (3) inside legs (2) as shown.
Secure bottom shelf (3) to legs (2) using screws (A)
and nuts (B).
Repeat step for remaining legs.
Note: Do not fully tighten hardware.
2
B
3
Masterbuilt Manufacturing, Inc. · 1 Masterbuilt Ct. Columbus, GA 31907 · Customer Service: 1-800-489-1581 · www.masterbuilt.com
MADE IN CHINA
For use with the following models:
20070106, 20070107, 20070108, 20070110, 20070206,
20070207, 20070211, 20070307, 20070311, 20070407, 20070408, 20070409, 20070411, 20070507,
20070508, 20070509, 20070511, 20070609, 20070707, 20070709, 20070710, 20070807, 20070809,
20070810, 20070907, 20070910, 20070911, 20071007, 20071009, 20071107, 20071011, 20071109,
20071110, 20071111, 20071207, 20071210, 20071211, 20071307, 20071310, 20071311, 20071407,
20071410, 20071411, 20071507,20071510, 20071511, 20071607, 20071610, 20071611, 20071711,
20071811, 20071910, 20072112, 20072210, 20072212, 20072010, 20072310, 20072312, 20072410,
20072412, 20072512, 20072912, 20072812 20073012.
CAUTION
· SMOKER STAND INTENDED FOR USE WITH DESIGNATED MASTERBUILT
SMOKERS ONLY.
· DO NOT SIT ON SMOKER STAND.
· NEVER MOVE SMOKER STAND WHILE IN USE.
DO NOT RETURN TO RETAILER
For Assembly Assistance, Missing or Damaged Parts
Call: MASTERBUILT Customer Service at 1-800-489-1581.
A
B
M6 x 12
M6
Screw
Flange Nut
Qty. 16
Qty. 16
STEP
2
Position leg (2) inside tabletop (1) as shown.
Secure leg (2) to tabletop (1) using screws (A)
and nuts (B).
Repeat step for remaining legs.
Tighten all hardware.
1
A
B
* Hardware C
and D are packaged
with the unit but will
not be used in
assembly.
2
A
112712-04SS
Advertisement

Related Manuals for Masterbuilt 20101113


Summary of Contents for Masterbuilt 20101113
- Page 1 TUERCA DE TENSIÓN Masterbuilt Manufacturing, Inc. · 1 Masterbuilt Ct. Columbus, GA 31907 · Customer Service: 1-800-489-1581 · www.masterbuilt.com Masterbuilt Manufacturing, Inc. · 1 Masterbuilt Ct. Columbus, GA 31907 · Servicio al cliente: 1-800-489-1581 · www.masterbuilt.com MADE IN CHINA 112712-04SS...
- Page 2 (F). TENSION NUT Masterbuilt Manufacturing, Inc. · 1 Masterbuilt Ct. Columbus, GA 31907 · Servicio al cliente: 1-800-489-1581 · www.masterbuilt.com Masterbuilt Manufacturing, Inc. · 1 Masterbuilt Ct. Columbus, GA 31907 · Customer Service: 1-800-489-1581 · www.masterbuilt.com HECHO EN CHINA...
Need help?
Do you have a question about the 20101113 and is the answer not in the manual?
Questions and answers