Table of Contents
Advertisement
Dear athlete,
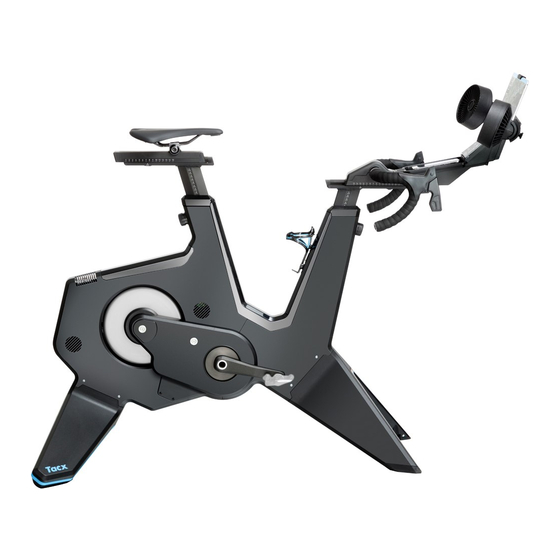
Congratulations! You are now the proud owner of the Tacx NEO Bike
Smart, the first fully equipped Smart bike trainer fused with a bike.
Since the launch of the NEO Smart, 4 years ago, our intention has
always been to create the best and most immersive indoor cycling
experience possible. Integrating a bike with NEO Smart technology
creates a whole new product typology that opened the doors to new
and unique features. This will significantly enhance your indoor
cycling experience. Get insprired by it's possibilities and watch the
video on YouTube!
This manual explains the assembly and usage of this unique trainer.
Please consult the assembly card when assembling the trainer.
Enjoy your training and don't forget to
#PushYourLimits!
The Tacx Team
- 1 -
Advertisement
Table of Contents

Related Manuals for Tacx NEO Bike Smart T8000


Summary of Contents for Tacx NEO Bike Smart T8000
- Page 1 Dear athlete, Congratulations! You are now the proud owner of the Tacx NEO Bike Smart, the first fully equipped Smart bike trainer fused with a bike. Since the launch of the NEO Smart, 4 years ago, our intention has always been to create the best and most immersive indoor cycling experience possible.
- Page 2 Parts list FRAME HANDLEBARS Bottle cage Handlebar cover Air grill Handlebar rail Disc Handlebar distance bolt Front leg Stem Adjustable feet (left and right) Stem adjustment bolt Crank Control buttons Rear leg Brakes Wheels (left and right) Shifter big Shifter small CONTROL PANEL Air fans SADDLE...
-
Page 3: Table Of Contents
Table of contents 1. Before you begin 1a. Important precautions 1b. Dimensions 1c. Clearance 1d. Guidelines for cycling posture 1e. Geometry set up 2. Assembly 3. Quick start guide 3a. Product regulations 3b. The display 3c. Settings 3d. Start training 3e. -
Page 4: Before You Begin
For your benefit, read this manual carefully before using the Smart bike. If you have questions after reading this manual, please contact Tacx support (see the Tacx support card). To help us assist you, please note the name of the product (front of this manual) and article number (backside of this manual) before contacting us. - Page 5 19. The trainer should not be used by persons 14. Use the trainer only as described in this weighing more than 120kg (265lbs). manual. 20. The temperature of the room should be 15. Before beginning any exercise program, within 10°C - 30°C to ensure a proper climate consult your physician.
-
Page 6: 1B. Dimensions
1. Before you begin 1b. Dimensions The maximum height of the NEO Bike Smart from the surface to the top of the fans is 1.35 m (4.43 ft). The maximum length of NEO Bike Smart including the fans is 1.50 m (4.92 ft) and the width is 0.75 (2.5ft). -
Page 7: 1C. Clearance
1c. Clearance Place the trainer with at least 600 mm (23.6 in.) of clearance on the sides and back. See image below, dimensions are displayed in millimeters. - 7 -... -
Page 8: 1D. Guidelines For Cycling Posture
1. Before you begin 1d. Guidelines for cycling posture Below are guidelines for a correct cycling posture on the NEO bike. Please note, a correct cycling posture is very personal and can vary between people. 4 - 10 cm 1.6 - 3.9 in - 155 - 8 -... - Page 9 SEAT HEIGHT When you sit on the bike with your shoe on or in the pedal and press your leg fully downwards, your knee should make an angle of 150 to 155 degrees. If this is not the case, change the height as follows: 1.
-
Page 10: 1E. Geometry Set Up
1. Before you begin 1e. Geometry set up The minimum and maximum dimensions of the height and horizontal positon of the saddle and handlebars on the bike are shown in the image below. You can set them according to the geometry of your road bike. - Page 11 - 11 -...
-
Page 12: Assembly
2. Assembly The NEO Bike is packed in the following parts: 1. T8001.50 Frame 2. T8003 Front leg (A4) 3. T8002 Rear leg (A7) 4. T8011.50 Saddle, mounted on rail (D1-D3) 5. T8010.50 Control panel with handlebars (B3, B4, C1-C3 & C6-C9) 6. - Page 13 26. Plug the power cable of your tablet into the USB ports under the panel. Tacx is not liable or responsible for damage caused to your devices due to incorrect mounting of the tablet holder. K. CONNECT TO MAINS POWER Choose to train with or without mains power.
-
Page 14: Quick Start Guide
The NEO Bike Smart is a complete plug and play indoor cycling experience. Specifications • Control: Automatic or manual • Software: Tacx software & third party software • Communication: ANT+ FE-C & Bluetooth open protocol • Max. incline realistic up to 25% •... - Page 15 IMPORTANT Please download the free Tacx Utility app from the App store or Google Play and connect the NEO Bike Smart before first use. This app is used to update the trainer, change the gear ratio, check your connections and analyze issues if needed.
-
Page 16: 3B. The Display
For your benefit, read this manual carefully before using the Smart bike. If you have questions after reading this manual, please contact Tacx support (see the Tacx support card). To help us assist you, please note the name of the product (front of this manual) and article number (backside of this manual) before contacting us. - Page 17 Error/Update indicator ERROR indicator: is shown when an error has occurred in the trainer. Connect the trainer to the Tacx Utility app for more information on the type of error and contact Tacx support if you cannot resolve it yourself.
-
Page 18: 3C. Settings
3. Quick start guide Front gears Current setting of the front gears. You can switch the front gears by pressing the left shifters. Gear up with the big shifter (C8) or down with the small shifter (C9). Cassette Current setting of the cassette (rear gears). You can adjust the rear gears by pressing the right shifters. Gear up with the big shifter (C8) or down with the small shifter (C9). -
Page 19: 3D. Start Training
Resistance mode: based on 10 predefined resistance positions Train with software The NEO Bike Smart can be controlled automatically by the Tacx Training app, Tacx Desktop app and that of third parties like Zwift and TrainerRoad. To start riding with software, please take the following steps: 1. - Page 20 Tacx software The Tacx software consists of the Tacx Training app for smartphones and tablets, Tacx Desktop app for Mac and Windows computers and the cloud website where you download and create your workouts, analyse your activities and follow your friends.
- Page 21 Other software Proceed with the following steps if you wish to ride with software of a third party: 1. Open the app. 2. Follow the instructions provided by the app. 3. Connect the trainer via ANT+ or Bluetooth. 4. Connect a second device if required. 5.
-
Page 22: 3E. Special Features
The NEO Bike measures the power output from your left and right leg seperately, enabling pedal stroke analysis. This can only be displayed in the Tacx Films of the Tacx Desktop app. Follow the steps to ride with the Tacx Desktop app on page 20 and select a Tacx Film for your workout. The power-output from your left and right leg are clearly displayed in a graph on the right. - Page 23 Gear up with the big shifter (C8) or down with the small shifter (C9). Use the left shifters to change the gears on the front, and the right shifters to change the gears of the cassette. You can change the gear ratio via the Tacx Utility app: 1. Open the Tacx Utility app.
-
Page 24: Maintenance
4. Maintenance How to maintain the Smart bike • Regularly check the Tacx Utility app (for free in the App store and on Google Play) to see if any firmware updates are available. • Regularly inspect and properly tighten visible bolts. -
Page 25: Troubleshooting
5. Troubleshooting Most problems can be solved by following the simple steps below. Find the symptom that applies, and follow the steps listed. If further assistance is needed, please contact Tacx support. A. The display does not show anything Start pedalling to get the display to wake up. -
Page 26: Warranty Conditions
3. When a fault arises this should be notified to Tacx or the dealer from whom you’ve bought the trainer in writing as soon as possible, but not later than two months after it has been discovered. - Page 27 Liability • Tacx B.V. reserves the right to modify, improve or replace returned products with a similar or equivalent product without prior notification. Tacx is not, however, obliged to improve the product or to fit new elements. • Given the many configuration options and configuration problems Tacx B.V. does not guarantee that the supplied software will work on all systems, not even if the PC configuration complies with the recommended specifications.
Need help?
Do you have a question about the NEO Bike Smart T8000 and is the answer not in the manual?
Questions and answers