Table of Contents
Advertisement
Copyright © 2005~2011 CIPHERLAB CO., LTD.
All rights reserved
The software contains proprietary information of CIPHERLAB CO., LTD.; it is provided
under a license agreement containing restri
ctions on use and disclosure and is also
protected by copyright law. Reverse engi
neering of the software is prohibited.
Due to continued product development this in
formation may change without notice. The
information and intellectual property contained herein is confidential between CIPHERLAB
and the client and remains the exclusive property of CIPHERLAB CO., LTD. If you find
any problems in the documentation, please report them to us in writing. CIPHERLAB
does not warrant that this document is error-free.
No part of this publication may be reproduced, stored in a retrieval system, or
transmitted in any form or by any mean
s, electronic, mechanical, photocopying,
recording or otherwise without the prior wr
itten permission of CIPHERLAB CO., LTD.
For product consultancy and technical su
pport, please contact your local sales
representative. Also, you may visit ou
r web site for more information.
The CipherLab logo is a registered
trademark of CIPHERLAB CO., LTD.
All brand, product and service, and trademark
names are the property of their registered
owners.
The editorial use of these names is for identi
fication as well as to the benefit of the
owners, with no intention of infringement.
CIPHERLAB CO., LTD.
http://www.cipherlab.com
Website:
Advertisement
Table of Contents

Related Manuals for CipherLab 1166


Summary of Contents for CipherLab 1166
- Page 1 The information and intellectual property contained herein is confidential between CIPHERLAB and the client and remains the exclusive property of CIPHERLAB CO., LTD. If you find any problems in the documentation, please report them to us in writing. CIPHERLAB does not warrant that this document is error-free.
- Page 2 I M P O R T A N T N O T I C E S Class B digital device, pursuant to Part 15 of the FCC Rule s. These limits are designed to provide reasonable protection against harmful interference in a residential installation. This e q u ipment generates, uses and can radiate ra dio fre q u ency energy an d , if not installed and used in accordance w i th the instructions, may cause harmful interference to radio...
-
Page 3: Safety Precautions
CAUTION This laser component emits FDA / IEC Class 2 laser light at the exit port. Do not stare into beam. SAFETY PRECAUTIONS RISK OF EXPLOSION IF BATTERY IS REPLACED BY AN INCORRECT TYPE. DISPOSE OF USED BATTERIES ACCORDING TO THE INSTRUCTIONS. T h e u s e o f a n y b a t t e r i e s o r c h a r g i n g d e v i c e s , w h i c h a r e n o t o r i g i n a l l y s o l d o r m a n u f a c t u r e d b y C i p h e r L a b , w i l l v o i d y o u r w a r r a n t y a n d m a y c a u s e d a m a g e t o... - Page 4 R E L E A S E N O T E S M o d i f i e d : S p e c i f i c a t i o n s — P o w e r A d a p t o r 3 .
- Page 7 Bluetooth D o n g l e ..................®...
- Page 9 Bluetooth D o n g l e ......................1 5 3 ®...
- Page 12 I N T R O D U C T I O N R e c e i v i n g i n R e t a i l P r o d u c t l a b e l i n g & T r a c k i n g S h e l f P r o d u c t R e p l e n i s h m e n t M o b i l e P o i n t o f S a l e ( P O S ) M o b i l e I n v e n t o r y M a n a g e m e n t...
- Page 13 1) H o l d t h e s c a n n e r s t i l l a n d i n s e r t t h e b a t t e r y i n t o t h e b a t t e r y c o m p a r t m e n t a t t h e b o t t o m o f t h e s c a n n e r .
- Page 14 L E D I n d i c a t o r s D B - 1 5 p o r t K e y b o a r d W e d g e d i s c o n n e c t e d I n t e r f a c e s e t t o K e y b o a r d W e d g e R e d , - - -...
- Page 15 1) I n s t a l l t h e b a t t e r y t o t h e s c a n n e r . 2) C o n n e c t o n e e n d o f t h e p o w e r s u p p l y c o r d t o t h e D C p o w e r j a c k a t t h e b o t t o m o f t h e s c a n n e r .
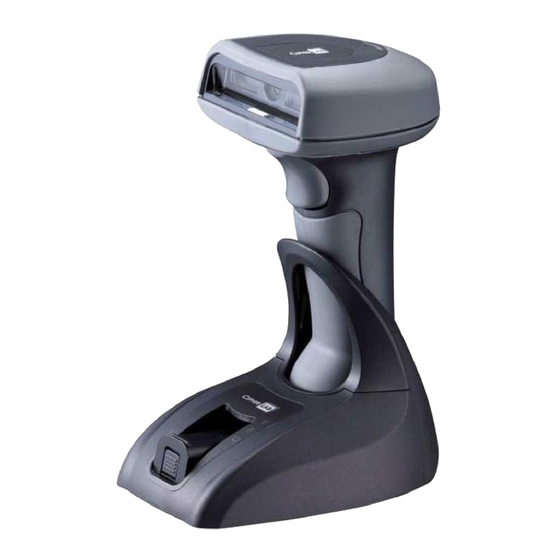
- Page 16 B a r c o d e S c a n n e r ( 1 1 6 6 o r 1 2 6 6 ) B T B a s e ( 3 6 6 6 ) R e c h a r g e a b l e L i - i o n b a t t e r y P r o d u c t C D ScanManager software N o t e : ( 1 ) T h e C D - R O M i n c l u d e s t h i s m a n u a l a n d W i n d o w s - b a s e d...
- Page 17 Codabar E n a b l e d Code 93 E n a b l e d D i s a b l e d Plessey D i s a b l e d Telepen D i s a b l e d Code 128 C o d e 1 2 8 E n a b l e d...
- Page 18 DataBar (RSS) GS1 DataBar Expanded Stac k e d Disabled...
- Page 20 Q U I C K S T A R T ScanManager software . T h is section descri b e s the p r ocedure of co nfiguring the scanner b y reading the setup b a rcodes and p r ov i des som e ex a m p l es for dem o nstration. Configuration Mode I n stall the b a tter y to the scanner , and the sca nner will turn on auto m a ticall y .
- Page 21 ® Bluetooth wireless technology . R e fer to Chap t er 3 – Setting up a W P A N Connection for details . T h e connection b e tween the scanners and 3 6 6 6 is m a de easy and reliab l e. N o te: I f R S - 2 3 2 or BT SPP is selected for ou tp u t interface, the ho st can directly send serial com m a nds to config...
- Page 22 T h e s c a n n e r w i l l r e s p o n d w i t h s i x b e e p s a n d i t s L E D i n d i c a t o r w i l l b e c o m e s o l i d b l u e a f t e r r e a d i n g t h e b a r c o d e .
- Page 23 A f t e r r e a d i n g t h e “ U p d a t e ” b a r c o d e , a l l t h e p a r a m e t e r s o f t h e s c a n n e r w i l l r e t u r n t o t h e i r d e f a u l t v a l u e s .
- Page 24 N u m e r i c b a r c o d e s , s a y , f o r k e y b o a r d t y p e , i n t e r - c h a r a c t e r d e l a y , l e n g t h q u a l i f i c a t i o n H e x a d e c i m a l b a r c o d e s , s a y , f o r c h a r a c t e r s t r i n g s a s p r e f i x , s u f f i x , e t c .
- Page 25 Enter the Configuration Mode. T h e scanner will auto m a ticall y restart itself … Sa m e as for Power on the scanner . W h en an y configuration error occurs . . . T he scanner will res p o nd with one long b e e p ( l ow tone ) .
- Page 26 Normal setup barcode Normal setup barcode Special setup barcode Decimal barcodes R e f e r A p p e n d i x “ D e c i m a l S y s t e m ” T h e s c a n n e r w i l l r e s p o n d w i t h t w o b e e p s ( h i g h - l o w t o n e ) w h e n t h e i n p u t v a l u e s a r e v a l i d a t e d .
- Page 27 Special setup barcodes R e f e r t o A p p e n d i x I I I R e a d t h e “ H e x a d e c i m a l V a l u e ” b a r c o d e s f o r t h e d e s i r e d c h a r a c t e r s t r i n g .
- Page 28 List Page 1 List settings regarding Prefix, Suffix, and Length Code Setting List Page 2 List settings regarding Code ID List Page 3 List settings regarding: Readable Symbologies List Page 4 List settings regarding Symbology Parameters (1/3) List Page 5 List settings regarding Symbology Parameters (2/3) List Page 6...
- Page 31 P o w e r - S a v i n g : T h e s c a n n e r w i l l s t a y a c t i v e a t p o w e r - o n f o r 1 m i n u t e . W h e n t h e s c a n n e r f a i l s t o c o n n e c t i n t h e i n t e r v a l , i t w i l l e n t e r p o w e r - s a v i n g m o d e a u t o m a t i c a l l y .
- Page 32 W h e n o u t o f r a n g e , t h e s c a n n e r w i l l r e s p o n d w i t h t h r e e s h o r t b e e p s , t o n e d e s c e n d i n g f r o m h i g h t o l o w .
- Page 33 Enable *Disable Warning: No WPAN connection is allowed unless the memory mode is disabled. Memory Data Delay You may set a delay between each data record while transmitting data back to the server. *None 250 ms 500 ms 1 sec 2 sec 3 sec 5 sec...
- Page 34 8 sec Send Data The 128 KB flash memory on the scanner can store up to 8,192 scans based on EAN-13 barcodes. When it is used up, the scanner will respond with three short beeps (low tone) as a warning. You are advised to send data to the server immediat ely by having the scanner read the barcode below.
- Page 35 P o w e r o n , w i t h o n e l o n g b e e p ( h i g h t o n e , L E D o n f o r 1 s e c o n d ) G o o d R e a d , w i t h o n e s h o r t b e e p ( h i g h t o n e ) a n d b e e p e r p i t c h p r o g r a m m a b l e - - -...
- Page 36 G o o d R e a d , w i t h r e d L E D o n a n d o f f q u i c k l y P r o g r a m m a b l e , d e f a u l t t o 4 K H z E n t e r C o n f i g u r a t i o n M o d e , w i t h b l u e L E D o n S i x s h o r t b e e p s E x i t C o n f i g u r a t i o n M o d e...
- Page 37 *Enable Buzzer Disable Buzzer 1.4.2 FREQUENCY 8 kHz *4 kHz 2 kHz 1 kHz...
-
Page 39: Test Mode
A f t e r a s u c c e s s f u l d e c o d i n g , t h e r e m o v a l o f b a r c o d e i s r e q u i r e d . I t i s n o t a l l o w e d t o p r o c e e d t o d e c o d e u n t i l t h e p r e s e t d e c o d i n g d e l a y t i m e h a s p a s s e d . -
Page 40: Auto Power Off Mode
T h e s c a n n i n g w o n ' t s t o p u n t i l ( 1 ) a b a r c o d e i s d e c o d e d , a n d ( 2 ) t h e p r e - s e t t i m e o u t e x p i r e s . -
Page 41: Momentary Mode
C a p a b l e o f r e - t r a n s m i t t i n g b a r c o d e d a t a i f t r i g g e r i n g w i t h i n o n e s e c o n d a f t e r a s u c c e s s f u l d e c o d i n g . - Page 42 L a s e r m o d e A u t o O f f m o d e A u t o P o w e r O f f m o d e Scanner Time-out after 0~255 sec. (*10) 1) R e a d t h e b a r c o d e a b o v e t o s p e c i f y t h e t i m e i n t e r v a l b e f o r e t h e s c a n e n g i n e t i m e s o u t .
- Page 43 C o n t i n u o u s m o d e A u t o P o w e r O f f m o d e A l t e r n a t e m o d e M o m e n t a r y m o d e 100 ms 200 ms...
- Page 44 I f " N o R e d u n d a n c y " i s s e l e c t e d , o n e s u c c e s s f u l d e c o d i n g w i l l m a k e t h e r e a d i n g v a l i d a n d i n d u c e t h e "...
- Page 45 Enable *Disable...
- Page 46 C h a p t e r 2 S E L E C T I N G O U T P U T I N T E R F A C E 1) I n s t a l l t h e b a t t e r y a n d t h e s c a n n e r w i l l t u r n o n a u t o m a t i c a l l y . 2) H a v e t h e s c a n n e r r e a d t h e “...
- Page 47 Activate BT HID & Select Keyboard Type… 1) R e a d t h e b a r c o d e a b o v e t o a c t i v a t e B T H I D a n d s e l e c t a k e y b o a r d t y p e . 2) R e a d t h e “...
- Page 48 Reset Connection Note : The “Restore System Defaults” barcode will have the current connection record cleared as well.
- Page 49 A l p h a b e t s L a y o u t D i g i t s L a y o u t C a p i t a l L o c k T y p e C a p i t a l L o c k S e t t i n g A l p h a b e t s T r a n s m i s s i o n D i g i t s T r a n s m i s s i o n...
- Page 50 S e l e c t “ L o w e r R o w ” f o r t h e “ D i g i t s L a y o u t ” s e t t i n g f o r t h e u p p e r r o w i s f o r s p e c i a l c h a r a c t e r s . F r e n c h K e y b o a r d S t y l e –...
- Page 51 *Normal Upper Row Lower Row Note : This setting is to be used with the Ch aracter Substitution setting when support to certain keyboard types (languages ) is unavailable but required.
- Page 52 *Normal Shift Lock Capital Lock Capital Lock State Description Capital Lock OFF Assuming that status Caps Lock keyboard OFF, transmitted characters are exactly the same as in the barcode (when " c ase-sensitive " is selected for Alphabets Transmission). Capital Lock ON Assuming that the status of Caps Lock on the keyboard is ON, transmitted characters are exactly the same as in the barcode (when "...
- Page 53 *Capital Lock OFF...
- Page 54 Ignore Case *Case-sensitive...
- Page 55 Numeric Key *Alphanumeric Key Note : If you select “Numeric Keypad”, the Num Lock status of the physical keyboard should be “ON”. This setting is not supported on PDAs.
- Page 56 *Batch Processing By Character...
- Page 57 Activate BT SPP, Slave Mode...
- Page 58 Activate 3666 Keyboard Wedge & Select Keyboard Type… 1) R e a d t h i s b a r c o d e a b o v e t o a c t i v a t e K e y b o a r d W e d g e a n d s e l e c t a k e y b o a r d t y p e .
- Page 60 *Normal AZERTY QWERTZ Note: This setting only works when the keyboard type selected is US keyboard, such as PCAT (US). The Alphabets Layout and Digits Layout setting must match your keyboard.
- Page 61 S e l e c t “ L o w e r R o w ” f o r t h e “ D i g i t s L a y o u t ” s e t t i n g f o r t h e u p p e r r o w i s f o r s p e c i a l c h a r a c t e r s . F r e n c h K e y b o a r d S t y l e –...
- Page 62 *Normal Upper Row Lower Row Note: This setting is meant to be used with the Alphabets Layout; and perhaps with the Character Substitution setting when support to certain keyboard types (languages) is unavailable but required.
- Page 63 *Normal Shift Lock Capital Lock Capital Lock State Description Capital Lock OFF Assuming that status Caps Lock keyboard OFF, transmitted characters are exactly the same as in the barcode (when " c ase-sensitive " is selected for Alphabets Transmission). Capital Lock ON Assuming that the status of Caps Lock on the keyboard is ON, transmitted characters are exactly the same as in the barcode (when "...
- Page 64 *Capital Lock OFF...
- Page 65 Ignore Case *Case-sensitive...
- Page 66 Numeric Key *Alphanumeric Key Note : If you select “Numeric Keypad”, the Num Lock status of the physical keyboard should be " O N " .
- Page 67 Laptop Support By default, laptop support is disabled. It is suggested to enable this feature if you connect wedge cable to a laptop without an external keyboard being inter-connected. *Disable Enable...
- Page 68 Inter-Character Delay… (*0~255) 1) R e a d t h e b a r c o d e a b o v e t o s p e c i f y t h e i n t e r - c h a r a c t e r d e l a y . 2) R e a d t h e “...
- Page 69 Activate 3666 RS-232 Interface 2.4.2 BAUD RATE 115200 bps 38400 bps 19200 bps *9600 bps 4800 bps 2400 bps...
- Page 70 1200 bps 600 bps Note : The option “600 bps” is available for 1200 only. 2.4.3 DATA BITS *8 bits 7 bits 2.4.4 PARITY *No parity Even...
-
Page 71: Intercharacter Delay
*None Scanner Ready Data Ready Invert Data Ready 2.4.6 INTER-CHARACTER DELAY By default, the inter-character delay is zero . Specify a value, ranging from 0 to 255 in units of millisecond, to match the computer response time. Such delay time is inserte between every character being transmitted. -
Page 72: Setting Up A W P An Connection
Chapter 3 SETTING UP A W P AN CONNECTION ® Bluetooth wireless technolog y . U p o n p o wering u p , the scanner will b e read y for esta b l ishing a W P A N connection . T o estab l ish a connection v i a 3 6 6 6 after reading “... - Page 73 ® Bluetooth D o ngle ....... . 3 . 1 CO N N E CT I N G V I A 3 6 6 6 By default, the interface of 3 6 6 6 is set to “...
- Page 74 1) H a v e t h e s c a n n e r r e a d t h e “ S e t C o n n e c t i o n ” a n d “ S e r i a l N u m b e r ” l a b e l s a t t h e b a c k o f 3 6 6 6 .
- Page 75 *Enable Disable...
- Page 76 BLUETOOTH D O N G L E ® 3 . 2 . 1 C H A N G E I N T E R F A C E Belo w i s the p r o c e d u r e to c o n f i g u r e the s c a n n e r b e f o r e e s t a b l i s h i n g a W P A N c o n n e c t i o n ®...
- Page 77 *Enable Disable Note: When connecting more than two scanne rs to a notebook computer or PDA with ® Bluetooth wireless technolog y , we suggest th at y o u disa b l e th e p o wer- s av i ng setting for a m o re reliab l e connection.
- Page 78 Use Preset PIN Read one of the barcodes to specify the PIN code, in hexadecimal. By default, the PIN code is set to “0000”. Maximum 6 characters are allowed. Enter PIN in Hexadecimal… Read the “ Hexadecimal Value ” barcode on page 166 for the desired digits or character string.
- Page 79 No PIN required...
- Page 80 ® Bluetooth function on y o ur com p u ter, running W i ndows X P SP2 . ® D o ub l e- c lick the Bluetooth icon fro m the lower right of the tas k b a r . A l ternati v e l y , y o u m a y go to Control Panel >...
- Page 82 ID of 1166/1266...
- Page 84 Scanner as BT SPP Slave...
- Page 85 ID of 1166/1266 Select and Remove...
- Page 86 ID of 1166/1266 BT SPP Connected ID of 1166/1266 BT SPP Disconnected...
- Page 89 *Enable Disable 4.1.1 START/STOP CH ARACTERS SELECTION Select one of the four different start/stop character pairs – * abcd/abcd abcd/tn*e ABCD/ABCD ABCD/TN*E...
-
Page 90: Clsi Conversion
Transmit Start/Stop Characters *Do Not Transmit 4.1.3 CLSI CONVERSION When enabled, the CLSI editing strips the start/stop ch aracters and inserts a space after the first, fifth, and tenth characters of a 14-character Codabar barcode. Apply CLSI Editing *Do Not Apply Note : The 14-character barcode length do es not include start/stop characters. -
Page 91: Select Start/Stop Pattern
*Enable Disable 4.2.1 SELECT START/STOP PATTERN This decides the readability of all 2 of 5 symbology variants. For example, flight ti actually use an Industrial 2 of 5 barcode but with Interleaved 2 of 5 start/stop pattern. In order to read this barcode, the start/stop pa ttern selection parameter of Industrial 2 of 5 should set to "... -
Page 92: Transmit Check Digit
Verify Industrial 25 Check Digit *Do Not Verify 4.2.3 TRANSMIT CHECK DIGIT Decide whether to include the check di git in the data being transmitted. *Transmit Industrial 25 Check Digit Do Not Transmit... - Page 93 I f " M a x / M i n L e n g t h " i s s e l e c t e d , t h e m a x i m u m l e n g t h a n d t h e m i n i m u m l e n g t h m u s t b e s p e c i f i e d .
- Page 94 *Enable Disable 4.3.1 SELECT START/STOP PATTERN This decides the readability of all 2 of 5 symbology variants. For example, flight ti actually use an Industrial 2 of 5 barcode but with Interleaved 2 of 5 start/stop pattern. In order to read this barcode, the start/stop pa ttern selection parameter of Industrial 2 of 5 should set to "...
- Page 95 Verify Interleaved 25 Check Digit *Do Not Verify 4.3.3 TRANSMIT CHECK DIGIT Decide whether to include the check di git in the data being transmitted. *Transmit Interleaved 25 Check Digit Do Not Transmit...
- Page 96 I f " M a x / M i n L e n g t h " i s s e l e c t e d , t h e m a x i m u m l e n g t h a n d t h e m i n i m u m l e n g t h m u s t b e s p e c i f i e d .
- Page 97 Enable *Disable 4.4.1 SELECT START/STOP PATTERN This decides the readability of all 2 of 5 symbology variants. For example, flight ti actually use an Industrial 2 of 5 barcode but with Interleaved 2 of 5 start/stop pattern. In order to read this barcode, the start/stop pa ttern selection parameter of Industrial 2 of 5 should set to "...
- Page 98 Verify Matrix 25 Check Digit *Do Not Verify 4.4.3 TRANSMIT CHECK DIGIT Decide whether to include the check di git in the data being transmitted. *Transmit Matrix 25 Check Digit Do Not Transmit...
- Page 99 I f " M a x / M i n L e n g t h " i s s e l e c t e d , t h e m a x i m u m l e n g t h a n d t h e m i n i m u m l e n g t h m u s t b e s p e c i f i e d .
- Page 100 *Enable Disable 4.5.1 TRANSMIT STAR T/STOP CHARACTERS Decide whether to include the start/stop ch aracters in the data being transmitted. Transmit Code 39 Start/Stop Characters *Do Not Transmit...
- Page 101 Verify Code 39 Check Digit *Do Not Verify 4.5.3 TRANSMIT CHECK DIGIT Decide whether to include the check di git in the data being transmitted. *Transmit Code 39 Check Digit Do Not Transmit 4.5.4 STANDARD/FULL ASCII CODE 39 Decide whether to support Code 39 Full ASCII that includes all the alphanumeric and special characters.
- Page 102 *Enable Disable 4.7 CODE 128 You can only configure the scanner to read this symbology or not. *Enable Disable...
- Page 103 *Enable EAN-8 (No Addon) Disable EAN-8 Addon 2 Enable EAN-8 Addon 2 *Disable EAN-8 Addon 5 Enable EAN-8 Addon 5 *Disable...
- Page 104 A f t e r c o n v e r s i o n , t h e d a t a f o l l o w s E A N - 1 3 f o r m a t a n d i s a f f e c t e d b y E A N - 1 3 p r o g r a m m i n g s e l e c t i o n s ( e .
- Page 105 *Enable EAN-13 (No Addon) Disable EAN-13 Addon 2 Enable EAN-13 Addon 2 *Disable EAN-13 Addon 5 Enable EAN-13 Addon 5 *Disable...
-
Page 106: Convert To Issn
Convert EAN-13 to ISBN *Do Not Convert 4.9.2 CONVERT TO ISSN Decide whether to convert the EAN-13 barcode, starting with 977 to ISSN. Convert EAN-13 to ISSN *Do Not Convert 4.9.3 TRANSMIT CHECK DIGIT Decide whether to include the check di git in the data being transmitted. -
Page 107: Transmit Code Id
Enable *Disable 4.10.1 TRANSMIT CODE ID Decide whether to include the Code ID (“ ”) in the data being transmitted. Transmit Code ID *Do Not Transmit 4.10.2 FIELD SEPARATOR (GS CHARACTER) Decide whether to apply a fi eld separator (to convert the control character to human FNC1 readable character). -
Page 108: Verify Check Digit
Enable *Disable 4.11.1 VERIFY CHECK DIGIT Select one of the three calcul ations to verify check digit when decoding barcodes. If incorrect, the barcode will not be accepted. *Single Modulo 10 Double Modulo 10 Modulo 10 & 11 4.11.2 TRANSMIT CHECK DIGIT Decide whether to include the check di git in the data being transmitted. - Page 109 I f " M a x / M i n L e n g t h " i s s e l e c t e d , t h e m a x i m u m l e n g t h a n d t h e m i n i m u m l e n g t h m u s t b e s p e c i f i e d .
- Page 110 Enable *Disable 4.12.1 TRANSMIT CHECK DIGIT Decide whether to include the check di git in the data being transmitted. *Transmit French Pharmacode Check Digit Do Not Transmit...
- Page 111 Enable *Disable 4.13.1 TRANSMIT CHECK DIGIT Decide whether to include the check di git in the data being transmitted. *Transmit Italian Pharmacode Check Digit Do Not Transmit...
-
Page 112: Convert To Uk Plessey
Enable *Disable 4.14.1 CONVERT TO UK PLESSEY Decide whether to change each occurrence of the character ' A ' to character ' X ' in the decoded data. Convert to UK Plessey *Do Not Convert 4.14.2 TRANSMIT CHECK DIGIT Decide whether to include the two check digits in the data being transmitted. *Transmit Plessey Check Digits Do Not Transmit... - Page 113 G S 1 D a t a B a r O m n i d i r e c t i o n a l G S 1 D a t a B a r T r u n c a t e d G S 1 D a t a B a r S t a c k e d G S 1 D a t a B a r S t a c k e d O m n i d i r e c t i o n a l G r o u p I I —...
- Page 114 Enable RSS-14 & RSS Expanded (Groups I, II) *Disable The settings below apply to Group I symbologies only : G S 1 D a t a B a r O m n i d i r e c t i o n a l G S 1 D a t a B a r T r u n c a t e d G S 1 D a t a B a r S t a c k e d G S 1 D a t a B a r S t a c k e d O m n i d i r e c t i o n a l...
- Page 115 *Transmit RSS-14 Check Digit Do Not Transmit...
- Page 116 Enable RSS-14 & RSS Expanded (Groups I, II) *Disable The settings below apply to Group II symbologies only : G S 1 D a t a B a r E x p a n d e d G S 1 D a t a B a r E x p a n d e d S t a c k e d T r a n s m i t C o d e I D D e c i d e w h e t h e r t o i n c l u d e t h e C o d e I D i n t h e d a t a b e i n g t r a n s m i t t e d .
- Page 117 Enable RSS Limited (Group III) *Disable Transmit Code ID Decide whether to include the Code ID in the data being transmitted. *Transmit RSS Limited Code ID Do Not Transmit Transmit Application ID Decide whether to include the Application ID ( " 01"...
-
Page 118: Telepen Output - Full Ascii/Numeric
Enable Telepen *Disable 4.16.1 TELEPEN OUTPUT – FULL ASCII/NUMERIC Decide whether to support Telepen in full ASCII code. By default, it supports ASCII mode. A I M T e l e p e n ( F u l l A S C I I ) i n c l u d e s a l l t h e a l p h a n u m e r i c a n d s p e c i a l c h a r a c t e r s . Original Telepen (Numeric) *AIM Telepen... - Page 119 *Enable UPC-A (No Addon) Disable UPC-A Addon 2 Enable UPC-A Addon 2 *Disable UPC-A Addon 5 Enable UPC-A Addon 5 *Disable...
-
Page 120: Transmit System Number
A f t e r c o n v e r s i o n , t h e d a t a f o l l o w s E A N - 1 3 f o r m a t a n d i s a f f e c t e d b y E A N - 1 3 p r o g r a m m i n g s e l e c t i o n s ( e . - Page 121 *Enable UPC-E (No Addon) Disable UPC-E Addon 2 Enable UPC-E Addon 2 *Disable UPC-E Addon 5 Enable UPC-E Addon 5 *Disable...
-
Page 122: Convert To Upc-A
S y s t e m n u m b e r e n a b l e d f o r d e c o d i n g U P C - E 0 b a r c o d e s . S y s t e m n u m b e r e n a b l e d f o r d e c o d i n g U P C - E 1 b a r c o d e s . - Page 123 Transmit UPC-E System Number *Do Not Transmit 4.18.4 TRANSMIT CHECK DIGIT Decide whether to include the check di git in the data being transmitted. *Transmit UPC-E Check Digit Do Not Transmit...
- Page 124 C h a p t e r 5 D E F I N I N G O U T P U T F O R M A T 1) P e r f o r m c h a r a c t e r s u b s t i t u t i o n o n t h e d a t a s c a n n e d . 2) A d d C o d e I D a n d...
- Page 125 Configure Set 1 Configure Set 2 Configure Set 3 1) R e a d t h e b a r c o d e a b o v e t o e n a b l e c h a r a c t e r s u b s t i t u t i o n b y s e t . F o r e x a m p l e , h a v e t h e s c a n n e r r e a d t h e “...
- Page 126 I f “ B T H I D ” , “ U S B H I D ” o r “ K e y b o a r d W e d g e ” i s c o n f i g u r e d f o r i n t e r f a c e , K e y T y p e a n d K e y S t a t u s...
- Page 127 I f “ B T H I D ” , “ U S B H I D ” o r “ K e y b o a r d W e d g e ” i s c o n f i g u r e d f o r i n t e r f a c e , K e y T y p e a n d K e y S t a t u s...
- Page 129 1) R e a d t h e b a r c o d e b e l o w t o c h a n g e c o d e I D o f a s p e c i f i c s y m b o l o g y . 2) R e a d t h e “...
-
Page 130: Clear Code Id Settings
Configure Code ID for Interleaved 25 Configure Code ID for Matrix 25 Configure Code ID for Configure Code ID for Plessey Configure Code ID for Telepen Configure Code ID for UPC-A Configure Code ID for UPC-E 5.3.3 CLEAR CODE ID SETTINGS Clear All Code ID Settings... - Page 131 Apply *Do Not Apply Length Code for Code 39 Apply *Do Not Apply Length Code for Code 93 Apply *Do Not Apply Length Code for Code 128 Apply *Do Not Apply...
- Page 132 Apply *Do Not Apply Length Code for EAN-8 Apply *Do Not Apply Length Code for EAN-13 Apply *Do Not Apply Length Code for French Pharmacode Apply *Do Not Apply Length Code for Italian Pharmacode Apply *Do Not Apply...
- Page 133 Apply *Do Not Apply Length Code for Interleaved 25 Apply *Do Not Apply Length Code for Matrix 25 Apply *Do Not Apply Length Code for MSI Apply *Do Not Apply Length Code for Plessey Apply *Do Not Apply...
- Page 134 Apply *Do Not Apply Length Code for UPC-A Apply *Do Not Apply Length Code for UPC-E Apply *Do Not Apply...
-
Page 136: Applying Formats For Data Editing
Chapter 6 APPLYING FORMATS FOR DATA EDITING None Barcode itself 0x0d by default by default IN THIS CHAPTER 6.1 Activating Ed iting Formats.......... 126 6.2 How to Configure Editing Formats ....... 1 28 6.3 Configuring Format — Define Data Criteria ....6.4 Configuring Format —... - Page 137 Enable *Disable Editing Format 2 Enable *Disable Editing Format 3 Enable *Disable Apply All 3 Editing Formats to Telepen *Yes...
- Page 140 U p t o t h r e e d i f f e r e n t f o r m a t s c a n b e s p e c i f i e d . Configure Format 1 Configure Format 2 Configure Format 3...
- Page 141 Restore Default Format...
- Page 142 *Apply to All Clear All Codabar Apply Code 39 Apply Code 93 Apply...
- Page 143 Apply GS1-128 & GS1 DataBar Apply EAN-8 Apply EAN-8 Addon 2 Apply EAN-8 Addon 5 Apply EAN-13 Apply EAN-13 Addon 2 Apply EAN-13 Addon 5 Apply...
- Page 144 Apply Italian Pharmacode Apply Industrial 25 Apply Interleaved 25 Apply Matrix 25 Apply Apply Plessey Apply UPC-A Apply...
- Page 145 Apply UPC-A Addon 5 Apply UPC-E Apply UPC-E Addon 2 Apply UPC-E Addon 5 Apply Note: For applying all three editing formats to Telepen, refer to 6.1.1 Activate Editing Formats.
- Page 146 Y o u m a y s p e c i f y a v a l u e f r o m 0 t o 2 5 5 . W h e n z e r o i s g i v e n t o b o t h , t h e s c a n n e r w i l l n o t p e r f o r m t h e l e n g t h q u a l i f i c a t i o n . 1) R e a d t h e b a r c o d e b e l o w t o s p e c i f y M a x .
- Page 147 W h e n t h e M a t c h i n g S t r i n g L o c a t i o n i s z e r o , t h e s c a n n e r w i l l o n l y c h e c k f o r t h e e x i s t e n c e o f t h e m a t c h i n g s t r i n g i n t h e b a r c o d e d a t a .
- Page 148 T h e t o t a l n u m b e r o f f i e l d s m u s t b e s p e c i f i e d c o r r e c t l y . I f t h r e e f i e l d s a r e c o n f i g u r e d f o r t h e e d i t i n g f o r m a t , t h e d a t a c h a r a c t e r s a f t e r F 3 w i l l b e a s s i g n e d t o F 4 a u t o m a t i c a l l y .
- Page 149 B y d e f a u l t , t h i s s t r i n g w i l l b e i n c l u d e d i n t h e f i e l d . Y o u m a y d i s c a r d i t . B y L e n g t h A l t e r n a t i v e l y , y o u m a y s i m p l y s p e c i f y t h e f i e l d l e n g t h .
- Page 150 Select Field Separator to Divide Field 2… Read the “ Hexadecimal Value ” barcode on page 166 for the desired character string. Read the “Validate” barcode to complete this setting. Read the “Discard Separator” barcode if the field separator is not desired in the field. *Include Separator Discard Separator If not dividing the field by a specific separator, you may divide it by a specified length.
- Page 151 Select Field Separator to Divide Field 3… Read the “ Hexadecimal Value ” barcode on page 166 for the desired character string. Read the “Validate” barcode to complete this setting. Read the “Discard Separator” barcode if the field separator is not desired in the field. *Include Separator Discard Separator If not dividing the field by a specific separator, you may divide it by a specified length.
- Page 152 Select Field Separator to Divide Field 4… Read the “ Hexadecimal Value ” barcode on page 166 for the desired character string. Read the “Validate” barcode to complete this setting. Read the “Discard Separator” barcode if the field separator is not desired in the field. *Include Separator Discard Separator If not dividing the field by a specific separator, you may divide it by a specified length.
- Page 153 Select Field Separator to Divide Field 5… Read the “ Hexadecimal Value ” barcode on page 166 for the desired character string. Read the “Validate” barcode to complete this setting. Read the “Discard Separator” barcode if the field separator is not desired in the field. *Include Separator Discard Separator If not dividing the field by a specific separator, you may divide it by a specified length.
- Page 154 I f “ B T H I D ” , “ U S B H I D ” o r “ K e y b o a r d W e d g e ” i s c o n f i g u r e d f o r i n t e r f a c e , K e y T y p e a n d K e y S t a t u s w i l l t h e n b e c o m e a p p l i c a b l e .
- Page 155 1) R e a d t h e “ S t a r t ” b a r c o d e t o b e g i n w i t h p r o g r a m m i n g t h e f i e l d t r a n s m i s s i o n s e q u e n c e .
- Page 156 Additional Field 2 Additional Field 3 Additional Field 4 Additional Field 5 3) R e a d t h e “ E n d ” b a r c o d e t o c o m p l e t e t h i s s e t t i n g . End Programming…...
- Page 158 F r o m t h e 1 c h a r a c t e r t o t h e 6 c h a r a c t e r i s t h e d a t e c o d e . F r o m t h e 7 c h a r a c t e r t o t h e d a s h ‘...
- Page 160 S P E C I F I C A T I O N S S e r i a l P o r t P r o f i l e ( B T S P P ) H u m a n I n t e r f a c e D e v i c e P r o f i l e ( B T H I D ) 3 6 6 6 P h y s i c a l C h a r a c t e r i s t i c s 4 K B f o r t r a n s m i t b u f f e r...
- Page 161 √ √ √ √ √ √ √ √ √ √ √ √ √...
- Page 162 A p p e n d i x I F I R M W A R E U P G R A D E 1) C o n n e c t t h e R S - 2 3 2 c a b l e b e t w e e n 3 6 6 6 a n d y o u r c o m p u t e r . C o n n e c t t h e p o w e r s u p p l y c o r d f r o m 3 6 6 6 t o a p r o p e r p o w e r o u t l e t .
- Page 163 Enter Setup Download 5) R u n t h e d o w n l o a d u t i l i t y “ P r o g L o a d . e x e ” o n y o u r c o m p u t e r . K e r n e l + U s e r P r o g r a m U s e r P r o g r a m O n l y 1 x 6 6 B u i l d V x x x .
- Page 164 BLUETOOTH D O N G L E ® 1) R e f e r t o 3 . 2 . 3 C o n n e c t t o D o n g l e f o r t h e t a r g e t s c a n n e r t o a c c e p t t h e c o n n e c t i o n r e q u e s t f r o m y o u r c o m p u t e r .
- Page 165 F o r t h e c o m m u n i c a t i o n s e t t i n g s , s e l e c t “ R S - 2 3 2 ” a n d t h e c o r r e c t C O M p o r t f o r B T S P P i n t e r f a c e , a n d i g n o r e t h e b a u d r a t e s e t t i n g .
- Page 166 1) C o n n e c t t h e R S - 2 3 2 c a b l e b e t w e e n 3 6 6 6 a n d y o u r c o m p u t e r . 2) C o n n e c t t h e p o w e r s u p p l y c o r d f r o m 3 6 6 6 t o a p r o p e r p o w e r o u t l e t .
- Page 167 F o r t h e c o m m u n i c a t i o n s e t t i n g s , s e l e c t “ R S - 2 3 2 ” a n d t h e c o r r e c t C O M p o r t . F o r R S - 2 3 2 , s e l e c t 1 1 5 2 0 0 b p s f o r b a u d r a t e .
- Page 168 1) C o n n e c t t h e i n t e r f a c e c a b l e , R S - 2 3 2 , K e y b o a r d W e d g e o r U S B H I D , b e t w e e n 3 6 6 6 a n d y o u r c o m p u t e r .
- Page 169 7) R e a d t h e “ U p d a t e ” b a r c o d e f o r t h e s c a n n e r t o r e s u m e i t s o p e r a t i o n ( e x i t t h e c o n f i g u r a t i o n m o d e ) .
- Page 170 List Page 3 Serial Command...
- Page 171 F o r t h e s c a n n e r t o t u r n o f f t h e b e e p e r a n d s a v e t h e s e t t i n g – # @ 0 3 1 9 <...
- Page 172 " Home Do w n & Left Right PgUp Exec < PgDn > ENTER* Note : (1)
-
Page 173: Key Status
*Normal Scan Code KEY STATUS Decide whether or not to change key status when “Normal Key” is selected for Key Type. Add Shift Add Left Ctrl Add Right Ctrl Add Left Alt Add Right Alt... - Page 178 V alidate " EN Q & < >...
- Page 179 1) I n t h e c o n f i g u r a t i o n m o d e , r e a d t h e b a r c o d e b e l o w t o u s e a p r e s e t P I N f o r a u t h e n t i c a t i o n .
Need help?
Do you have a question about the 1166 and is the answer not in the manual?
Questions and answers