Advertisement
Quick Links
USER MANUAL
MA-600 is a plug-in receiver, it can carry two wireless transmitters
such as doorbell buttons with two distinguishable flash pattern.
The first coded transmitter will flash rapidly; the second coded
transmitter flashes slower.
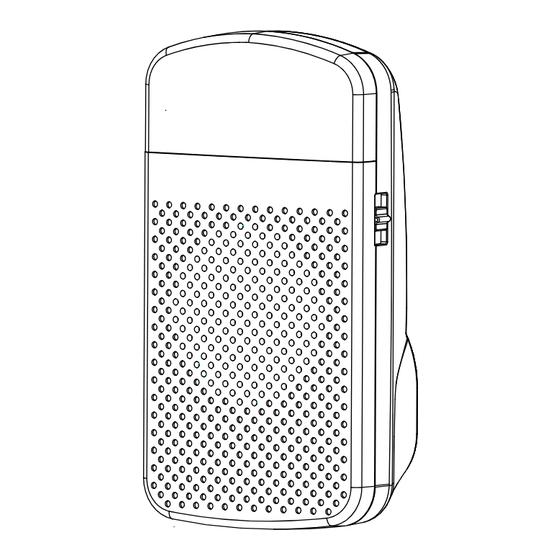
PARTS & FUNCTION
Melody
button
Learn
button
MOUNTING & POWER
This receiver works with AC 80V to 240V. Simply plug into a well
visible AC wall socket, it'll turn on.
TELEPHONE SIGNALER
PARTS & FUNCTION
Telephone Plug
RJ11
BATTERY INSTALLATION
Open the cover
Paring to the receiver
The telephone signaler is already paired with the receive. You can add (pair)
one more transmitter to the system follow the instructions of the receiver.
OPERATION
Plug the telephone line into the telephone socket as the diagram. The
system is ready to use.
BATTERY LOW INDICATOR
The status of sensor battery is indicated on the receiver. Please
refer to the "battery low indicator" on the receiver.
CODE CONFLICT
If the telephone signaler coding is the same as another sensor you must
change the code. After you have changed the code re-matching the
telephone signaler.
Open the cover
Remove the battery
DT-100
Flasher
Indicator
Speaker
Wall plug
(AC plug)
Battery
compartment
Test
CR2032
Press and hold the test
button, insert the battery
whilst holding the button
for 5 seconds. The LED will
flash 5 times when a new
code is generated
1. ASSIGNMENT OF THE TRANSMITTER
* PLEASE NOTE THE TRANSMITTER & RECEIVER ARE
READY TO USE
Two transmitters can be assigned to the receiver by sequence.
The transmitter can only be assigned if it is not yet known in the
memory of the receiver.
Step 1: Press & Hold the
f o r 3 s e c o n d s . T h e r e d L E D
indicator inside the lens will blink.
(if the red LED indicator lights
c o n s t a n t l y t h a t m e a n s t h e
memory of the receiver is full.
Please see section 3)
Step 2: Press the Melody
to scroll through the melodies.
Function
Once you hear a melody you
switch
prefer, do not press any button as
t h e m e l o d y i s s e t f o r t h a t
transmitter.
Step 3: Once the melody is selected, trigger the transmitter to
pair. If successful, the receiver (chime unit) will
generate a short tone. Press the
button to exit the pairing mode, the system is now
ready to use.
2. CHANGE THE MELODY
Press & hold the
mode. Press the
transmitters , press the
have found the desired melody.
Trigger the transmitter to confirm the melody, when you hear a
twice short tone press the
3. CLEAR THE TRANSMITTER FROM THE RECEIVER
MEMORY
Press & hold the
pairing mode. Press & hold both the
Melody selector together for 3 seconds to delete the memory.
T h e r e c e i v e r w i l l g e n e r a t e a b e e p t o n e t o i n d i c a t e a l l
transmitters on the memory is deleted. The red LED will change
to blink. Now you can pair the new transmitters to the receiver
as per the previous section.
4. TRANSMITTER BATTERY LOW
When the indicator lights constantly after triggered, it indicates this
transmitter is battery low. Please replace its battery as soon as possible.
Important Safety Instructions
1.
Read these instructions.
2.
Keep these instructions.
3.
Read all warnings.
4.
Follow all instructions
5.
Do not use this device near water.
6.
Clean only with a dry cloth.
7.
Do not block any ventilation openings.
Install in accordance with the manufacturer's instructions.
8.
Do not install near any heat sources such as radiators, heat registers, stoves, or
other.
9,
Do not tamper with the polarized & Grounding plug. Each blade of the plug has a
special purpose for seamless communication & safety. A grounding type plug
has two blades and a third grounding prong.
10.
Protect the power cord from being walked on or pinched particularly at plugs,
convenience receptacles, and the point where they exit from.
11.
Only use attachments/accessories specified by the manufacturer.
12.
Use only with the cart, stand, tripod, bracket, or table specified by the
manufacturer, or sold with the product. When moving the cart/product
combination to avoid injury from tip-over (When applicable).
13.
Unplug this product during lightning storms or when unused for a long periods of
time.
14.
Refer all servicing to qualified service personnel. Servicing is required when the
product has been damaged in any way, such as power-supply cord or plug is
damaged, liquid has been spilled or objects have fallen into the product, the
product has been exposed to rain or moisture, does not operate normally, or has
been dropped.
15.
This product shall not be exposed to dripping or splashing water and that no
object filled with liquids such as vases shall be placed on the product.
Liquid damage is not covered by warranty.
16.
Mains plug is used as disconnect device and it should remain readily operable
during intended use. In order to disconnect the apparatus from the mains
completely, the mains plug should be disconnected from the mains socket outlet
completely.
17.
Caution marking is located at the bottom of device.
18.
The marking information is located at the bottom of device.
Safety Instructions
Warning: To prevent fire or shock hazard. Do not expose this
unit to rain or moisture.
The lighting flash with an
arrowhead within a triangle
alerts you to uninsulated
dangerous voltage within
t h e p r o d u c t ' s e n c l o s u r e
that could cause an electric
shock
-
The socket-outlet shall be installed near the
equipment and shall be easily accessible.
Learn button
Melody
Learn
♫
selector button
Learn button for 3 seconds to enter the pairing
Learn button to scroll between 1 and 2
♫
Melody selector repeatedly until you
Learn button to exit.
Learn button for 3 seconds to enter the
Learn button & the
CAUTION
RISK OF ELECTRIC SHOCK
DO NOT OPEN
T O R E D U C E T H E R I S K O F
T h e e x c l a m a t i o n p o i n t
E L E C T R I C S H O C K D O N O T
within a triangle alerts you
REMOVE COVER (OR BACK) NO
to pressence of important
U S E R S E R V I C E A B L E PA R T S
operating, maintenance and
INSIDE. REFER SERVICING TO
servicing instructions in this
QUALIFIED PERSONNEL.
user's manual.
Learn selector
♫
Advertisement

Related Manuals for switel DT-100

Summary of Contents for switel DT-100
- Page 1 1. ASSIGNMENT OF THE TRANSMITTER * PLEASE NOTE THE TRANSMITTER & RECEIVER ARE USER MANUAL DT-100 READY TO USE Two transmitters can be assigned to the receiver by sequence. MA-600 is a plug-in receiver, it can carry two wireless transmitters The transmitter can only be assigned if it is not yet known in the such as doorbell buttons with two distinguishable flash pattern.
- Page 2 DT100R Multi-Alert Receiver: Power by: AC plug (VDE 2 round pin plug for EU) Adaptor: Built-in AC Power 90V-240V 50/60 Hz 3W Product dimensions: 120 (L) x 64 (W) x 31 (H) mm Product Weight: 110 grams Wireless frequency: radio frequency 868.0 ~868.6MHz MHz for Europe Transmission distance 300m /1,000ft (direct line of sight) DT100T Wireless Telephone Signaler: Battery type: CR2032...
Need help?
Do you have a question about the DT-100 and is the answer not in the manual?
Questions and answers