
Subscribe to Our Youtube Channel
Related Manuals for Medtrum TouchCare A7+


Summary of Contents for Medtrum TouchCare A7+
- Page 2 A7+ TouchCare® Insulin Management System User Guide © 2019, Medtrum Technologies Inc. All rights reserved.
- Page 3 Humalog® is a trademark of Eli Lilly and Company. NovoRapid® is a trademark of Novo Nordisk A/S. Apidra® is a trademark of Sanofi S.A. 0197 Medtrum Technologies Inc. This product complies with 7F, Building 8, No. 200, Niudun Directive 93/42/EEC (MDD) and Road Directive 2014/53/EU (RED).
- Page 4 Contents Contents ..................i 1 Introduction ................1 1.1 Before you begin ................1 1.2 Indications ................... 1 1.3 Contraindications ................. 2 1.4 User Safety ................... 2 1.4.1 Warnings and Precautions ............2 1.4.2 Consumables ................. 5 1.4.3 Radio Frequency (RF) Communication .......... 6 1.4.4 Emergency Kit ................
- Page 5 3.2.2 Time and Date ................23 3.2.3 Bolus Calculator ................24 3.3 Home Screen ................25 3.3.1 Status Bar Icons ................26 3.3.1.1 Battery Icon ..................26 3.3.1.2 Time Icon ..................26 3.3.1.3 Audio Icon ..................27 3.3.1.4 Pump RF Signal Icon ................ 27 3.3.1.5 Alert Icons ..................
- Page 6 3.9.2 Insulin Injection ................43 3.9.3 Carbohydrates Information ............43 3.9.4 Physical Exercise Information ............. 44 3.9.5 Health Information ..............45 3.9.6 Other Events................45 3.10 History ..................46 3.10.1 Pump History ................47 3.10.2 Sensor History ................47 3.10.3 PDM Alert History ..............47 3.10.4 Event History ................
- Page 7 3.11.4.2 Bolus Reminder ................64 3.11.4.3 BG Reminder ................. 64 3.11.4.4 Cal Reminder ................. 64 3.11.5 Username .................. 64 3.11.6 Telephone .................. 65 3.11.7 Diagnostics ................66 3.11.8 About Us ..................68 3.12 Troubleshooting ................ 68 4 How to use Patch Pump ............71 4.1 Change the reservoir patch ............
- Page 8 4.3.6 Change the time of the Basal Pattern ........101 4.3.7 Maximum Basal Rate..............103 4.4 Suspend and Resume ..............104 4.4.1 Suspend Insulin Delivery ............104 4.4.2 Resume Insulin Delivery ............107 4.5 Insulin Pump Settings ..............108 4.5.1 Add/Change the Pump Base SN ..........108 4.5.2 Bolus Setup................
- Page 9 5.7.2 BG Reminder ................139 5.8 Pump History ................140 5.8.1 Pump History ................140 5.8.1.1 Delivery History ................141 5.8.1.2 Alert History .................. 145 5.8.2 Pump Summary History ............. 145 5.8.2.1 Summary History: Insulin History ..........145 5.8.2.2 Summary History: Bolus History ........... 146 5.9 Troubleshooting Pump issues ............
- Page 10 6.3.1 Enter Your Meter BG ..............165 6.3.2 Set Calibration Repeat .............. 167 6.3.3 Calibration Reminder ..............167 6.4 CGM System settings ..............168 6.4.1 CGM Feature on/off ..............168 6.4.2 Set the Transmitter SN .............. 169 6.4.3 Graph Range ................170 6.4.4 Cal Repeat .................
- Page 11 8.1 Safety System ................197 8.2 Safety Checks ................197 8.3 Alarms ..................197 8.3.1 PDM Alarms ................200 8.3.2 Pump Alarms ................201 8.4 Alerts ..................203 8.4.1 PDM Alerts ................205 8.4.2 Pump Alerts ................205 8.4.3 CGM Alerts ................206 8.5 Reminding messages ..............
- Page 12 1 Introduction 1.1 Before you begin Check with your healthcare provider (diabetes team) regarding your individual training needs. Do NOT attempt to use the A7+ TouchCare® System before you have been properly trained. As part of your training, your healthcare provider will work with you to establish diabetes management guidelines and settings that best fit your needs.
- Page 13 Some features require great knowledge of insulin pumping and advanced self-care skills. Do NOT use the A7+ TouchCare® System until you have specific information for your treatment plan and have had specific training on each feature from your healthcare provider or local Medtrum distributor.
- Page 14 General Precautions Do NOT put skin care products on the A7+ TouchCare® System, that might result in damage to the plastic surface of the products. Wipe off the skin care products such as sunscreen by using a clean cloth. If you find a crack in any part of the A7+ TouchCare®...
- Page 15 If you drop your PDM or if it has been hit against something hard, check whether the display screen and the touch screen are working properly, whether the PDM can be charged normally. Call customer support or your local Medtrum...
- Page 16 Reservoir Patch—The Pump Base (JN-022) is only used with the 200-unit Medtrum Reservoir Patch (MD-JN-011). Change your Reservoir Patch every 2-3 days or as directed by your healthcare provider. Glucose Sensor—The Transmitter (MD1026) is used with the Medtrum Glucose Sensor (MD3026). Change your MD3026 Glucose Sensor every fourteen days.
- Page 17 Medtrum. We recommend using Medtrum Reservoir Patches and Glucose Sensors as we cannot guarantee appropriate operation if the system is used with consumables offered by third- parties and therefore we are not responsible for any injury or malfunctioning of the system that may occur in association with such use.
- Page 18 Urine ketone testing supplies Insulin syringe Rapid-acting U-100 insulin Extra Medtrum 2.0 mL Reservoir Patches Power Bank Instructions from your healthcare provider about how much insulin to inject if pump delivery is interrupted ...
- Page 19 Store the Sensor at temperatures between 2°C (36°F) and 30°C (86°F), and at humidity levels between 20% and 90% relative humidity for the length of the Sensor’s shelf life. For temperatures greater than 30°C (86°F), the Sensor will require cooled storage at temperatures no lower than 2°C (36°F). You may store the Sensor in the refrigerator if it is within this temperature range.
- Page 20 PDM is repaired or replaced, the warranty period shall not be extended. The warranty is valid only if the PDM is used in accordance with Medtrum’s instructions and will not apply: •...
- Page 21 Pump Base to the original end use purchaser (the “Warranty Period”). During the Warranty Period, Medtrum will, at its discretion, either repair or replace (with a new or recertified Pump Base, at Medtrum’s discretion) any defective Pump Base, subject to the conditions and exclusions stated herein.
- Page 22 Transmitter to the original end use purchaser (the “Warranty Period”). During the Warranty Period, Medtrum will, at its discretion, either repair or replace (with a new or recertified Transmitter at Medtrum’s discretion) any defective Transmitter, subject to the conditions and exclusions stated herein.
- Page 23 THE REMEDIES PROVIDED FOR IN THIS WARRANTY ARE THE EXCLUSIVE REMEDIES AVAILABLE FOR ANY WARRANT CLAIMS. NEITHER MEDTRUM NOR ITS SUPPLIERS OR DISTRIBUTORS SHALL BE LIABLE FOR ANY INCIDENTAL, CONSEQUENTIAL, OR SPECIAL DAMAGE OF ANY NATURE OR KIND CAUSED BY OR ARISING OUT OF A DEFECT IN THE PRODUCT.
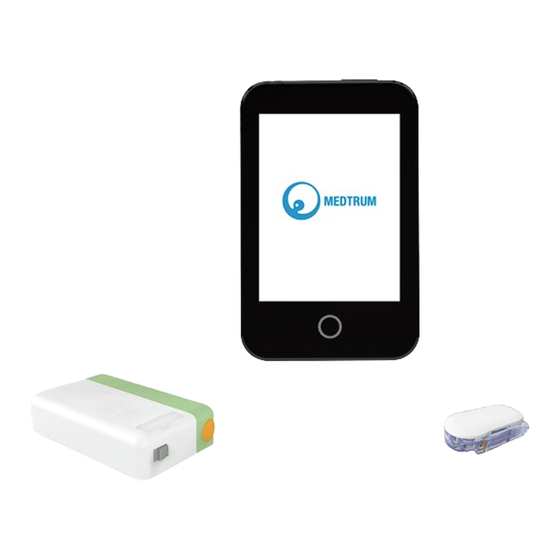
- Page 26 2 Your A7+ TouchCare® System 2.1 Personal Diabetes Manager (PDM) The Personal Diabetes Manager (PDM) monitors and controls your Patch Pump and Continuous Glucose Monitoring System via wireless RF communication. It stores your Pump and Sensor data of the last 90 days. Keep the PDM with you at all times so that, when needed, you are able to deliver a bolus, change the basal rate, check your glucose level and so on.
- Page 27 precise dispensing screw, a plunger, an actuator, a needle, a buzzer and a battery to power your Pump. The delivery system and enclosure of the Reservoir Patch are applied parts of the Pump. ✓ ✓ Reservoir Patch Pump Base (JN- (MD-JN-011, consumable) 022) 2.3 Glucose Sensing System (Optional)
- Page 28 ✓ ✓ Glucose Sensor Transmitter (MD3026, Consumable) (MD1026, Chargeable) ✓ USB charging cable (LQ005)
- Page 30 3 How to use the PDM 3.1 Basics of the PDM We recommend that your PDM is only used by an intended and qualified operator. 3.1.1 Turn on/off the PDM 1) Turn-on When you long-press the power button, a green light will flash, the ⚫...
- Page 31 3.1.2 Charge the PDM As a safety measure, the PDM will give you “PDM BATTERY LOW” or “CHARGE PDM NOW” alert when you keep the PDM working at a low power level. If you receive a “PDM BATTERY LOW” alert, respond to the alert and continue. Though the PDM will still function normally, the battery life could be decreased.
- Page 32 3.1.3 Power Mode The PDM has two power modes: 1. Sleep Mode The PDM enters the Sleep Mode after screen backlight timeout and the screen shuts down. You can turn the PDM into Lock Screen of Awake Mode by short-pressing the Power button. a.
- Page 33 An Alarm occurs when the screen An Alarm occurs when the screen is locked. is not locked. 3.1.4 Scroll Bar If there is excessive text length for the screen, a scroll bar appears on the right side of the screen. You can view any additional text by scrolling up and down. 3.2 Setting up the PDM 3.2.1 Select language and country/region 1.
- Page 34 You can change language. See “Language” in Section “Settings” for setup instructions. 2. Select your country/region, then tap Next. 3.2.2 Time and Date When starting PDM for the first time, you need to set the time and date. Setting the correct time and date in your PDM is necessary for accurate basal insulin delivery and enables you to keep a correct record of your insulin delivery and Sensor readings.
- Page 35 (1) Choose the time. (2) Tap the blue button to increase and to decrease hour on the left. Tap the blue button to increase and to decrease minute on the right. (3) When finish, tap Done. 2. Select the Date, then tap Next. (1) Choose the date.
- Page 36 directly to Lock Screen. See “Bolus Calculator” in Chapter “Advanced Pump Feature” for more information. If you choose Setup, the Bolus Calculator function will be forced to turn on; If you choose Skip, the Bolus Calculation function will stay turned-off. 3.3 Home Screen The Home Screen is the starting point to access the programming screens.
- Page 37 Note: At this screen, slide on the screen from right to left, you can open main menu screen. Slide from left to right to open status screen. Slide PDM from top to bottom to open alert notification screen. Slide on the screen from bottom to top to open shortcut screen.
- Page 38 ➢ 02:00 p 12-hour format ➢ 14:00 24-hour format 3.3.1.3 Audio Icon There are eight kinds of audio icons, indicating different Reminder types, you can set it in the General Settings menu and CGM Settings menu. Audio Vibrate Audio and Vibrate Audio off /Vibrate off Alert Silence + Audio Reminder Alert Silence + Vibrate Reminder...
- Page 39 3.3.2 Pump Status 1. EasyLoop Icon 2. Insulin Pump Delivering Status 3. IOB (Insulin on Board) 4. Pump RF Signal 5. Insulin left You can view the Pump Status on the Home Screen. Insulin Delivering Status icons in different situations: Icon Shape and Color Description...
- Page 40 Purple ring represents the extend Purple and dark Bolus, the deep purple part indicates purple ring the progress of delivery. Red ring represents the delivery Red ring suspend status. The status information is indicated by text below: Basal(U/H) 1.00: The current basal rate is 1.00U/H. ...
- Page 41 1. Trend Arrow 2. The last senor reading or status 3. Time of the last sensor reading 4. The scope of glucose limit 5. High Limit of glucose limit 6. Low Limit of glucose limit 7. CGM Curve 8. Last Glucose point 9.
- Page 42 The next calibration is due in 20 to 24 hours. The next calibration is due in 16 to 20 hours. The next calibration is due in 12 to 16 hours. The next calibration is due in 8 to 12 hours. The next calibration is due in 4 to 8 hours.
- Page 43 If you disconnect the Sensor for a while and reconnect it, it takes some time to recover the data. The icon indicates that data is being recovered. It disappears when data-recovery is completed. ➢ Special conditions Under normal Sensor conditions, the most recent glucose reading is displayed at the center of the ring on the Home Screen.
- Page 44 Low - Sensor glucose is below 2.2 mmol/L (40mg/dL). Underlined reading - Calibration overdue. A new meter BG is needed for calibration. Note: 1) When the Sensor is warming up, a progress bar is displayed at the bottom of Home Screen. It takes 120 minutes for each Sensor to warm up. 2) After you enter a meter BG value to calibrate the Sensor, it may take up to 3 minutes for the Sensor to adjust its readings, with the Sensor glucose reading blinking.
- Page 45 3.3.5 Sensor Graph The Y-axis of the Sensor graph is featured by four values: 5, 10, 15, 20 mmol/L (90, 180, 270, 360 mg/dL). The X-axis of the Sensor graph presents a period of the last 3 hours. The Sensor graph can be switched to a landscape screen display. Long tap the Sensor graph for 1 second and the display will turn horizontal.
- Page 46 Sensor glucose is above 22.2 mmol/L (400mg/dL). (HIGH) and Sensor glucose is below 2.2 mmol/L (40mg/dL). (LOW). After the warm-up phase, the values before the first calibration are ⚫ replaced by “BG”. When the Sensor calibration expires, the reading values will be ⚫...
- Page 47 3.4 Lock Screen The PDM displays the Lock Screen every time you turn it on to view glucose Information, insulin delivery information, alarm/alert information, date and time. You also can customize this screen by editing your username and telephone number. See “Username” and “Telephone” in Section “Settings” for more information.
- Page 48 See Chapter “Safety System and Alarms/Alerts” for more information about Alarm, Alert or Reminder status. 3.5 Notification Screen Notification Screen only records alert and alarm notifications which are still effective today. You can slide from top to bottom on Home Screen to call the Notification Screen.
- Page 49 1) Calibration Shortcut icon “ ” 2) Bolus Shortcut icon “ ” If the Food/Correction Bolus function is turned on, then you’ll enter ⚫ Food/Correction Bolus by tapping this icon. If not, you’ll enter Manual Bolus by tapping this icon. ⚫...
- Page 50 The Status Screen displays the following information. Delivery/Today Bolus Basal Other Status Info Device Info...
- Page 51 3.8 Menus The Main menu consists of nine sub-menus: Bolus, Basal, Suspend, Patch, Sensor, History, Events, EasyLoop, Settings. Slide from right to left on the Home Screen to open Main Menu. Note: After all insulin delivery is suspended, the Suspend icon on the Main Menu turns into Resume icon.
- Page 52 When a Bolus is being delivered, with the Suspend function you can suspend Bolus or all insulin deliveries (basal and bolus) for a set period of time. See Section “Suspend and Resume” in Chapter “How to use Patch Pump” for more information.
- Page 53 glucose, carbs, insulin injection, health condition, exercise and others. This information can help you and your healthcare provider make better decisions about your diabetes management plan. Go to Events Screen. You can select event type you want to record. Main Menu➔Events 3.9.1 BG Measurement 1.
- Page 54 5. When finished, tap Save to confirm input. Or press to cancel. 3.9.2 Insulin Injection Select Injection in the Events screen. Choose the date and time for insulin injection. Tap Type option, you can choose the insulin type between “Rapid-acting”, “Intermediate-acting”, “Long-acting”, “Pre-mixed”...
- Page 55 2. Choose the date and time for carbohydrate intake. 3. Tap Carbs value to select the carbohydrates you eat or drink. The input range is 0-200 grams. 4. When finished, tap Save to confirm or press to cancel. 3.9.4 Physical Exercise Information 1.
- Page 56 3.9.5 Health Information Select Health in the Events screen. Choose the date and time for health information Tap Health option to select the physical condition. You can choose the intensity between “Illness”, “Stress”, “High Symptoms”, “Low Symptoms”, “Menstruation” and “Alcohol”. When finished, tap Save to confirm input.
- Page 57 For example, when you want to enter “a”, tap abc and select “a”. Tap ABC to switch to capital. Tap and choose the letters for text input. Note: Use no more than 22 characters to describe an event. When finished, tap Save to confirm input. Or press to cancel.
- Page 58 3.10.1 Pump History On the Pump History menu you can review Pump History. See Section “Pump History” in Chapter “Advanced Pump Features” for more information. 3.10.2 Sensor History On the Sensor History menu you can review Sensor History. See Section “Sensor History”...
- Page 59 Tap the date to switch between records of different dates. Tap each Alert to view alert detail information. Tap to return to the previous menu. See “Alert Icons” for more information about how to address alarms and alerts and the meanings of different alarm/alert icons. 3.10.4 Event History Go to the Event History screen.
- Page 60 BG History contains BG from Calibration , Event BG and BG input during Bolus delivery through Bolus Calculator Tap the date or to switch between records of different dates. 3.10.6 Summary History The Summary History displays a summary of past histories including Insulin History, Bolus History, BG history, Sensor History and Low Suspend History.
- Page 61 3.10.6.1 Summary History: Insulin History See Section “Pump Summary History” in Chapter “Advanced Pump Features” for more information. 3.10.6.2 Summary History: Bolus History See Section “Pump Summary History” in Chapter “Advanced Pump Features” for more information. 3.10.6.3 Summary History: BG History This screen displays the BG result summary history.
- Page 62 3.11 Settings 3.11.1 CGM System (Optional) Tap CGM System on the Settings screen to enter the CGM System screen. You can set your Sensor in CGM System Screen. You can turn CGM System on or off, set Transmitter SN, set calibration alert repeat time, set alert silence, set Sensor expiration alert on or off.
- Page 63 3.11.3.1 Language You can change your PDM Language. Main Menu ➔Settings➔General➔Language 3.11.3.2 Time/Date Setting the correct time and date in your PDM is essential to accurate basal insulin delivery and keeping an accurate record of your insulin delivery and other events. You can select a 12-hour or 24-hour clock. Occasionally when you need to change the date and time settings (for example, to adjust for daylight saving time or after resetting the PDM), change the old Reservoir Patch and activate a new patch, disconnect the Sensor and reconnect it.
- Page 64 Main Menu ➔Settings➔General➔Time/Date If you turn the switch on, the time is set as 24-hour-format. Date keyboard and Time keyboard 3.11.3.3 Audio Options Audio/Vibrate You can choose one of the four audio options for your alerts and alarms: audio, vibrate, audio and vibrate, or both off. The factory setting is audio and vibrate. Your choice applies to both your PDM and Patch Pump.
- Page 65 If Audio off/Vibrate off is selected, your PDM and Patch Pump will not beep or vibrate. But there are exceptions: If an alarm is not cleared within 10 minutes, your PDM or/and Patch Pump will make a siren sound until the alarm is cleared. When “BELOW 3.1mmol/L (BELOW 56mg/dL)”...
- Page 66 Slide or tap to adjust the brightness, you can choose between 10 brightness levels. Lower level consumes less power. 3.11.3.5 Confidence Reminder If this feature is turned on, the PDM will beep and/or vibrate in response to your instructions, including: ⚫...
- Page 67 Note: If there is an active Reservoir Patch, Reset Settings and Restore Settings will be disabled. ⚫ Save Take these steps to save your current PDM settings: Select Save in the User Settings screen. If this is the first time saving your PDM settings, this screen appears: If you have saved PDM settings, this screen appears:...
- Page 68 Read the instructions on the screen; then tap Next to save your current settings. This screen indicates that your user settings have been saved. ⚫ Restore Take these steps to restore the most recent PDM settings you have saved to your PDM.
- Page 69 This screen indicates that your user settings have been restored. Tap OK to exit the menu and check your system settings. ⚫ Reset Warning: Do NOT reset your PDM settings unless directed by your healthcare provider. If you reset your PDM settings, it will be necessary to reprogram all your personal PDM settings as directed by your healthcare provider.
- Page 70 Tap OK. The PDM will be reset to the factory default settings and restart. ⚫ Settings History On this screen you can review all recent user settings operation records and the date and time. Select Settings History in User Settings screen. Slide to scroll up/down to view the entire settings history.
- Page 71 3.11.3.7 Passcode Lock The passcode lock function is a safety feature that prevents improper operation by unintended user. Main Menu ➔Settings➔General➔Passcode Lock Tap Set Passcode, enter the old passcode and then set a new one.
- Page 72 Enter the 4-digit passcode. Note: The default passcode is 0000. Enter the new passcode twice.
- Page 73 Turn on Passcode Lock and enter the Passcode to activate Lock, the Passcode Lock is only for one-time use, you need to enter the passcode each time you turn on the function. With the Passcode Lock feature turned on, only the Lock Screen is displayed. You have to enter the correct passcode after you slide to unlock the PDM.
- Page 74 Main Menu➔Settings➔Reminders➔Personal Reminder Tap +Add Reminder to add a reminder, choose the time and tap Done. Note: (1) You can set up to 4 Reminders. (2) The Reminders will be saved automatically. Slide from right to left on one reminder, tap Delete to delete this segment.
- Page 75 3.11.4.2 Bolus Reminder See Section “Reminder” in Chapter “Advanced Pump Features” for more information. 3.11.4.3 BG Reminder See Section “Reminder” in Chapter “Advanced Pump Features” for more information. 3.11.4.4 Cal Reminder See Section “Calibration Reminder” in Chapter “How to use CGM system” for more information.
- Page 76 (1) Use the keyboard to enter the username. For example, when you want to enter “a”, tap abc key, “a”,”b”,”c” appear on the top of the keyboard , then select “a”. (2) When finish, tap Done. (3) Tap the name in blue to edit Username again. Note: You can enter as many as 18 letters including spaces.
- Page 77 (1) Use the keyboard to enter the telephone number . (2) When finish, tap Done. (3) Tap the number in blue to edit telephone number again. Note: You can enter as many as 18 letters including spaces. The PDM displays the Telephone number on Lock Screen, which works in two optional ways: 1.
- Page 78 The PDM will beep three times and vibrate one time while the screen suggests checking alarms. When checking is completed, tap OK to return to the last menu.
- Page 79 Warning: If the PDM fails to beep or vibrate, call customer support. To continue using the PDM may put your health at risk. Note: Your PDM uses battery power to beep and vibrate. Checking alarms often will result in reduced battery life and the “CHARGE PDM NOW” Alarm may appear sooner than expected.
- Page 80 We recommend that you charge the PDM when a PDM BATTERY LOW alert happens. PDM does not power on after you press the Power button: 1. PDM battery is too low. Charge the PDM. 2. PDM is outside of its operating temperature range. Move the PDM to a temperature between +5°C ~ +40°C and then try to power it on.
- Page 82 4 How to use Patch Pump 4.1 Change the reservoir patch The Reservoir Patch requires replacement and shall not be reused. The Reservoir Patch should be replaced approximately every 2-3 days or as directed by your healthcare provider. Warning: Do NOT attempt to apply or use a Patch Pump before you have been trained by your healthcare provider.
- Page 83 Note: The syringe provided by Medtrum matches the fill port on the Reservoir Patch. Other syringes and needles meeting the following specifications are also permitted. Specifications of syringe: Reservoir volume: 2.0 mL Needle size: 26G Needle length: 8 mm (0.31’’) ...
- Page 84 Several seconds later, you will see a message showing that the Patch has been deactivated. 4.1.1.2 Remove the Current Reservoir Patch After the Reservoir Patch is deactivated, press the needle release button on the side of the Reservoir Patch, and slide it to the direction of the arrow to retract the needle.
- Page 85 Note: To avoid possible skin irritation, remove the Reservoir Patch slowly and gently. If any adhesive remains on your skin, remove it with soap and water. Warning: Check the infusion site for signs of infection. Press and hold the two release buttons on both ends of the Pump Base and pull the Pump Base off the old Reservoir Patch.
- Page 86 1. You can either enter SN manually or search for the SN if it is the first time you enter the SN. 2. You can only enter SN manually if you want to update the SN. Enter SN manually Tap --------- or the existing Pump base SN, you will see the following screen. Then enter the SN to your PDM and tap Done.
- Page 87 Note: If it is an 8-digit SN, enter space ” ” at the end. Search for the SN You can select Search to search for the SN if it is the first time you enter the SN. Make sure that your Pump Base is connected to a new Reservoir Patch and move the PDM closer to your Pump before searching for the SN.
- Page 88 If your PDM finds multiple Pumps, the SNs won’t be displayed to prevent you from selecting the wrong SN. Tap OK to go back to Patch Menu, then select “---------” to enter the SN manually. If your PDM does not find a Pump, make sure that your Pump Base is connected to a new Reservoir Patch, move the PDM closer to your Pump, and search again or enter the SN manually.
- Page 89 4.1.3 Connect the Pump Base to a New Reservoir Patch Tap Next on your PDM and you will see the following message on the screen. Warning: Do NOT use a Reservoir Patch if its sterile package has been damaged or already opened, or if the Reservoir Patch has expired, or if the Reservoir Patch is damaged in any possible way.
- Page 90 The Pump performs a series of safety checks immediately after the two parts are connected. The safety checks take about twenty seconds. The indicator light flashes in the order of blue, green, yellow, and red, and the Pump beeps four times. Warning: If the Pump fails to beep or the indicator light fails to flash, call customer support.
- Page 91 With the help of your healthcare provider, decide on the amount of insulin (70 U-200 U) you need to insert into the Reservoir Patch. Draw air into the syringe up to the amount of insulin you need. Insert the needle into the insulin vial and push down on the plunger to pressurize the vial.
- Page 92 Make sure that the needle is still in the fill port and release the plunger. Pressure will pull the plunger to its neutral position, but it will NOT push any air back inside the reservoir. 10. Withdraw the needle from the fill port. Turn the syringe upright and pull on the plunger.
- Page 93 Warning: Do NOT use a Reservoir Patch if you hear a crackling noise or feel abnormally strong resistance when you press down on the plunger. These conditions can result in not delivering enough insulin. Warning: Do NOT inject air into the fill port. Doing so may result in unintended or interrupted insulin delivery.
- Page 94 Hold the Patch Pump on a clean flat surface with one hand, and with the other hand, press the top square part of the button cover all the way until you hear a click, indicating the needle button is locked in place by the two hooks on the button cover.
- Page 95 Warning: Do NOT remove the button cover before priming is completed. Once completed, the next screen “Attach and Insert” appears, and the Pump vibrates three times. Warning: If the Pump fails to vibrate, call customer support. To continue using the Pump may put your health at risk. 4.1.6 Select and Prepare the Infusion Site The place on your body where you attach the Pump is important for the success of your therapy.
- Page 96 The area stays flat during normal daily activities without bending or creasing. When choosing the location for the Pump, avoid the following: Areas that are constrained by clothing, such as the belt line or waist. Curved or rigid areas due to muscle or bone. Areas that involve rigorous movement during exercise.
- Page 97 Note: If you have sensitive skin or your skin gets irritated, contact your healthcare provider. 4.1.7 Attach the Patch Pump Remove the button cover. Peel off the adhesive liner from the bottom of the Reservoir Patch. Remove the liner and expose the adhesive. Avoid touching the stickiness of the adhesive pad, press the Pump against the skin at the selected infusion site.
- Page 98 Note: The adhesive of the Reservoir Patch keeps the Patch position secured for up to 3 days. Several products are available to enhance adhesion if necessary. Ask your healthcare provider about these products. Avoid getting body lotion, creams, or oil near the infusion site because it may loosen the adhesive. Note: The adhesive is designed for one-time use.
- Page 99 Warning: Check the infusion site and needle after insertion to ensure that the needle has been properly inserted. If the needle is not properly inserted, hyperglycemia may ensue. Slide to activate basal delivery if the needle is properly inserted. Or tap Home Key if you find a problem with the needle, then the PDM will instruct you to discard the Reservoir Patch.
- Page 100 Warning: Check the infusion site frequently for improper placement and leaks that can result in inadequate infusion. You can also check blood glucose level to ensure normal infusion. 4.2 Bolus A bolus dose is insulin you deliver to cover meals or snacks, or to correct high blood glucose.
- Page 101 Set your bolus amount. Select Normal Bolus type. Bolus type is Normal Bolus, Extended Bolus or Combo Bolus. Tap Next to confirm if the bolus setting is correct.
- Page 102 Note: You can set a bolus dose between 0 and the Max Bolus. When an extend Bolus is already being delivered, you can only choose a Normal Bolus. Note: The BG Reminder screen will appear if you have BG Reminder turned on. See Section “BG Reminder”...
- Page 103 You can cancel an active Normal Bolus in the Suspend Menu even after insulin delivery has started. Slide to Stop to cancel the bolus. An on-screen message will tell you how much insulin has been delivered. Tap OK to go back to the Home Screen.
- Page 104 If the total Bolus in the last 30 minutes has already exceeded 10 U, the screen will show the following reminder: If connection between PDM and Pump failed during delivery, the screen shows “Checking Pump status”, the delivery cannot be cancelled.
- Page 105 When insulin delivery is completed, PDM display returns to the Home Screen automatically. 10. When a Normal Bolus is being delivered, if the PDM screen goes dark as a result of display timeout, you can slightly shake the PDM to light up the screen again.
- Page 106 4.3.1 Your Basal Settings You must program your basal settings before you deliver any basal insulin. Keep a written record of your basal settings. You can program up to 8 basal patterns with the A7+ TouchCare® System. Having more than one pre-set basal pattern makes it easy for you to switch between patterns to cater to your different needs such as weekends, weekdays, shift work, and menstruation.
- Page 107 4.3.2 Edit Your Standard Basal Pattern We recommend that you get acquainted with the Standard basal pattern before using multiple basal patterns. You can set up to 48 basal segments in the Standard basal pattern. Go to the Edit Basal screen. Main Menu➔Settings➔Insulin Pump➔Basal Setup➔Edit Basal Select the Standard pattern to edit it.
- Page 108 The edit screen appears. Tap +Add time segment to add a new segment. Enter the end time for this segment. Then tap Done. Note: ➢ The first basal segment always starts at 00:00 (12:00 am). ➢ The last basal segment always ends at 23:59 (11:59 pm). ➢...
- Page 109 24 Hour Total Note: If all 48 basal segments were added, the +Add time segment button disappears automatically. Set your basal segments as recommended by your healthcare provider. 4.3.3 Check the Current Basal Rate The Home Screen and the Status Screen show the information of the current basal rate.
- Page 110 4.3.4 Review Your Basal Patterns The Basal Review screen shows your daily basal rates of all patterns. Go to the Basal Review screen. Main Menu➔Settings➔Insulin Pump➔Basal Setup➔Basal Review Choose the basal pattern that you want to review. Tap it to review your programmed settings.
- Page 111 4.3.5 Delete a time segment of Basal Pattern 1. Select segment, slide to left on each and a delete button will appear. Tap Delete to delete the selected segment. Slide back to right to close Delete. The last segment cannot be deleted and the starting time of all segments cannot be changed.
- Page 112 4.3.6 Change the time of the Basal Pattern Note: Only the ending time of a segment is editable. 1. Change the ending time point of a segment to a later time point. When the ending time point A of a segment is changed to a later time point B (for example: 12:00 is changed to 15:00), all previous segments between time point A and time point B will be deleted, leaving only the edited segment featuring a period between its original starting time point and ending time point...
- Page 113 2. Change the ending time point of a segment to an earlier time point When the ending time point B of a segment is changed to an earlier time point A, all previous segments between time point A and time point B will be deleted, leaving only the edited segment featuring a period between its original starting time point and ending time point A.
- Page 114 4.3.7 Maximum Basal Rate Maximum (Max) basal rate is a safety limit for the amount of basal insulin to be delivered within an hour. This maximum rate applies to every basal rate that is set, including a temporary basal. Once your basal rates have been set, you cannot set a maximum basal rate that is less than any of the programmed basal rates.
- Page 115 4.4 Suspend and Resume 4.4.1 Suspend Insulin Delivery Sometimes you may need to suspend insulin delivery. When no bolus is being delivered, you can suspend basal insulin delivery for a set period of time. When the Bolus is being delivered, you can choose to suspend all insulin deliveries (basal and bolus) for a set period of time or to just stop the bolus currently being delivered.
- Page 116 Note: When you suspend insulin delivery, Bolus and Temp Basal will be canceled and cannot be resumed. The PDM will give an on-screen message to let you know that insulin delivery is indeed suspended. The remaining suspend time can be found on Home Screen.
- Page 117 b. When a Normal/Extended/Combo Bolus is being delivered. 1. You can choose to suspend all insulin delivery or only the bolus. Main Menu➔Suspend 2. If you select All, the same to the situation when no bolus is being delivered. The feature can stop all insulin. 3.
- Page 118 Stop Normal Bolus Stop Extended Bolus 4.4.2 Resume Insulin Delivery After all insulin delivery is suspended, Tap Resume on the Main Menu screen, and the following screen appears. Slide to resume Basal delivery.
- Page 119 Note: Only basal pattern can be resumed, Bolus and Temp Basal cannot be resumed. 4.5 Insulin Pump Settings Go to Insulin Pump Settings screen. You can turn on or off Insulin Pump, set Pump SN, set Bolus Setup, set Basal Setup and set Pump Alerts. 4.5.1 Add/Change the Pump Base SN Every time you use a new Pump Base, you need to add the Pump Base SN to your PDM.
- Page 120 Tap Pump Base SN to edit it. You can use your PDM to search for your Pump Base (only for the first time), or you can enter the SN printed on your Pump Base manually. The Pump Base SN can only be changed when there is no activated Reservoir Patch.
- Page 121 4.5.3 Basal Setup Tap Basal Setup on the Insulin Pump screen to enter the Basal Setup screen. You can edit basal, check basal review, set preset temp basal and set Max basal. 1. Edit Basal See Section “Basal” in Chapter “How to use Patch Pump” for more information. You can set up to 48 basal rates for any basal pattern.
- Page 122 4.5.4 Pump Alerts 1. Patch Expiration Here you can turn on/off “PATCH EXPIRED” Alarm, “PATCH EXP ADVISORY” Alert, and “PATCH EXP IN 1 HOUR” Alert. When the alerts are turned on, if you do not remove a Reservoir Patch after 72 hours’ use, the “PATCH EXPIRED” Alarm repeats every hour until the system automatically deactivates the current Reservoir Patch after 80 hours’...
- Page 123 A specified number of units that remain in the Reservoir Patch A specified maximum amount of time that remains before the Reservoir Patch will be empty Note: You can set the amount of insulin between 5 U and 50 U with an increment of 1 U.
- Page 124 Note: If you resume insulin delivery manually after the hourly/daily max was exceeded, the previously delivered amount in this hour/day will be cleared and the PDM will record the hourly/daily amount from zero. 4. Auto Off You may program your PDM to automatically suspend basal delivery and give an alarm if the PDM does not receive a Patch Pump status in a set number of hours.
- Page 126 5 Advanced Pump Features 5.1 Bolus Calculator With your input of the number of carbs eaten and your current (actual) BG value, this feature can automatically calculate your Food Bolus and Correction Bolus, based on your Insulin-to-Carbohydrate ratio (I:C ratio), Insulin Sensitivity Factor (ISF), BG Target and the amount of IOB for the current time.
- Page 127 Turn on or off Bolus Calculator. The factory default is off. Note: IC Ratios is the abbreviation for Insulin-to-Carb Ratios. BG is the abbreviation for blood glucose. Insulin to Carb (I:C) Ratios An Insulin to Carb (I:C) ratio features the amount of carbs you can cover with one unit of insulin.
- Page 128 1. The first segment always starts at midnight. The Carbs field is indicated by the blue editable digit. You can tap the blue digit to change it. Note: You can set the carbs between 1.0 g and 200 g. When the carbs is between 1.0 g and 9.9 g, the increment is 0.1 g.
- Page 129 4. When finished, press to save settings. Or Press to cancel setup and exit the edit mode. Insulin Sensitivity An insulin sensitivity factor (ISF) evaluates the blood glucose level you can expect to lower with one unit of insulin. This value is used to calculate a suggested insulin dose to correct a high BG.
- Page 130 3. Continue to set ISF segments as recommended by your healthcare provider. Note: Select segment, slide to left on each and a delete button will appear. Tap delete to delete the selected segment. The first segment cannot be deleted and the starting time of first segment cannot be changed.
- Page 131 2.Tap + Add time segment to create a new segment. Note: Add time segments by choosing from 00:30-23:30 or 12:30A-11:30P, with an increment of 00:30. Note: If +Add time segment does not appear, you have programmed all possible segments. 3.Continue to set the BG Target segments as recommended by your healthcare provider.
- Page 132 The IOB feature shows how much insulin from a previous bolus dose might still be active in your body. The actual amount of insulin left in your body is determined by the rate at which your body utilizes insulin, your infusion site, your activity level, and other factors.
- Page 133 Tap BG value to enter your BG and tap Carbs value to enter your carbohydrate amount. Note: (1) If you are not entering a BG and want a bolus for food, enter only your carbohydrate amount, the bolus calculator feature will calculate an estimate of insulin for your food entry without considering your BG level.
- Page 134 After BG and Carbs input, the recommended Bolus dose according to the Bolus Calculator appears on the right side of the BG value and carbohydrate amount. For example: The following screen appears with the calculated bolus amount. You can adjust the recommended Bolus amount for the Set Bolus as needed. Then choose the Bolus type and tap Next.
- Page 135 See “BG Reminder” in this chapter for more information. Slide to Deliver to begin the bolus delivery. As the Normal Bolus is being delivered, the amount shown on the screen will add up to the actual bolus amount which is delivered. Note: You can cancel an active Normal Bolus (one that is currently being delivered) even after insulin delivery has started.
- Page 136 See the following graphic for a description of the different bolus types. Note: It is important that you consult with your healthcare provider before using a Combo/Extended Bolus. You should be familiar with the basic functions of your PDM before exploring these options. 5.2.1 Combo/Extended Bolus Without Bolus Calculator Calculate your food and/or correction bolus amount.
- Page 137 Tap Type option to choose Extended Bolus. Then tap Next. Enter the amount of time you want the Extended Bolus to last and tap Next. Note: You can set the duration between 30 min and 8 h with an increment of 30 min.
- Page 138 Note: You can set a bolus dose between 0 and the Max Bolus. Note: The number of units you enter for the Combo Bolus is a total amount of Normal Bolus and Extended Bolus units. Tap Type option to choose Combo Bolus. Then tap Next. Tap the blue icon to increase Normal Bolus.
- Page 139 Details of the Combo Bolus will be displayed. Slide to Deliver to start delivery. 5.2.2 Combo/Extended Bolus Using Bolus Calculator If you are using the bolus calculator feature to calculate your extended or Combo Bolus amounts, you will be prompted to enter your BG reading and/or carb intake.
- Page 140 Note: If you need to make any changes in the previous menu, press to return to the previous menu, select Bolus Calculator, and re-enter the values. You can adjust the Set Bolus as needed. Note: You can set a bolus dose between 0 and the Max Bolus. Note: If there is an active Extended Bolus, the extended or Combo Bolus will not be available until the active Extended Bolus finished.
- Page 141 Note: You can set the duration between 30 min and 8 h with an increment of 30 min. Details of the Extended Bolus will be displayed, then slide to deliver to start delivery. Note: The BG Reminder screen will appear if you have BG Reminder turned on. You can accept or modify the time before you are reminded to check your blood glucose after a bolus.
- Page 142 Note: You can set the duration between 30 min and 8 h with an increment of 30 min. Note: The BG Reminder screen will appear if you have BG Reminder turned on. You can accept or modify the time before you are reminded to check your blood glucose after a bolus.
- Page 143 5.3.1 Preset Bolus Setup Go to the Preset Bolus Setup screen. Main Menu➔Settings➔Insulin Pump➔Bolus Setup➔Preset Bolus Setup Select a preset bolus you want to edit. If it has been edited, the current settings will appear. Choose a bolus type. For a Normal Bolus, set the bolus amount. For an Extended Bolus, set the bolus amount and duration.
- Page 144 Tap Save to save the settings. Tap or Home button and tap No to quit the settings. 5.3.2 Deliver a Preset Bolus You must set up a preset bolus before you can deliver it. Go to the Preset Bolus screen. Main Menu➔Bolus➔Preset Bolus The existing preset bolus settings are displayed on this screen.
- Page 145 Verify your preset bolus settings. Start bolus delivery. 5.4 Select a Basal Pattern Go to the Select Pattern screen. Main Menu➔Basal➔Select Pattern Select the desired pattern to activate. 5.5 Temp Basal With a temp basal rate, you can adjust your basal rate for a short period of time to manage glucose levels during temporary activities or different conditions.
Need help?
Do you have a question about the TouchCare A7+ and is the answer not in the manual?
Questions and answers