Table of Contents
Advertisement
Advertisement
Table of Contents

Subscribe to Our Youtube Channel
Related Manuals for FEIYUTECH AK2000S


Summary of Contents for FEIYUTECH AK2000S
- Page 1 3-Axis Stabilized Handheld Gimbal for Camera Instruction EN V 2.0...
-
Page 2: Table Of Contents
Catalogue 1. Product Overview ……………………………………………… 2 2. Start to Use ……………………………………………………… 4 2.1 Charging ……………………………………………………………………… 4 2.2 Unlock and Lock …………………………………………………………… 4 2.3 Camera Installation ………………………………………………………… 6 2.4 Gimbal Balancing …………………………………………………………… 7 2.5 Power ON/OFF ……………………………………………………………… 8 3. Function operation ……………………………………………… 9 3.1 Mode/Function Introduction ………………………………………………... - Page 3 AK2000S is designed with function button and LCD touch screen, which can switch the gimbal working mode, control the rotation and the parameters setting by one hand.
-
Page 4: Product Overview
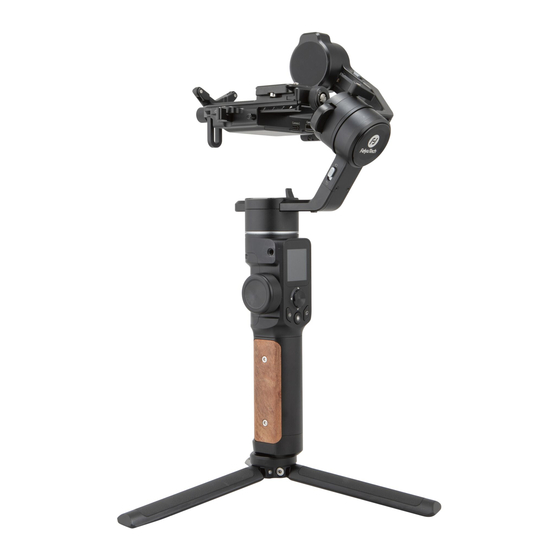
1. Product Overview * This product does not include the camera. www.feiyu-tech.com... - Page 5 Standard kit accessories USB 2.0 to Micro USB 3.0 to Micro 3.0 USB 2.0 to Mini USB 2.0 to Type-C Type-C to Multi (A01)×1 (A02)×1 (B01)×1 (C01)×1 (Sony Shutter Cable) ×1 DC 2.5mm(Panasonic Type-C to TRS 2.5 Anti-slip metal Type-C to TRS 2.5 Shutter Cable)×1 (T02)×1 tripod×1...
-
Page 6: Start To Use
Optional accessories Wireless MIC Kit Hyperlink remote Multifunctional Extension rod×1 Wireless MIC×1 Wireless receiver×1 controller×1 bracket for tilt axis×1 2. Start to Use TIPS 1) Please mount the camera and balance it before Power ON. 2) When the battery is low, please charge the gimbal. 3) When not in use for a long time, power off the gimbal. -
Page 7: Unlock And Lock
2.2 Unlock and Lock Each rotating axes has a position lock for convenient balancing and storage. Be sure to unlock the position locks before using the gimbal. Lock Unlock Step: Stored lock satus Balanced lock satus www.feiyu-tech.com... -
Page 8: Camera Installation
2.3 Camera Installation Camera is ready to shoot. (The lens cover should be removed from the camera and the memory card and battery needs to be inserted to the camera to complete all the connections.) www.feiyu-tech.com... -
Page 9: Gimbal Balancing
2.4 Gimbal Balancing For ideal shooting effects, balancing the gimbal is necessary, and accurate balance will offer longer battery life. TIPS 1) Before balancing the gimbal, please lock the gimbal at the balanced lock status, and the lens cover should be removed from the camera and the memory card needs to be inserted to the camera to complete all the connections to ensure that the camera is ready for shooting. -
Page 10: Power On/Off
2.4.2 Balance roll axis ·Turn the camera lens forward. ·Unlock the safety lock(red). ·Loosen the lock screw (red). ·Move the camera to balance. ·Tighten the lock screw after balanced. 2.4.3 Balance pan axis ·Hold the handle aslant to 15°~20°. ·Loosen the lock screw (red). ·Move the camera to balance. -
Page 11: Function Operation
3. Function operation 3.1 Mode/Function Introduction ① Pan Mode (Default mode) The roll and tilt direction are fixed, and the camera moves according to the left-right movements of the user's hand. ② Follow Mode The roll direction is fixed, and the camera moves according to the left-right or up-down movements of the user's hand. -
Page 12: Button Operation
⑥ Manual Lock Slide the tilt axis to a desired position, and hold on for 0.5 second. Set the camera position accurately and conveniently. ⑦ Auto-rotation mode Auto-rotation mode helps user setup and automatically taketime-lapse photography. It can set rotation route and time. ⑧... - Page 13 3.2.2 Shutter button Button Function Description 1. Focus Single tap (half-way press) Shutter Button 2. Photography Full-way press after focusing. (2stages-way 3. Video recording Single tap(fully tap) start/stop press: half-way press & full-way Long press for 5 seconds, (fully press) ,after press) 4.
- Page 14 Button Function Description 1. Power ON/OFF Long press 2. Lock/ unlock screen/ go back to (Set up the display) Single tap home page Power Button 3. Standby mode Double tap 4. Awaken the gimbal Single tap at standby mode 3.2.6 Trigger button Button Function Description...
-
Page 15: Usb Port
3.3 USB Port There are USB2.0 and Type C port at the fixed plate, which enable to connect to camera/follow focus and other devices. 3.4 Touch Screen 3.4.1 Screen Icon Mode Icon Mode Camera Connected/Photography All Lock Mode Camera Unconnected Pan Mode www.feiyu-tech.com... - Page 16 Icon Mode Icon Mode Video Recording Mode Follow Mode Bluetooth Connected All Follow Mode Bluetooth Unconnected Tilt Axis Enabled Multi-function Knob Dnabled Roll Axis Enabled Multi-function Knob Disabled Pan Axis Enabled Zoom Status Battery Level Follow Focus Status 3.4.2 Display screen switch 3.4.3 Usage of touch screen Slide right to left: Flip to the right sub page.
-
Page 17: Modes Setting
3.5 Modes Setting Description: Slide right to left Slide left to right Tap to select current menu 3.5.1 Inception Mode setting Single tap Inception Mode on screen, the camera lens will rotate to upward. Holding the gimbal horizontally, and set rotation direction/speed/one circle or continuous circle. - Page 18 3.5.3 Protrait setting Holding the gimbal horizontally, tap Portrait on screen to enter protrait shooting. 3.5.4 Other setting Set motor power according to camera weight. Set scene modes according to camera function. Higher sensitivity gives faster reaction of gimbal/camera. System setting www.feiyu-tech.com...
-
Page 19: Motion-Timelapse Mode
3.6 Motion-timelapse Mode 3.6.1 Motion-timelapse setting Method 1: Set the Motion-timelapse mode parameters on Feiyu ON App. Enter the parameter setting interface to select the Motion-timelapse mode for setting. The maximum interval time is 59 seconds, while maximum staying time for long exposure photograhy is 58 seconds. - Page 20 Method 2: Set the Motion-timelapse mode parameters by entering the Motion Timelapse interface on screen. Operate with joystick to set up time setting parameter on touch screen. Minimum time Maximum time Display icon Mode/Status setting setting PAN (T1) Pan axis rotation period 00:00:00 07:59:59 TILT (T2)
- Page 21 (3) Set the end position Rotate the pan or tilt axis to a desired position, hold on for 0.5 seconds. Tap OK on screen to record an end position. (4) Gimbal rotate automatically from the start position to the end position gimbal return the start initial position after setting, and then tilt and pan axis will start to rotate according to the parameter that has been set.
-
Page 22: Initialization
To get more videography skills with gimbal and it's tutorial, please kindly visit our official or download Feiyu ON App. http://www.feiyu-tech.com 3.7 Initialization Initialization the gimbal when: (1) The camera is not in balance. (2) Not use for a long period of time. (3) The surrounding temperature changes abruptly. -
Page 23: Feiyu On App
and/or pan positions are automatically saved. 4. Feiyu ON App 4.1 Download the Feiyu ON App Scan the QR code to download the app, or search for "Feiyu ON" in the App Store or Google Play. Watch tutorials in video skill page on Feiyu ON. * Requires iOS 9.0 or above, Android 6.0 or above. -
Page 24: Firmware Upgrade
Steps: (1) Power on the gimbal. (2) Select Wi-Fi connection menu on camera (find in setting-network-Wi-Fi ), keep this page which has Wi-Fi name and its password on. (3) Login Feiyu ON App (or register). (4) The App will search around the enable devices. It will show connect successful the connection is done, if not, please exit and reconnect again. - Page 25 Repair/update or newly add control cameras/follow USB Hub update focus through USB cable, repair the bugs about camera control, and etc. (Support for AK4500/AK2000S only) Noted: Gimbal has an update protection function. When the update fails, restart the gimbal, it will return to the previous firmware.
-
Page 26: Accessories
5.1 Tripod AK2000S is equiped with 1/4 inch thread hole and 3/8 inch thread hole to mount all type of Tripod for standing shooting. 5.2 Versatile Arm Installation: Install the versatile arm on the handle, align screw holes and tighten the screws by L shape wrench.(it is attached on versatile arm, the end cover of... -
Page 27: Brushless Follow Focus
(2) Tap setting menu on remote controller screen, select bluetooth connection and connect it. (3) After successful connection,the function of AK2000S enable to operate on remote controller, and the tilt/pan movement can follow the movement of the Hyperlink remote controller. -
Page 28: Extension Rod
Notice: The function of horizontal adjustment button is disable for AK2000S. 5.5 Extension Rod It can be used as a mini crane, or take the footage of emulating flying at a low altitude. www.feiyu-tech.com... -
Page 29: Multifunctional Bracket
5.6 Multifunctional Bracket To extra stabilize the camera by mounting it on top of camera and tilt axis. The bracket can be used an extension plate for mounting other accessories on it. 5.7 Wireless MIC Kit The wireless receiver can collect the sound from the wireless microphone within 20m range. - Page 30 How to connect and use it: Usage scenario 1 Step 1: Two way to enter video recording mode: (1) Manually set video mode on camera. (2) Single tap function button to switch to video mode on gimbal, after it connected to camera via cable. Step 2: Plug in the receiver to camera receiver jack and turn it on.
- Page 31 Step 4: Plug the wireless clip-on microphone in the MIC. *Wireless microphone kit can be used without gimbal, and follow the step 2.3.4 to use it. Usage scenario 2 Step 1: Connect with smartphone Plug the wireless microphone (receiving terminal) in DC3.5 CTIA (American Standard)/ OMTP (GB), then plug it in 3.5mm earphone port adapter.
-
Page 32: Specifications
6. Specifications Product Size (well balanced) 151×203.5×372.8mm Max. Tilting Range 230° Max. Rolling Range 360° Max. Panning Range 360° Tilt Follow Speed 2°/s ~ 75°/s Pan Follow Speed 3°/s ~ 150°/s Payload Capability 2200g/4.85 lb (well balanced) About 1100g/2.4 lb (not included the shutter release Weight cable, camera, lens and so forth) Battery... -
Page 33: Compatible Cameras For Reference
Compatible Cameras for Reference AK2000S Lens Compatible List Brand Can be equipped with a lens Lens size & weight Camera(H/W/D) Model Brushless follow Brand Camera (Φ×L) Remark focus + Camera E 10–18mm F4 OSS Φ70mm×63.5mm 225g √ √ FE 12-24mm F4 G Φ87mm×117mm 565g... - Page 34 AK2000S Lens Compatible List Brand Can be equipped with a lens Lens size & weight Camera(H/W/D) Model Brushless follow Brand Camera (Φ×L) Remark focus + Camera LEICA DG SUMMILUX 15mm f/1.7 115g ASPH √ × LEICA DG SUMMILUX 25mm f/1.4 Φ77.7mm×75mm 510g...
-
Page 35: Disclaimer
3.DO NOT disassembly the product except marked detachable. It need send to FeiyuTech after-sales or authorized service center to fix it if you accidently disassembly and cause abnormal work. The relevant costs are borne by user. - Page 36 Official Social Media Website Facebook Youtube Twitter Instagram Website: www.feiyu-tech.com Facebook: www.facebook.com/feiyutech YouTube Channel: www.youtube.com/c/Feiyu-tech Twitter: www.twitter.com/feiyutech Instagram: www.instagram.com/FeiyuTech Online Store: store.feiyu-tech.com www.feiyu-tech.com...
Need help?
Do you have a question about the AK2000S and is the answer not in the manual?
Questions and answers