
Subscribe to Our Youtube Channel
Related Manuals for Avtech AVH516 Plus

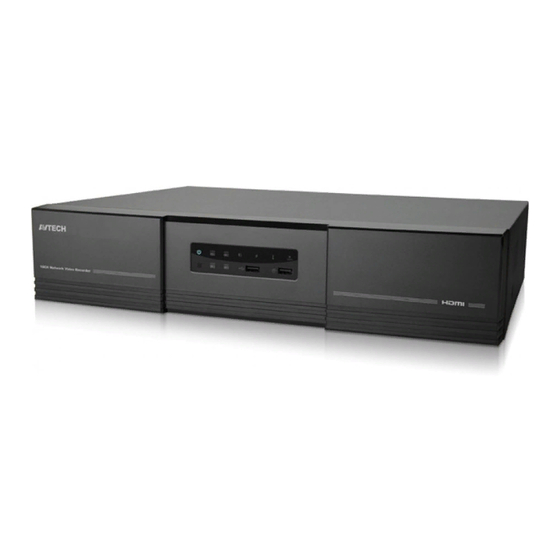
Summary of Contents for Avtech AVH516 Plus
- Page 1 HD VIDEO RECORDER SERIES User Manual Please read instructions thoroughly before operation and retain it for future reference. Online manual download: www.surveillance-download.com/user/h0516plus.swf h516+_516a+_manual_V1.0...
- Page 2 IMPORTANT SAFEGUARD All lead-free products offered by the company comply with the requirements of the European law on the Restriction of Hazardous Substances (RoHS) directive, which means our manufacture processes and products are strictly “lead-free” and without the hazardous substances cited in the directive. The crossed-out wheeled bin mark symbolizes that within the European Union the product must be collected separately at the product end-of-life.
- Page 3 MPEG4 Licensing THIS PRODUCT IS LICENSED UNDER THE MPEG4 VISUAL PATENT PORTFOLIO LICENSE FOR THE PERSONAL AND NON-COMMERCIAL USE OF A CONSUMER FOR (i) ENCODING VIDEO IN COMPLIANCE WITH THE MPEG4 VISUAL STANDARD (“MPEG-4 VIDEO”) AND/OR (ii) DECODING MPEG4 VIDEO THAT WAS ENCODED BY A CONSUMER ENGAGED IN A PERSONAL AND NON-COMMERCIAL ACTIVITY AND/OR WAS OBTAINED FROM A VIDEO PROVIDER LICENSED BY MPEG LA TO PROVIDE MPEG4 VIDEO.
-
Page 4: Table Of Contents
TABLE OF CONTENTS 1. HARDWARE OVERVIEW ........................1 1.1 Front Panel..............................1 1.2 Rear Panel ..............................1 2. CONNECTION............................ 2 2.1 Hard Disk Installation ..........................2 2.2 Camera IP Configurations by LAN ......................3 2.2.1 AUTO Mode..............................3 2.2.2 Static / DHCP Mode ............................5 2.3 Manual Connection Setup ......................... - Page 5 5.4.5 NETWORK ..............................27 5.4.6 DISPLAY ................................30 5.4.7 RECORD................................31 5.4.8 NOTIFY ................................32 5.4.9 MULTICASTING.............................34 5.5 SCHEDULE SETTING ..........................35 5.5.1 RECORD / EVENT / ALARM OUT.........................35 6. REMOTE OPERATION........................36 6.1 Supplied Licensed Software........................36 6.1.1 Installation & Network Connection .........................36 6.1.2 Control Panel Overview ..........................37 6.1.3.
-
Page 6: Front Panel
HARDWARE OVERVIEW 1. HARDWARE OVERVIEW 1.1 Front Panel Note: The functions on the front panel and rear panel may vary, depending on the mode you have. 1) LED indicators Internet The device is connected to Internet. The device is connected to LAN. Alarm An alarm event occurs. -
Page 7: Hardware Overview
HARDWARE OVERVIEW 3) eSATA 1, eSATA 2 & eSATA SWITCH (For selected models only) This device could be used as a NVR to connect a disk array; it could also be used as a disk array to be connected to a NVR for video recording. To know how to switch the mode, please check the table below: Used as…... -
Page 8: Connection
CONNECTION 2. CONNECTION 2.1 Hard Disk Installation Two RAID 5 arrays could be built on this device: HDD 1 ~ 5 as RAID5 array 1, and HDD 6 ~ 10 as RAID5 array 2 Before installing hard disks, make sure: At least 3 hard disks shall be prepared for one RAID 5 array for the RAID5 function to work properly. -
Page 9: Camera Ip Configurations By Lan
CONNECTION 2.2 Camera IP Configurations by LAN 2.2.1 AUTO Mode Auto mode is to simplify the complicated network settings within three minutes. The connection mode of the LAN port is “AUTO” by default. This mode is suitable when the LAN port of the device is connected to a hub. Note: SETTING Path: ADVANCED CONFIG) ... - Page 10 IP camera with its connection status to this device and MAC address. b) Select the IP address which is not used, and select “SETUP”. IP SEARCH PORT TYPE PROTOCOL STATUS 10.1.1.12 00:0e:53:e5:9a:f1 IP CAMERA AVTECH CONNECTED TO CH1 10.1.1.12 UNKNOWN IP CAMERA ONVIF CONNECTED TO CH1 10.1.1.13 00:0e:53:a6:91:18 IP CAMERA...
-
Page 11: Static / Dhcp Mode
CONNECTION 2.2.2 Static / DHCP Mode Note: SETTING Path: ADVANCED CONFIG) NETWORK LAN MODE. When the LAN port of the recorder is connected to a router (not a hub), you can: Choose “Static” when you know the network segment of your router. For example, the IP address of your router of 192.168.0.1, and the network segment of your router will be 192.168.0.xx (xx is ranged from 2 ~ 254). -
Page 12: User Interface
USER INTERFACE 3. USER INTERFACE 3.1 Local Access Connect your USB mouse to one of the USB ports on the front panel, and check if there’s a mouse icon ( ) on the screen, indicating the USB mouse is detected properly. Move your mouse to enter the password with the password keypad. -
Page 13: Channel Status
FREQUENTLY-USED FUNCTIONS 3.2.2 Channel Status Note: The functions shown may vary based on the model or the access user level you use. Auto search on Auto search off Original size Fit to screen Live audio on Audio off Audio playback on Audio playback off Recording PTZ control... -
Page 14: Frequently-Used Functions
You’ll see the list of every connected IP camera with its connection status to this recorder and MAC address. IP SEARCH PORT TYPE PROTOCOL STATUS 10.1.1.12 00:0e:53:e5:9a:f1 IP CAMERA AVTECH CONNECTED TO CH1 10.1.1.12 UNKNOWN IP CAMERA ONVIF CONNECTED TO CH1 10.1.1.13 00:0e:53:a6:91:18... -
Page 15: User Level Creation
FREQUENTLY-USED FUNCTIONS To connect to another IP camera, select the unused IP camera from the IP search list, and select “CONNECT”. Select the channel you want to display the camera images, and click “SAVE” to start connection. CONNECT 10.1.1.14 PORT CHANNEL USER NAME admin... -
Page 16: Ptz Control (1Ch Mode)
FREQUENTLY-USED FUNCTIONS Function User Level SUPERVISOR POWER NORMAL GUEST Quick operation Channel Switch Playback IP Search Power Main menu Quick Start System Event Information Advanced Config. ... -
Page 17: Event Search
REMOTE OPERATION How to set a preset point: Step1: Step2: Click to the proper ratio you need, and click to move to the point you want to configure as a preset point. Step3: Click the numbering you want to configure for this point, and wait till you see (command sending) appearing and disappearing on the device status bar. -
Page 18: Video Backup
REMOTE OPERATION 4.6 Video Backup Note: This function is available for “SUPERVISOR”. For details, please refer to “4.3 User Level Creation” at page 9. Note: Before using the USB flash drive, please use your PC to format the USB flash drive to FAT32 format first. -
Page 19: Convert The File Format To Avi
REMOTE OPERATION 4.7.1 Convert the file format to AVI To convert the video file format to AVI, click “AVI” from the playback panel to start file conversion. Note: The recorded audio (if any) will be removed when the file format is converted to AVI. Note: If the backup video includes data for multiple channels, click to a specific channel for this function to work properly. -
Page 20: Main Menu
MAIN MENU 5. MAIN MENU Note: This menu is available only for “SUPERVISOR”. To know more details, please refer to “4.3 User Level Creation” at page 9. Note: The menu shown here takes a 4CH model as an example. The actual display may vary. 5.1 QUICK START 5.1.1 GENERAL QUICK START... - Page 21 MAIN MENU LIVE QUICK START LIVE MANUAL EVENT TIMER CHANNEL TYPE QUALITY I.P.S. BITRATE G.O.V. (kbps) H.264 2048 H.264 2048 H.264 2048 H.264 2048 REMAINING CAPACITY: 11% EXIT MANUAL QUICK START LIVE MANUAL EVENT TIMER CHANNEL IMAGE SIZE QUALITY I.P.S.
-
Page 22: Time Setup
MAIN MENU 5.1.2 TIME SETUP QUICK START GENERAL DATE 2009 / NOV / 17 TIME SETUP TIME 15 : 35 : 53 SIMULATION NTP SERVER Tock.stdtime.gov.tw SYNC PERIOD DAILY (UTC+08:00)TAIPEI EXIT 1) DATE Set the current date. The default display format is YEAR – MONTH – DATE (Y-M-D). Note: To change the date display format, please refer to “5.2.1 DATE INFO”. -
Page 23: System
MAIN MENU 5.2 SYSTEM 5.2.1 ACCOUNT This function is used to create a new user account, or modify or delete an existing account for different access privilege. Note: For details about available local operations of each user level, please refer to “4.3 User Level Creation”... -
Page 24: System Info
MAIN MENU 4) BACKUP CONFIG / RESTORE CONFIG To keep the current configurations after upgrade, insert a compatible USB flash drive into the USB port, and select “SUBMIT” in “BACKUP CONFIG” to copy the current configurations to a file “System.bin” and save to your USB flash drive. -
Page 25: Backup Schedule
MAIN MENU 5.2.4 BACKUP SCHEDULE This function is used to copy recorded video data or logs from the recorder to a USB flash drive. You might arrange several backup events in the schedule if you want, and the backup starts when a compatible USB flash drive is inserted to this recorder. -
Page 26: Online
MAIN MENU 5.2.5 ONLINE This function is used to configure how the remote access should work. SYSTEM ACCOUNT ANONYMOUS VIEWER LOGIN TOOLS LOGIN WITH CAPTCHA IMAGE SYSTEM INFO MAX ONLINE USER BACKUP SCHEDULE DROP ALL VIDEO CONNECTION SUMIT ONLINE REGULAR REPORT EXIT 1) ANONYMOUS VIEWER LOGIN Switch to “ON”... -
Page 27: Event Information
MAIN MENU Step4: Then, select which time you want to receive reports, which channel(s) you want to see, and which event type(s) you want to see (ALARM / MANUAL / MOTION / SYSTEM / TIMER / INFLOW / OUTFLOW / VIRTUAL FENCE / ONEWAY / SCENE CHANGE / HUMAN DETECTION). -
Page 28: Event Search
MAIN MENU 5.3.2 EVENT SEARCH EVENT INFORMATION QUICK SEARCH DATE 2009/NOV/19 EVENT SEARCH TIME 16:13:16 HDD INFO CHANNEL EVENT LOG HARD DISK ALL HDD EVENT TYPE MOTION SEARCH START EXIT 1) DATE / TIME Select the specific time period that you want to search. 2) CHANNEL Select the video channel you want to search. -
Page 29: Advanced Config
MAIN MENU 5.4 ADVANCED CONFIG 5.4.1 CONNECTION To manually assign the address of your camera connected locally, click “URI” to modify. ADVANCED CONFIG CONNECTION CHANNEL CONFIG CAMERA AVTECH://ip_office.ddns.eagleeyes.tw:80 SETUP DETECTION ONVIF://10.1.1.125:88 SETUP ALERT AVTECH://10.1.1.30:88 SETUP NETWORK AVTECH://10.1.1.12:88 SETUP DISPLAY AVTECH://10.1.1.14:88... -
Page 30: Camera
MAIN MENU 5.4.2 CAMERA ADVANCED CONFIG CONNECTION CAMERA BRIGHTNESS DETECTION CONTRAST ALERT SATURATION NETWORK DISPLAY COV. RECORD NOTIFY REC AUDIO MULTICASTING CHANNEL TITLE EDIT PORT FORWARD ENABLE PORT FORWARD EXIT 1) BRIGHTNESS / CONTRAST / SATURATION / HUE Click the current value to manually adjust the brightness/contrast/saturation/hue of each channel here. 2) COV. -
Page 31: Detection
MAIN MENU 5.4.3 DETECTION ADVANCED CONFIG CONNECTION CH1 CH2 CH3 CH4 CH5 CH6 CH7 CH8 CH9 CH10 CH11 CH12 CH13 CH14 CAMERA ALARM DETECTION SENSITIVITY ALERT NETWORK MOTION DISPLAY AREA EDIT RECORD PRIVACY MASK SETUP NOTIFY REGION OF INTEREST SETUP MULTICASTING EXIT 1) ALARM... -
Page 32: Alert
MAIN MENU Item Description MOSAIC SIZE Choose the mosaic size of the privacy mask. The options are: 8×8, 32×32, and 64×64. NAME Name your privacy mask. FUNCTION Select “On” to enable the privacy mask function. MOSAIC Select “ON” to have the mosaic effect. COLOR Select “ON”... -
Page 33: Network
MAIN MENU 3) KEY BUZZER Select to enable or disable the sound when pressing the buttons on the front panel (ON / OFF). 4) VLOSS BUZZER Select to enable or disable the sound when video loss happened (ON / OFF). 5) MOTION BUZZER Select to enable or disable the sound when any motion alarm is triggered (ON / OFF). - Page 34 MAIN MENU E-MAIL Configure your E-mail account here to send event notifications to the E-mail address(es) specified in “NOTIFY”. Note: To know the SMTP server and port number you should use, please check with your E-mail service provider. ADVANCED CONFIG CONNECTION WAN LAN E-MAIL DDNS NETWORK MONITOR SNMP V1/V2...
- Page 35 MAIN MENU SNMP V1/V2 Select “ON” to enable this function, and enter the names of “READ COMMUNITY” and “WRITE COMMUNITY” based on your NMS configurations. To enable TRAP to notify the management station of important events, choose “V1” or “V2C” in “TRAP ENABLE”, enter the address and community name, and select the event type(s) needed.
-
Page 36: Display
MAIN MENU PROTOCOL Configure the payload length from 100 ~ 10000. The higher the value, the larger data packet is carried, and the longer time is needed for the video to display. The lower the value, the less data packet is carried, and the more possibility you might see video lag. ADVANCED CONFIG CONNECTION WAN LAN E-MAIL DDNS NETWORK MONITOR... -
Page 37: Record
MAIN MENU 6) DISPLAY OUTPUT Select the display resolution you want. There are four options as follows: AUTO (default) 1920 x 1080 1280 x 720 1024 x 768 Note: To have the best image quality on your monitor, make sure (1) the selected DVR output resolution is supported by your monitor, and (2) the output settings on both the LCD monitor and DVR are consistent. -
Page 38: Notify
MAIN MENU 7) RECORD CONFIG Click “SETUP” to enter the setting page individually for manual record, event record and timer record. For details, please refer to “5.1.1 GENERAL” at page 14. 5.4.8 NOTIFY You can configure this recorder to send notifications for certain events to mobile devices with our mobile app, EagleEyes, installed, or to the specified E-mail address(es). - Page 39 MAIN MENU MESSAGE MAIL Note: For E-mail notifications, make sure you have configured an E-mail account in “NETWORK” “E-MAIL” to send the notifications. Enable this function in “ACTION”, select the event type(s) you want to send notifications in “EVENT”, and add the E-mail address(es) to which you want to send notifications in “RECEIVER”.
-
Page 40: Multicasting
MAIN MENU How to check video recording Step1: Open the html file attached. Note: Please accept to install ActiveX control on your computer. Step2: Enter the user name and password to log into this recorder, and select the channel you want. Step3: Click “Open”... -
Page 41: Schedule Setting
MAIN MENU 1) MULTICAST STREAM ADDRESS Configure the addresses used for the three streams per channel. The address range for multicasting is from 224.0.0.0 to 239.255.255.255. Note: The address for each stream per channel should be unique and can’t be the same as other stream in the same channel or other channel. -
Page 42: Remote Operation
REMOTE OPERATION 6. REMOTE OPERATION You can also control the DVR remotely via the supplied licensed software “Video Viewer”, web browser, and your smart phones. 6.1 Supplied Licensed Software The sections below describe frequently-used functions of the Video Viewer. For details about this software and network settings, please download its extended user manual from the following link: www.surveillance-download.com/user/network_setup/network_setup_recorder.pdf 6.1.1 Installation &... -
Page 43: Control Panel Overview
REMOTE OPERATION a) When the network configuration of your DVR is completed, you can access your DVR remotely via Internet. b) Double-click “ ” on your PC desktop to enter the control panel. By defaults, the “Address Book” panel will be displayed on the right side of the control panel. - Page 44 REMOTE OPERATION Full Function Version Main Button Overview Button Function Description Simplified Full Function Click to show the predefined IP address(es). You can add, Address Book remove or search the IP address to log in the DVR remotely. Remote Click to go into the detailed DVR setting. Config Record Click to go to the detailed record setting.
-
Page 45: General Operation
REMOTE OPERATION 6.1.3. General Operation Record To record remotely at the same time for any event or alarm at the DVR side, click “ ” or “ ” → “ ” to go to the “Record Setting” page. In the “Record Setting” page, you can set the following items: ... - Page 46 REMOTE OPERATION To immediately play a recording, select a log from the list, and click “Play”, or double-click the selected log. Network Backup Click “ ” → “ ”, or click “ ” to go into the “Backup” page as follows, and you can select a specific time range or event to make a video backup remotely.
- Page 47 REMOTE OPERATION Function Description Simultaneous Playback To view the backup images simultaneously when the download process is in progress, select the checkbox “Simultaneous Playback”. You will see the backup images while the images are being downloaded to the PC or notebook. To simply backup images without previewing, deselect the checkbox “Simultaneous Playback”.
-
Page 48: E-Map
REMOTE OPERATION 6.1.4. E-Map Video Viewer is also a Central Management System (CMS) software, which allows network device control & management for up to 16 devices simultaneously. Note: Before using this function, make sure Video Viewer is connected to all the devices (up to 16) you want to monitor. - Page 49 REMOTE OPERATION STEP3: When the E-Map group is created, you will see the tree on the top-left panel, showing all the devices you’ve added to this group.
- Page 50 REMOTE OPERATION Icon Description The connected device is camera. When it’s selected, it will become red. The connected device is DVR. When it’s selected, it will become red. For any motion or alarm event, it will appear on the screen to catch your attention. To know what’s happening quickly, double-click the device icon on the E-Map to show the live view.
- Page 51 REMOTE OPERATION For Single E-Map Group Right-click on the group name to show the shortcut menu list, and select “Edit E-MAP” or “Remove E-MAP” as needed. For Building E-Map Group Right-click on the group name to show the shortcut menu list, and select “Edit Building E-MAP”...
- Page 52 REMOTE OPERATION To edit or remove a certain level of the building E-Map group, right click on the level name, and select “Edit E-MAP” or “Remove E-MAP” as needed.
-
Page 53: Web Browser
REMOTE OPERATION 6.2 Web Browser You can view the images or operate your DVR with a web browser, for example, Microsoft Internet Explorer. Note: The supported PC operation systems are Windows 8, Windows 7, Windows Vista & Windows XP. Note: To use Mozilla Firefox or Google Chrome for remote access, please go to Apple’s official website (http://www.apple.com) to download and install QuickTime first. -
Page 54: Mobile Devices
REMOTE OPERATION 6.3 Mobile Devices Note: For more details about mobile surveillance via your mobile device, please visit our official website www.eagleeyescctv.com, or download the instructions of EagleEyes installation and configuration from www.surveillance-download.com/user/eagleeyes_quick.pdf. EagleEyes is a mobile phone program used with our surveillance system for remote surveillance. It has several advantages: ... - Page 55 REMOTE OPERATION Step3: In the setting page, enter all the information needed to access this device in the “REQUIRED” column, and click “Get Type” to examine if the information you entered is correct. The device type will be detected properly. Step4: (Optional) Configure the settings in the “OPTIONAL”...
-
Page 56: Appendix 1 Compatible Usb Flash Drive List
APPENDIX 1 COMPATIBLE USB FLASH DRIVE LIST APPENDIX 1 COMPATIBLE USB FLASH DRIVE LIST Please upgrade the firmware of the recorder to the latest version to ensure the accuracy of the following table. If the USB flash drive is not supported by the recorder, you will see on the screen. -
Page 57: Appendix 2 Compatible Hard Disk List
APPENDIX 2 COMPATIBLE HARD DISK LIST APPENDIX 2 COMPATIBLE HARD DISK LIST Please upgrade the firmware of the device to the latest version to ensure the accuracy of the following table. Note: It’s necessary to install a hard disk first before firmware upgrade to ensure the upgrade process works properly. -
Page 58: Appendix 3 Battery Replacement
APPENDIX 3 BATTERY REPLACEMENT APPENDIX 3 BATTERY REPLACEMENT The time reset after power failure, for example, caused by a power outage, will cause the disorder of the recorded data, and users may have problems in searching the event clip they want. To keep the device time from resetting, a non-chargeable lithium battery, CR2032, is installed in the device. -
Page 59: Appendix 4 Product Specifications
APPENDIX 4 PRODUCT SPECIFICATIONS APPENDIX 4 PRODUCT SPECIFICATIONS Hardware Video Input One LAN port (up to 16 IP cameras) Video Output HDMI Video Output Resolution 1920 x 1080 HDD Storage** Ten 4TB HDDs (5 hard disks as a RAID5 array) eSATA Port YES (1) YES (2) -
Page 60: Appendix 5 Disk Array Compatible List
APPENDIX 5 DISK ARRAY COMPATIBLE LIST APPENDIX 5 DISK ARRAY COMPATIBLE LIST This NVR series has an eSATA interface built-in for external disk array connection. Here's the compatible list for disk arrays. Note: For the compatible hard disks used for those disk arrays listed below, please check their respective user manuals or official websites.
Need help?
Do you have a question about the AVH516 Plus and is the answer not in the manual?
Questions and answers