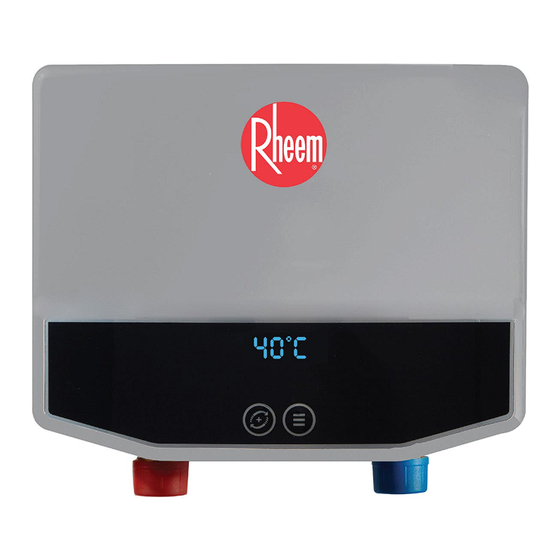
Rheem RTEC-04 E03 Operation And Installation Instructions Manual

Instantaneous

Advertisement

Electric Instantaneous Water Heater
Operation and Installation Instructions
Keep this instruction manual in a safe place once your unit is installed, you may need to refer to it for
general instructions or future maintenance.
Please read and follow the installation and operation instructions carefully, to ensure the long life
and reliable operation of this appliance.

Advertisement

Table of Contents
loading

Summary of Contents for Rheem RTEC-04 E03

  • Page 1 Electric Instantaneous Water Heater Operation and Installation Instructions Keep this instruction manual in a safe place once your unit is installed, you may need to refer to it for general instructions or future maintenance. Please read and follow the installation and operation instructions carefully, to ensure the long life and reliable operation of this appliance.
  • Page 2: Table Of Contents

    CONTENTS Important Safety Instructions -------------------------------------------------------------------------------- page 2 Product Features--------------------------------------------------------------------------------------------------Page 3 Electrical Diagram------------------------------------------------------------------------------------------------ page 4 Technical Data ---------------------------------------------------------------------------------------------------- page 5 Product Inner Structure -----------------------------------------------------------------------------------------page 5 Installation Guideline -------------------------------------------------------------------------------------------page 6 Installation Method-----------------------------------------------------------------------------------------------page 6 Operation Instructions ------------------------------------------------------------------------------------------page 10 Trouble-Shooting---------------------------------------------------------------------------------------------------page 12 Normal Maintenance----------------------------------------------------------------------------------------------page 12 Correct Disposal of this product------------------------------------------------------------------------------page 13 Packing List--------------------------------------------------------------------------------------------------------- page 13 1 / 15...
  • Page 3: Important Safety Instructions

    ■Important Safety Instructions 1. The installation must be in compliance with the National Electrical Code, your local electrical and plumbing codes. 2. This appliance must be EARTHED. (If the model is equipped with plug, it is an electric leakage protection plug). 3.
  • Page 4: Product Features

    WARNING: Do not switch on if there is a possibility that the water in the heater is frozen. ■Product Features This Mini tankless electric water heater differs from a conventional storage type mini water heaters. It doesn’t store hot water. Instead, water is heated instantaneously as it flows through the unit. The powerful heating elements are activated by a flow switch as water is drawn from a hot water faucet connected to the appliance.
  • Page 5: Electrical Diagram

    ■Electrical Diagram 4 / 15...
  • Page 6: Technical Data

    ■Technical Data Model RTEC-04 E03 RTEC-06 E03 Voltage 220V-240V~ Wattage 3500 6500 Rated Current 29.5 Min. required circuit breaker Min. wire size Min. water flow to activate unit L/min Frequency 50 – 60 Working pressure 0.02-0.6 Weight Product Dimensions 198x160x98 Water connections G1/2”...
  • Page 7: Installation Guideline

    ■Installation Guideline The installation must be in compliance with the National Electrical Code, your local electrical and plumbing codes. Make sure the appliance is intact, and the fittings are complete. Check valve is required to be installed at the water inlet. Please make sure the main power supply, water pressure, grounding condition, amperage/current and wire reach the standard of installation requirement.
  • Page 8 Locate an appropriate place on a section of wall as above mentioned. Fig 1 Front and back of the appliance Fig 2 Drill two holes of 6.00mm diameter: if you install the heater upright above the sink, the distance between every two holes is 146mm; if you install the heater upside down under the sink, the distance between every two holes is 139mm.
  • Page 9 Fig3 For Upright Installation, nail in the floor in upper hole (Fig3-A), For Downward Installation, nail in the floor in lower hole (Fig3-B), fix the appliance on the wall with the below nail. Fig3-A:Upward Installation Fig3-B: Upside down Installation Fig4 Fix the appliance on the wall with the fixed nail;...
  • Page 10 Fig5 Then fix the appliance with nail in another hole, to make sure the whole appliance is installed on firm. Fig 5-A: Upward Installation FIG 5-B: Upside down Installation ●Water Connections 1--- All water pipe must comply with national and applicable state and local water pipe codes. 2--- No matter install the appliance upright or handstand, Please connect the inlet connection (blue arrow points to) to the cold water inlet pipe;...
  • Page 11: Operation Instructions

    . ■Operation Instructions Model (RTEC-04 E03, RTEC-06 E03) 1--- Turn on the circuit breaker to bring electrical power to the unit. The LED digital display screen will light. 2--- Turn on the water faucet for a few minutes until water flow is continuous and all air is drained from water pipes.
  • Page 12 3--- After the unit is supplied with power, please turn on the water and then the appliance will start work. The min water flow to activate the unit is 1.5L/min. 4--- Turn off the water flow, the appliance will stop working. It is not necessary to turn off the heater by pressing any key on front panel.
  • Page 13: Trouble-Shooting

    ■Trouble-shooting Problems Possible Cause Corrective Actions 1. Inlet and outlet fittings leaking Fittings not tight Tighten fittings. Rubber washer worn-out Replace rubber washer. 2. LED no signal Power not connected. Connect power to the unit. LED damaged. Change LED. 3. Functional keys not working No water out from shower.
  • Page 14: Correct Disposal Of This Product

    ■Correct Disposal of this product This marking indicates that this product should not be disposed with other household wastes throughout the EU. To prevent possible harm to the environment or human health from uncontrolled waste disposal, recycle it responsibly to promote the sustainable reuse of material resources.
  • Page 15 EX07200-119 14 / 15...

This manual is also suitable for:

Rtec-06 e03

Table of Contents