
Related Manuals for Onyx RCR V2.0


Summary of Contents for Onyx RCR V2.0
- Page 1 OWNER’S MANUAL V2.0 onyxmotorbikes.com 455 Irwin St 265 Sunset Drive. #104 Suite 120 info@onyxmotorbikes.com (805) 370 1991 San Francisco, CA Thousand Oaks, CA 94107 94107...
- Page 3 @onyxmotorbikes electric bike. @onyxmotorbikes We want to thank you for choosing ONYX as your new form of transportation @onyxmotorbikes and recreational use. We welcome you to the ONYX riding community. We hope you use this manual to provide for reference in the operation, inspection ONYX Motorbikes Group facebook.com/groups/...
- Page 4 Riding an electric bike is extremely dangerous. Use of this product can result in serious damage, injury, or death. ONYX products function differently from conventional bicycles and are dangerous. To minimize risk of serious injury, protective equipment should be worn at all times including a helmet.
- Page 5 CONTENTS 08 . QUICK START GUIDE 30 . Operating Controls LET’S GET READY TO RIDE! MODEL RCR FEATURES OVERVIEW CHECKING AND PREPPING THE BIKE FOR THE FIRST RIDE HEADLIGHT BASIC BATTERY CHARGING PROCEDURE BRAKE LIGHT USEFUL RIDING INFORMATION PEDALS BATTERY COVER 16 .
- Page 6 48 . General Maintenance and Service OWNER RESPONSIBILITIES RECOMMENDED MAINTENANCE AND SERVICE SCHEDULE BASIC RCR MODEL MAINTENANCE CLEANING BODY PARTS & SKINS SERVICE CHECK YOUR NUTS & BOLTS CHECK YOUR ELECTRICAL STUFF BRAKE SERVICE WHEEL AND TIRE SERVICE CHAIN AND FREEWHEEL LONG TERM STORAGE 54 .
- Page 7 CALIFORNIA PROPOSITION 65 WARNING: Operating, servicing, or maintaining a passenger vehicle or off-highway motor vehicle can expose you to chemicals including engine exhaust, carbon monoxide, phthal- ates, and lead, which are known to the State of California to cause cancer and birth defects or other reproductive harm.
- Page 8 Lighting for Proper Operation Whether you are a seasoned cyclist or new to the Check Tire Rotation – Should Spin Smooth & Straight electric motorbike scene, riding an ONYX Motorbike is an awesome experience every time and Check Tire Pressure (32 psi F&R) everywhere you get to ride one.
- Page 9 Additionally, even if your locale does not require you to it can be unreliable especially at a full battery charge. So complete any formal training, ONYX Motorbikes strongly always use the regen brake feature with caution. recommends that you take a moped or motorcycle riding course for proper training, especially if you are new to motorbikes in general.
- Page 10 QUICK START GUIDE BASIC BATTERY CHARGING PROCEDURE The battery and cover should be handled with extreme care. Below are the steps for proper removal of the cover and battery so you can charge it fully for the first time. Once you have removed the battery, you will need to use the provided charger to fully charge the cells for about 3-4 hours.
- Page 11 QUICK START GUIDE Now slide the cover as far forward as possible to Unlatch the battery strap and gently place the be able to lift the back of the cover off the bike . buckles on the sides of the bike. WOOD IS NOT METAL.
- Page 12 QUICK START GUIDE To fully remove the battery for charging, grab Make sure the battery is in the “OFF” position. the battery case handle and lift out the front of the Plug in the charger into the wall and then plug in battery first until it clears the top of the bike.
- Page 13 QUICK START GUIDE Plug in the red battery discharge cables. Grab both ends of the battery strap and buckle Do not be alarmed if you forgot to turn off the it back together (adjust for a snug fit if necessary). battery and the connectors spark on contact.
- Page 14 OK to do so without damaging the local vegetation or animal population! Whether you are a seasoned cyclist or new to the electric motorbike scene, riding an ONYX Motorbike Be aware of your surroundings. Remember that is an awesome experience every time and e-bikes are quiet.
- Page 15 QUICK START GUIDE HAND SIGNALS LEFT TURN RIGHT TURN STOP...
- Page 16 SAFETY INFORMATION GENERAL SAFETY INFORMATION OPERATING SAFETY INFORMATION This is a performance electric motorbike and should RCR MODEL Your safety depends in part on the good mechanical be treated with extreme caution. Proper safety gear, condition of the motorcycle. Be sure to follow including a regionally approved helmet, eye protec- the maintenance schedule and adjustment re- tion, riding boots, gloves, and protective clothing...
- Page 17 The motor number starts after the W. VIN NUMBER ONYX will begin to provide VIN numbers in the near future. The Frame Number can be used for registration in some localities. Double check with your local DMV.
- Page 18 STANDARD RCR MODEL TECH SPECS RCR MODEL ONYX Motorbikes reserves the right to make changes to the product information contained on this site at any time without notice, including with respect to equipment, specifications, models, colors, and materials. GENERAL VEHICLE INFORMATION...
- Page 19 GENERAL INFORMATION Headlight Powerful Harley-Style 3-Element LED Bright White Projector Headlight with Halo Ring Running Light Tail Light Bright Red LED Brake Tail Light with Running Light Frame Automotive Grade Steel Tube Chassis and Strong Battery Holder Tray Chassis Display LED Backlit Multi-Function Speedometer, Clock, Odometer, Battery “Gas”...
- Page 20 Battery Pack Cell Matching & Grouping Tolerances Cell Capacity Gap = +/- 30 mah; Cell Voltage Gap = +/- 5 mV; Cell Internal Resistance Gap = +/- 3 mOhm ONYX Battery Management System (BMS) Integrated Battery Battery Management System (BMS manages safe and efficient charging and...
- Page 21 GENERAL INFORMATION Battery Charge Cable Connector Type Metal Case 3-Pin XLR (female) Battery (Charge Cycle) Life Rated for 800 Charge Cycles Battery Charger – Standard Charge Separate External 84 VDC Output, Fixed Output 5 Amp Smart Charger, 110 VAC and 230 VAC Power Cord Battery Charger Output 5 Amps @ 84 VDC (recommended;...
- Page 22 GENERAL INFORMATION MECHANICAL INFORMATION (continued) ITEM SPECIFICATION Frame Automated Robot-Formed and Welded Tubular and Plate Steel Construction Fork Heavy-Duty EBR-Designed Non-Adjustable Motorcycle Fork with Steel Fork Brace Fork Spring Stiffness Heavy-Duty EBR-Designed Non-Adjustable Motorcycle Fork with Steel Fork Brace RCR MODEL Fork Suspension Travel 3”...
- Page 23 GENERAL INFORMATION Rear Brake Rotor Disc Cross-Drilled 205 mm DIA x 1.9 mm THK (8” DIA x 0.07” THK) with 6 Low-Profile Head Mounting Screws Rear Brake Pad Material Semi-Metallic Rear Brake Pad Style Mountain Bicycle (MTB), 34.2 mm x 26.6 mm x 4 mm THK (NOTE: Replacement must match shape and configuration.) Bicycle Gearing 1 x 1-Speed...
- Page 24 GENERAL INFORMATION WHEEL + TIRE INFORMATION ITEM SPECIFICATION Tire Options 17” DIA x 2.75” Wide All-Weather Street (standard) OR 17” DIA x 2.75” Wide Knobby Tires (optional – purchased separately or in DRT Kit Package) Wheel Rim Type 17” DIA x 2.75” W with Laced Spokes RCR MODEL Wheel Spoke Type 12 Gauge Stainless Steel, Silver...
- Page 25 GENERAL INFORMATION 1 – ONYX Motorbike must be used in ECO mode on public roads in order to comply with U.S.A. Federal Class 2 Electric Bicycle requirements under Consumer Product Safety Commission (CPSC) Title 15 - COMMERCE AND TRADE CHAPTER 47 - CON- SUMER PRODUCT SAFETY, Sec.
- Page 26 GENERAL INFORMATION OPTIONAL EQUIPMENT TECH SPECS As we are constantly upgrading our optional equipment, we don’t have specifications for optional equipment at this time but check back in on our website and newsletter for updates. RCR MODEL...
- Page 27 As we are constantly evolving and upgrading our accessories, we don’t have currently specifications on accessories products. However, if you are ordering accessories, most vintage Puch and Yamaha parts will fit our bikes. Threads for ONYX RCR mirror mounts. Left side: M8, standard pitch.
- Page 28 TYPICAL RCR MODEL DISTANCE RANGE The battery gives the bikes an expected range of between 20-75 miles on a single charge for the ONYX RCR Model (15- 40 miles for the CTY Model) depending on the mode you use, the amount of pedaling you do, the terrain, and your size/ weight.
- Page 29 GENERAL INFORMATION PHYSICAL DIMENSIONS SPECIFICATION MEASUREMENT STANDARD RCR SUSPENSION MEASUREMENT “SHORTY” RCR SUSPENSION Overall Length 68” 68” Wheelbase – Center to Center 44.5” 44.5” Overall Height – from Ground to Top of Display 39.25” 37.25” Handlebar Width – Brake Lever Tip to Tip 27”...
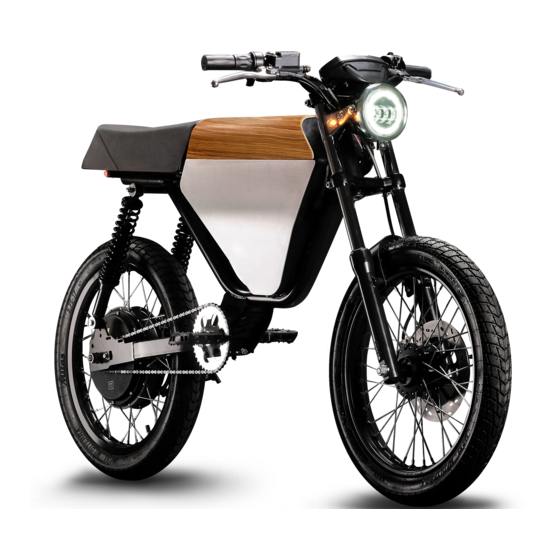
- Page 30 OPERATING CONTROLS RCR MODEL FEATURES OVERVIEW RCR MODEL HEADLIGHT BRAKE LIGHT AC CHARGING PORT ELECTRONICS COMPARTMENT BATTERY COVER BATTERY COVER REAR HUB MOTOR KICKSTAND PEDALS...
- Page 31 OPERATING CONTROLS HEADLIGHT The headlight has two modes, Daylight and High Beam. The headlight is always on for increased visibility and safety. See HANDLEBAR CONTROL OVERVIEW (p. 32) BRAKE LIGHT The brake light is located under the seat. PEDALS Pedals are used to manually propel the bike. Just keep in mind that this is a 145-lb bike with a single gear. BATTERY COVER See BATTERY COVER REMOVAL AND INSTALLATION (p.
- Page 32 OPERATING CONTROLS HANDLEBAR CONTROL OVERVIEW DISPLAY MASTER CYLINDER RIGHT MIRROR MOUNT RCR MODEL LEFT MIRROR MOUNT FRONT BRAKE LEVER REAR BRAKE LEVER HIGH BEAM SWITCH 3/4 THROTTLE TURN SIGNAL SWITCH START BUTTON HORN RIDING MODE SWITCH GO FARTHER BY BRAKING The key to going farther is using regenerative braking system, or the rear brake.
- Page 33 OPERATING CONTROLS LCD DASH DISPLAY OVERVIEW ODOMETER TRIP ODOMETER SPEEDOMETER CLOCK BATTERY VOLTAGE ADJUST BUTTON BATTERY CHARGE LEVEL GAUGE SELECT BUTTON LEFT TURN INDICATOR RIGHT TURN INDICATOR (optional) (optional) POSITION LIGHT INDICATOR HEAD LIGHT HIGH BEAM (not used since Daytime Running Light is always ON) DRIVE MODE INDICATOR...
- Page 34 OPERATING CONTROLS LEFT SIDE CONTROLS REAR REGENERATIVE BRAKE The left brake lever not only controls the rear mechanical brake, but it also controls the regen braking. To activate regen braking you only need to depress the lever slightly to activate the switch. Regen is very effective in not only stopping the bike but also recharging the battery.
- Page 35 OPERATING CONTROLS RIGHT SIDE CONTROLS THROTTLE ON/OFF SWITCH (KILL SWITCH) In total there are three ways to turn off the bike the only way to completely turn off the bike is to turn off the battery or disconnect it from the bike. The kill switch allows the user to quickly turn off the bike by the push of a button on the throttle.
- Page 36 OPERATING CONTROLS KEY-FOB BUTTON LAYOUT POWER OFF TO STANDBY POWER ON / OFF / ARM 1: Press the Unlock button once on the key fob and a au- Each bike comes equipped with two key fob dible chirp should sound to confirm you have deactivated remotes that can turn on and off the main power the system.
- Page 37 OPERATING CONTROLS Lock Button Unlock Button Alarm Bolt Button...
- Page 38 OPERATING CONTROLS BATTERY AND CHARGER OVERVIEW BATTERY HANDLE RCR MODEL BATTERY ON/OFF SWITCH RED BATTERY CONNECTORS BATTERY CHARGER DONGLE...
- Page 39 OPERATING CONTROLS BATTERY COVER REMOVAL The battery cover is made of solid bamboo and should be handled with extreme care. Below are the steps for proper removal of the cover so you do not break the cover. Never force, pry, or hit the cover or you could cause major damage to the wood.
- Page 40 OPERATING CONTROLS BATTERY REMOVAL Removing the battery is very easy but you need to take extreme caution when doing anything related to the battery. Below are the steps to safely remove the battery for charging it off the bike. Turn the battery switch to the “OFF” position. Never attempt to unplug the battery with the RCR MODEL battery switch in the “ON”...
- Page 41 OPERATING CONTROLS BATTERY INSTALLATION To install the battery, follow the removal steps in reverse using extreme care. 1: Always make sure the battery switch is in the “OFF” position before installing the battery. Place the back end of the battery on the battery tray first then let down the front gently moving the cables into the bike.
- Page 42 OPERATING CONTROLS BATTERY COVER INSTALLATION The battery cover is made of solid bamboo and should be handled with extreme care. Below are the steps for proper installation of the cover so you do not break the cover. Never force, pry, or hit the cover or you could cause major damage to the wood.
- Page 43 OPERATING CONTROLS Lower the front of the cover down and slide the cover as far back as possible so that the front tongue latch can clear the front latch plate. : Once the front latch is clear of the front latch plate you can slide the cover forward to toe in the front tongue.
- Page 44 OPERATING CONTROLS BATTERY CARE, MAINTENANCE + SAFETY TIPS Maintaining and caring for your battery will help prolong it’s life while promoting safe and efficient use. Below are some of the top tips for keeping a healthy battery. RCR MODEL + Never leave your battery on the charger after it is + Keep the bike off while charging the battery in the bike.
- Page 45 OPERATING CONTROLS OPTIONAL ACCESSORIES OVERVIEW TURN INDICATOR LIGHTS REARVIEW MIRRORS FRONT FORK GAITERS HEADLIGHT GRILL FRONT FENDER REAR FENDER WITH INTEGRATED BRAKE LIGHT REAR RACK...
- Page 46 OPERATING INSTRUCTIONS GENERAL OPERATION RCR MODEL Prop the bike on its kickstand. THROTTLE The speed of the bike is controlled with a twist grip Remove the wood cover to turn on the battery on the right side of the handlebar. To accelerate then replace the cover.
- Page 47 OPERATING INSTRUCTIONS STOP AND PARK Release the throttle and simultaneously apply both brakes to stop. Switch off engine with the kill switch. Turn off the bike with the key-fob. Rest the bike on the kickstand and set the alarm. It is highly recom- mended to lock the bike with a New York chain lock and use a front disc brake lock for added security.
- Page 48 RCR MODEL OWNER RESPONSIBILITIES SERVICE SHOP CONSIDERATIONS Take care of your ONYX Motorbike, and it will take If these procedures outlined in the maintenance care of you! Provide routine care for your ONYX bike and service schedule are beyond your ability, bring as detailed in this chapter.
- Page 49 MAINTENANCE RECOMMENDED MAINTENANCE + SERVICE SCHEDULE 1 MONTH 6 MONTHS 12 MONTHS 24 MONTHS SERVICE EVERY RIDE (or 30 HOURS) (or 100 HOURS) (or 200 HOURS) (or 400 HOURS) Check the Headlight, Tail Light for Proper Operation Check Tire Pressure (32 psi F&R) Check Front Brake &...
- Page 50 FASTENER LOCATION HANDLEBAR CLAMP RCR MODEL TRIPLE TREE BOLTS FRONT BRAKE PLATE FRONT AXLE NUT LOWER SHOCK MOUNT REAR AXLE NUT REAR AXLE STAY...
- Page 51 TORQUE SPECIFICATIONS It’s good practice to periodically check over your bike for loose nuts. Below is a table of torque specifications for various fasteners on your bike. FASTENER TORQUE NOTES Handlebar Clamp 12nm Triple Tree Bolts 30nm Front Brake Plate 30nm Front Axle Nut 80nm...
- Page 52 Inspect all electronic components in on the bike and under SPECS document for hardware and tightening infor- the battery cover for functionality. mation for your ONYX Motorbike. ALARM KEY FOB BATTERY REPLACEMENT Using a fine tip flat head screw driver pop the two chrome PARTS + FAIRINGS SERVICE sides off, starting from the top of the remote.
- Page 53 MAINTENANCE BRAKE SERVICE REPLACING THE REAR TIRE + TUBE INSTALLING THE REAR WHEEL FRONT BRAKE The front brake is hydraulic and require brake fluid to opperate. You should always check to make sure your brake CHAIN + FREE WHEEL resivour has enough fluid in it to opperate properly or you will eventually lose your ability to stop with the front brake.
- Page 54 TROUBLESHOOTING ELECTRIC MOTORBIKE PRECAUTIONS Your ONYX Motorbike has high voltage components. The high voltage used by these components is dangerous and can RCR MODEL cause personal injury, severe burns, electric shock and even fatal injury unless appropriate precautions are taken.
- Page 55 GENERAL PERFORMANCE CONCERNS SPEED CONTROLLER ERROR CODES UNRESPONSIVE THROTTLE HORN AND/OR RUNNING LIGHTS DO NOT WORK Likely the left brake lever is stuck, activating the brake Check the connectors and see if they have disconnected light and the regen braking. Regen braking prevents the and need to be reattached.
- Page 56 CHAIN IS LOOSE OR POPS OFF THE GEARS ADDITIONAL TROUBLESHOOTING The rear wheel might have become loose, allowing the RESOURCES wheel to slide forward and making the chain loose. Below are some helpful links to further trouble- shoot your bike and gain more knowledge of how your bike functions.
- Page 58 God, or any other cause of a similar nature beyond Onyx’s control. Under no circumstances will ONYX be liable for damages due to loss of use, loss of business or profits, or for any other incidental or consequential damages. Some states do not allow the exclusion or limitation of incidental or consequen- tial damages, so the above limitation may not apply.
- Page 59 ONYX is proud and confident of its dealers and products, and wants to assure that each new ONYX owner receives full satisfac- tion. In the event that satisfaction is not obtained at the dealer level, however, the original consumer is invited to contact ONYX...
- Page 60 NOTES RCR MODEL...
- Page 61 FIRST RESPONDER INFORMATION HIGH VOLTAGE COMPONENT LOCATIONS NEVER cut any high voltage cables or cabling. High voltage cables can hold charge for up to 60 seconds after disabling the vehicle.
- Page 62 MO PED S AR E BA CK ! onyxmotorbikes.com @onyxmotorbikes THIS MANUAL WAS LAST UPDATED info@onyxmotorbikes.com @onyxmotorbikes JUNE 2020 @onyxmotorbikes...
Need help?
Do you have a question about the RCR V2.0 and is the answer not in the manual?
Questions and answers