Table of Contents
Advertisement
Advertisement
Table of Contents

Related Manuals for Spatech LUXE

Summary of Contents for Spatech LUXE
- Page 1 User Manual...
-
Page 2: Receiving And Inspection
TRADEMARK DISCLAIMER LUXE is the registered trademarks of Spatech, Inc. Reproduction or reuse of part or all of trademarks are expressly prohibited without written permission from Spatech, Inc. Due to limitation of the printing process, product colors shown might look different from actual colors. Spatech will not be responsible for any misprint of this advertisement. -
Page 3: Table Of Contents
....................RECEIVING AND INSPECTION: ......................SAFETY PRECAUTIONS: PARTS ....................Identifying Parts for LUXE Model INSTALLATION ..................Spa to Spa Recommended Clearance: ..........................Wall Clearance: ................. Manicure Tray/ Armrest / Back Rest Installation ......................Up/Down Swinging Armrest: ............................ Back Rest: ...................... -
Page 4: Safety Precautions
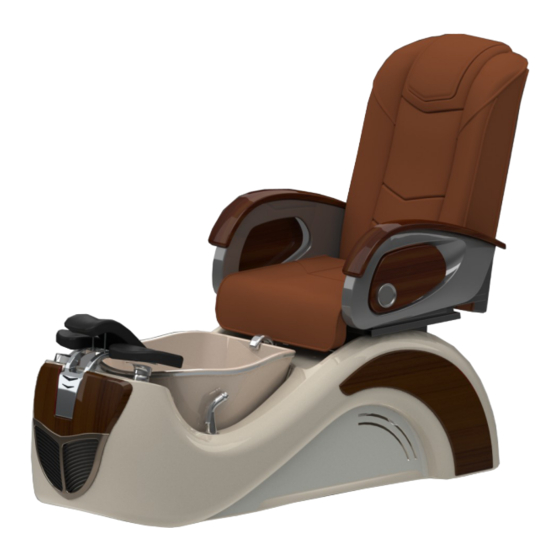
Discontinue use of the bowl until proper equipment is replaced. You may be held accountable for any injury that may occur. Spatech, Inc. is not liable for any injury that may occur. STATES’ NOTICE In the common wealth of most of the States, all pedicure spas shall be installed for Commercial usage in the states, are required to have backflow preventer. - Page 5 10. Dual Function Auto-Fill & Jet On/Off Knob 4. Massage Remote Control 11. Flex Water Filler/Spray Spout 12. Up/Down Armrest 5. Manicure-Tray 6. Angelic Bowl 13. Handbag (Purse) Hook 7. Calf Support 14. Tub Light 4 | User Manual Spatech...
- Page 6 58” 52” 22” User Manual Spatech | 5...
-
Page 7: Manicure Tray/ Armrest / Back Rest Installation
MANICURE TRAY/ ARMREST / BACK REST INSTALLATION Up/Down Swinging Armrest: Plug-In the manicure trays and attach the purse hook. (1 Supplied) 6 | User Manual Spatech... -
Page 8: Back Rest
1. To set backrest up: Lift up the backrest until a “Click” is heard. Make sure the lever is locked- before operating. 2. To fold down backrest: Lift up lever handle located on the left side / bottom of Chair. User Manual Spatech | 7... - Page 9 8 | User Manual Spatech...
- Page 10 User Manual Spatech | 9...
-
Page 11: Hot And Cold Water Supply Lines
*** Vaccum Breaker Due to Town and/or State requirement/s are varies in building code, if the Town and /or State requires Vaccum Breaker, As the Plumber MUST provide Vaccum Breaker according to building code requirement. 10 | User Manual Spatech... - Page 12 Using ¾” schedule 40 PVC (Power Drain) or 1 ¼” flex tube (Gravity Drain) and appropriate P-Traps connect drain to meet local plumbing codes. Rubber connection to the drain should be removable for easy service and should not be permanent to prevent damages. Drain System Recommendation 20” 20” User Manual Spatech | 11...
-
Page 13: Electrical And Pedicure Spa Component Specifications
• Depending on pedicure spa model, arms may swing open, swing up / down or slide forward / backward. SPECIFICATIONS Spa Dimensions & Weights All Spa (seat up-right): L≈51”-52”(129-132cm), LUXE model Length = 52” Adjustable Stool (127cm) W=22”(56cm) w/ Tray ≈45”-46”(114-116cm) H=58”(147cm) *Clearance of 18”... -
Page 14: Operation And Care
WARRANTY IS VOID IF THE PUMP HAS BEEN RUNNING DRY NOTE: Whirlpool action can cause even small amounts of soap or body oil to foam excessively. For this reason, refrain from using these products during the whirlpool cycle. User Manual Spatech | 13... - Page 15 2. When installing motor, first apply moderate pressure to motor to engage motor lips (4) with housing slots (4), then twist motor counterclockwise until secured. 14 | User Manual Spatech...
-
Page 16: Massage System & Remote Controller
4. Press Intensity button to select tapping intensity. 5. Button/LED is an option. Pressing this button will resume with Tapping action. 6. Press any chair button (Recline, Incline, Backward, Forward) to move the chair to desired positions. User Manual Spatech | 15... - Page 17 4 screws as Fig.3 Lift up back massage to engage locking device. (Manually adjust actuator rod to lock as needed) Install back cushions. Plug AC cord to power strip Located inside of the tub base. 16 | User Manual Spatech...
-
Page 18: Safety Requirements For Pedicure Spas
2. The spa system shall be flushed with the bleach and water solution, or Sodium Hypochlorite solution, for 5-10 minutes and allowed to sit for 6-10 hours. 3. The spa system shall be drained and flushed with water before use upon a patron. User Manual Spatech | 17... -
Page 19: Warranty
LIMITED DAMAGES: Allowed by law, Spatech will fully extend its options to disclaim and refuse any liability for substantial damages including, but not limited to, loss of business reputation, decrease in profits, or any fastidious damages other than these limited damages. In some states, the mentioned damages are not allowed to lawfully sustain;... - Page 20 Warning PROPER INSTALLATION ACCORDING TO THIS MANUAL IS REQUIRED. FAILURE TO DO SO MAY RESULT IN SERIOUS INJURY AND/OR WARRANTY WILL BE NULL. YOU MUST HAVE A QUALIFIED LICENSED PLUMBER TO CONNECT THE SPA IN PLACE SAFELY. UL SAFETY RECOGNIZED FOR UNITED STATES AND CANADA. ©2016 All Rights Reserved.
Need help?
Do you have a question about the LUXE and is the answer not in the manual?
Questions and answers