Table of Contents
Advertisement
Advertisement
Table of Contents

Related Manuals for Workzone WZ-TB 13 L


Summary of Contents for Workzone WZ-TB 13 L
- Page 1 User Manual BENCH DRILL WZ-TB 13 L Original instructions ID: #05007...
-
Page 2: Table Of Contents
Contents Overview .................. 3 Use ..................... 4 Pack contents/device parts ............. 6 General information ..............7 Reading and storing the user manual ........7 Explanation of symbols ..............7 Safety ..................8 Proper use ..................8 Residual risks ...................9 General safety notes for power tools ...........9 Safety notes for drills ..............12 Safety notes for the line laser ............. -
Page 6: Pack Contents/Device Parts
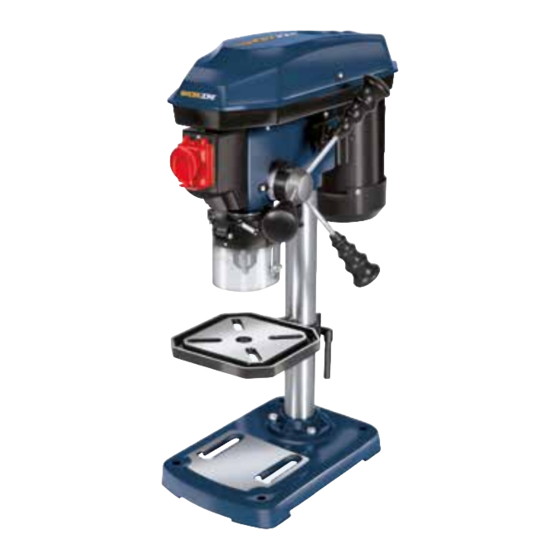
Product contents/device parts Protective hood Emergency stop switch Clamping screw for setting the drilling Locking screw depth, 2× Motor Vice Fixing screw, 2×; washer, 4×; Tensioning screw for the motor spring washer, 2×; nut, 2× Handle fixture Hexagon screw, 3× Handle, 3×... -
Page 7: Use
General information General information Reading and storing the user manual This user manual accompanies this bench drill WZ-TB 13 L (hereinafter referred to simply as “drill”). It contains important information on safety, usage and care. Read the user manual carefully before using the drill. Pay particular attention to the safety instructions and warnings. -
Page 8: Safety
Safety Wear a dust mask. Wear ear protection. If applicable, wear a hair net or cap to prevent your hair from getting caught in rotating parts. This device complies with protection class I. Products marked with this warning notice are laser devices VORSICHT ! - LASERSTRAHLUNG ! Nicht in den Strahl blicken! of class 2 with a wavelength of 650 nm and comply with EN... -
Page 9: Residual Risks
Safety • Usage of accessories and spare parts which are not intended for the drill; • Modifications to the drill; • Repairs to the drill by parties other than the manufacturer or a qualified professional; • Use of the drill for commercial or industrial applications as well as in connection with the trades;... - Page 10 Safety c) Keep children and other persons away from the power tool while you are using it. If you are distracted, you could lose control of the power tool. Electrical safety a) The connector plug for the power tool must fit in the socket. The plug must not be modified in any way.
- Page 11 Safety c) Avoid accidentally activating the device. Make sure that the power tool is turned off before you connect it to the power supply and/or the rechargeable battery, pick it up or carry it. Carrying power tools with your finger on the switch or connecting the power tool to a power supply while the switch is set to “on”...
-
Page 12: Safety Notes For Drills
Safety d) Keep unused power tools out of the reach of children. Do not let any individual who is not familiar with the power tool or who has not read these instructions operate this power tool. Power tools are dangerous in the hands of untrained users. e) Maintain power tools and insertion tools with care. -
Page 13: Safety Notes For The Line Laser
Safety e) The drill must be rotating before you guide it towards the workpiece. Otherwise, the drill can get caught in the workpiece, thus causing the workpiece to move unexpectedly as well as injuries. f) If the drill jams, stop pushing it down and turn off the power tool. -
Page 14: Supplementary Safety Instructions
Safety − Batteries must not be charged, opened, thrown into fire, short circuited or reactivated by other means. − Avoid contact with skin, eyes and mucus membranes. In the event of contact with battery acid, the affected area must be rinsed immediately with plenty of clean water and a doctor must be consulted immediately. - Page 15 Safety − Only open the housing to the extent described in this user manual. Have qualified professionals perform repairs. Contact a qualified workshop for this. Liability and warranty claims are waived in the event of repairs performed by the user, improper connection or incorrect operation. −...
-
Page 16: Check The Drill And Package Contents
Check the drill and package contents Check the drill and package contents Parts of the drill are greased to provide protection against corrosion. • Wear suitable work clothing. Place all parts on a piece of cardboard or similar. 1. Lift the drill out of the packaging using both hands. 2. -
Page 17: First Use
First use 7. Screw all three handles into the (see fig. K). handle fixture 8. Use 4 screws and washers (not included in the product contents) to secure the base plate on the base. The type and size of the screws differ depending on the base used. -
Page 18: Preparations
Operation Preparations 1. Fold the protective hood 2. Use the enclosed chuck key to loosen the jaws of the chuck 3. From below, insert the drill bit/tool vertically in the chuck opening and use the chuck key to tighten the chuck jaws. Then be absolutely sure to pull out the chuck key. -
Page 19: Setting The Speed
Operation − Unlock the emergency stop switch by pushing it upwards. − Only operate the drill again after the risk leading to the activation of the emergency stop switch has been rectified. − Only switch the drill back on once you are convinced that the drill is in proper working condition. - Page 20 Operation 2. Loosen the locking screw of the protective hood by turning it anticlockwise with the hex key 3. Fold the protective hood up. SPINDLE MOTOR 4. Loosen the two tensioning screws for the motor 5. Push the tension lever for the V-belt to the side so that the motor pushed towards the machine body.
-
Page 21: Speed Table
Operation Position Revolutions per minute Position Revolutions per minute 1030 1600 1930 2410 7. To tension the V-belts, push the tension lever for the V-belt to the other side so that the motor is pushed back again. 8. Tighten the two tensioning screws for the motor again. -
Page 22: Setting The Height Of The Protective Hood
Operation Setting the height of the protective hood The protective hood protects you against projectile chips. Before you start drilling, it must be set in such a way that the point where you intend to drill is closed off as much as possible. -
Page 23: Setting The Drill Depth
Operation Adjusting the height 1. Hold the drilling table in place with one hand. 2. With the other hand, loosen the rotary knob for setting the height which fixes the drilling table on the drill column somewhat. 3. Position the drilling table at the desired height. 4. -
Page 24: Drilling Workpieces
Operation 3. To set the two line lasers in such a way that they form a laser cross precisely on the drilling location, lower the drill bit onto the workpiece before start-up. 4. Set the two line lasers with the rotating bezels in such a way that the two line lasers cross on the workpiece, directly on the supporting surface of the drill bit. -
Page 25: Tips For Best Results When Drilling
Operation WARNING! Burn hazard! The drill bit or fitted tool may be very hot directly after drilling. − Wear suitable work gloves or wait a moment until the drill bit or fitted tool have cooled off before changing them. WARNING! Health hazard! Some work materials pose a health hazard. -
Page 26: Removing Blockages
Cleaning and maintenance Chip breaking − In many cases, excessively long drill chips can be broken. Whilst drilling, guide the chuck using the fitted drill bit out of the drilling hole so that the drilling chip comes out by itself. Removing blockages •... - Page 27 Cleaning and maintenance NOTICE! Risk of damage! Improperly cleaning the drill may damage it. − Do not use any aggressive cleaners, brushes with metal or nylon bristles or sharp or metallic cleaning utensils such as knives, hard scrapers and the like. They could damage the surfaces. −...
-
Page 28: Storage
Storage Checking the condition of the grinder Regularly check the condition of the drill. Among other things, check to make sure: − that the switches are not damaged, − that the accessories are in proper condition, − that the mains cord and the mains plug are not damaged, −... -
Page 29: Troubleshooting
The right speed has not been − Set the correct speed. clamped in place. selected. Technical data Model: WZ-TB 13 L Article number: 97015 Operating voltage: 230 V~, 50 Hz Output: S1 300 W · S2 500 W Short operation: S2 15 minutes;... -
Page 30: Noise Information
Noise information Noise information WARNING! Health hazard! Working without ear protection and suitable protective clothing poses a health hazard. − Wear ear protection and suitable protective clothing when working with the device. Measured as per EN ISO 3744. The noise at your workplace may exceed 85 dB(A); protective measures are necessary in this case (wear suitable ear protection). -
Page 31: Disposal
Disposal Disposal Disposing of the packaging Dispose of the packaging separated into single type materials. Dispose of paperboard and cardboard with wastepaper and plastics with recy- clable waste. Widely Not Yet Recycled Recycled Disposing of the drill − Dispose of the drill in accordance with the regulations in your country. Old devices must not be disposed of with household waste! This symbol indicates that this product must not be disposed of together with domestic waste in compliance with the Directive... -
Page 32: Declaration Of Conformity
EÚ a noriem pre výrobok Lýsir uppfyllingu EU-reglna og annarra staðla vöru a cikkekhez az EU-irányvonal és Normák szerint a következő konformitást jelenti ki Bench Drill WZ-TB 13 L (WORKZONE) 2014/29/EU 2006/42/EC Annex IV 2005/32/EC_2009/125/EC Noti ed Body: 2014/35/EU Reg. - Page 33 ALDI STORES LTD. PO BOX 26, ATHERSTONE WARWICKSHIRE, CV9 2SH. ALDI STORES (IRELAND) LTD. PO BOX 726, NAAS, CO. KILDARE. Visit us at www.aldi.com AFTER SALES SUPPORT 97015 0044 151 649 1500 0044 1890 946 244 www.einhell.co.uk YEAR MODEL: WARRANTY WZ-TB 13 L 11/2018...
Need help?
Do you have a question about the WZ-TB 13 L and is the answer not in the manual?
Questions and answers