Table of Contents
Advertisement
Advertisement
Table of Contents
Troubleshooting

Related Manuals for LNS FOX WS 2 170

Summary of Contents for LNS FOX WS 2 170
- Page 1 INSTRUCTION AND INSTALLATION MANUAL FOX WS 2 170 / 330 / 700 / 1020 / 1250 F190054000 WS2. 1 3.ANG LNS America, Inc. 4621 East Tech Drive Cincinnati, Ohio 45245 / USA YOUR ”ONE-STOP-SHOP” +1 513-528-5674 FOR MACHINE-TOOL PERIPHERALS LNS@LNSamerica.com...
-
Page 3: Table Of Contents
V1.3 CONTENTS CHAPTER 1: GENERAL INFORMATION ..........1-1 CONTENTS AND CONVENTIONS ..................1-2 SYMBOLS AND TERMINOLOGY ..................1-2 RIGHTS ..........................1-2 WARRANTY .......................... 1-3 SAFETY PRESCRIPTIONS ....................1-4 SAFETY ANALYSIS FOR CORRECT INSTALLATION ............1-5 MAIN SAFETY REGULATIONS ................... 1-5 INFORMATION LABEL DESCRIPTION AND PLACEMENT .......... - Page 4 CHAPTER 7: SPARE PARTS ..............7-1 SPARE PARTS ........................7-2 SPARE FILTER KITS ......................7-2 COMPLETE SPARE PARTS LIST ..................7-3 SERIES WS 2- F190054000...
-
Page 5: Chapter 1: General Information
CHAPTER 1: GENERAL INFORMATION CHAPTER 1: GENERAL INFORMATION SERIES WS 2 - F190054000... -
Page 6: Contents And Conventions
LNS. LNS and its branches cannot be held liable for any damages and problems due to the use of accessories and products other than those supplied or approved by LNS. -
Page 7: Warranty
CHAPTER 1: GENERAL INFORMATION 4. WARRANTY The LNS supplier guarantees its products to be free of defects that may hinder normal use for a period of 365 days starting from the date of installation which, unless otherwise stipulated between the parties, must not take place more than sixty days from the delivery date. -
Page 8: Safety Prescriptions
All individuals who work on this machine, must have read and understood the instructions in this manual. LNS cannot be held liable for any accidents or damages to property due to failure to follow the safety instructions. -
Page 9: Safety Analysis For Correct Installation
CHAPTER 1: GENERAL INFORMATION 6. SAFETY ANALYSIS FOR CORRECT INSTALLATION Consider the following points before installing the machine: Consider the safety procedures that reduce the risk to an acceptable level; Define the fields of application and use and assess what is needed for correct use and/or approach;... -
Page 10: Information Label Description And Placement
CHAPTER 1: GENERAL INFORMATION 8. INFORMATION LABEL DESCRIPTION AND PLACEMENT Label that emphasises the importance of reading the instruction manual where the main safety warnings on electric and mechanical risks can be found. Serial number label which, in addition to identifying the machine, contains data on: weight, power, electric current draw and air flow rate. -
Page 11: Unit Range Of Use
Maximum installation altitude: 1000 m above mean sea level Max. concentration oily mist: 360 mg/m3 Unit integrity LNS is not liable for any damage to the unit due to use in operating conditions different from the ones specified above. SERIES WS 2 - F190054000... - Page 12 CHAPTER 1: GENERAL INFORMATION SERIES WS 2- F190054000...
-
Page 13: Chapter 2: Technical Data / Transport
CHAPTER 2: TECHNICAL DATA / TRANSPORT CHAPTER 2: TECHNICAL DATA / TRANSPORT SERIES WS 2 - F190054000... -
Page 14: Identification And Technical Specifications
test certificate CE compliance declaration anti-vibration mounts and nuts and bolts set 1.2. Accessories Upon request, specific accessories are available for installing the unit. For further information, please contact LNS ITALIA S.R.L. SERIES WS 2- F190054000... -
Page 15: Handling And Transport
2.1. Handling and transporting packed material Personal safety– unit integrity LNS is not liable for any injuries to persons or damage to things caused by handling procedures that are non-compliant or contrary to safety standards. The unit must be handled by properly trained personnel with appropriate lifting and transport equipment chosen according to the weight and shape of the load. -
Page 16: General Specifications
CHAPTER 2: TECHNICAL DATA / TRANSPORT 3. GENERAL SPECIFICATIONS Model WS 2 250 WS 2 500 WS 2 1000 WS 2 1500 WS 2 2000 Frequency [Hz] Nominal air flow rate* [m 1130 1450 1720 1800 2120 Static pressure [Pa] 1420 1260 1800 1720 2300 Sound level [dB(A)] Rotation speed [min... -
Page 17: Dimensions
CHAPTER 2: TECHNICAL DATA / TRANSPORT 6. DIMENSIONS Model ØF ØG N1xN2xØM WS 2 250 332 x 382 x 9 WS 2 500 363 x 395 x 9 WS 2 1000 525 478 x 478 x 9 WS 2 1500 600 552 x 552 x 9 WS 2 2000 663 615 x 615 x 9... - Page 18 CHAPTER 2: TECHNICAL DATA / TRANSPORT SERIES WS 2- F190054000...
-
Page 19: Chapter 3: General Description
CHAPTER 3: GENERAL DESCRIPTION CHAPTER 3: GENERAL DESCRIPTION SERIES WS 2 - F190054000... -
Page 20: Equipment Description And Components
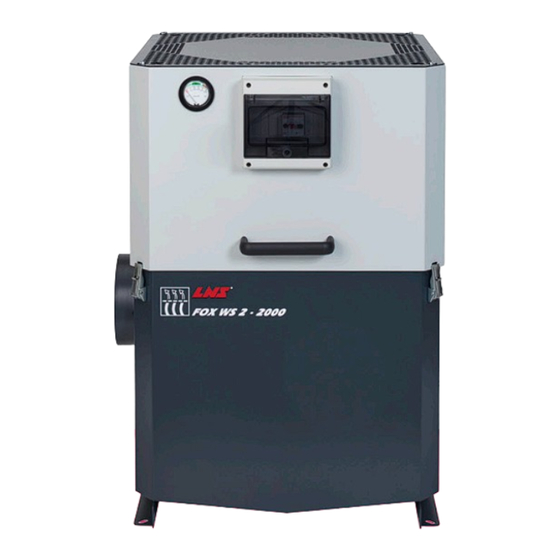
CHAPTER 3: GENERAL DESCRIPTION 1. EQUIPMENT DESCRIPTION AND COMPONENTS Read the safety instructions at the beginning of this instruction manual before performing any operation on the following devices. j) main filter stage a : control panel b : control pressure gauge i :centrifuge impeller... -
Page 21: Component Description
CHAPTER 3: GENERAL DESCRIPTION 2. COMPONENT DESCRIPTION a) Control panel with magnetothermal motor protector switch Additional optional devices can be installed inside the control panel, such as: hour counter indicator lights disconnector (as alternative to motor protector) ... - Page 22 CHAPTER 3: GENERAL DESCRIPTION SERIES WS 2- F190054000...
-
Page 23: Chapter 4: Installation And Use
CHAPTER 4: INSTALLATION AND USE CHAPTER 4: INSTALLATION AND USE SERIES WS 2 - F190054000... -
Page 24: Installation
CHAPTER 4: INSTALLATION AND USE 1. INSTALLATION Personal safety– unit integrity To prevent injuries to persons or damages to things, unit installation must be done by specialised personnel. Before proceeding to install the unit, select an extraction point and installation position in compliance with the following conditions: 1.1. -
Page 25: Unit Installation Point
CHAPTER 4: INSTALLATION AND USE 2. UNIT INSTALLATION POINT 2.1. Direct installation on the machine tool 2.2. Installation on carriage 2.3. Installation on floor rack SERIES WS 2 - F190054000... -
Page 26: Unit Installation
optional drainage trap for drainage tube Other accessories are available. Please contact LNS ITALIA SRL for the full list and relevant prices. For type-a installations, use the dimensions for hole centres for fastening the unit found on the chart and drill four 9 ø... -
Page 27: Extraction And Discharge Ducting
CHAPTER 4: INSTALLATION AND USE EXTRACTION AND DISCHARGE DUCTING 4.1. EXTRACTION Fume extraction point: Find an extraction point that will meet the following conditions as much as possible: Extraction that is opposite to the machine tool loading/unloading door. Extraction done as far as possible from sprayed coolant and projected dust and metal chips. - Page 28 CHAPTER 4: INSTALLATION AND USE Extraction fitting installation Using the screws, nylon washers and nuts, secure the fitting, internal ring and external ring (complete with gasket) on the purifier as illustrated. Be careful to correctly position the gaskets. ...
- Page 29 CHAPTER 4: INSTALLATION AND USE Cap installation Using the nylon washers and nuts, secure the internal and external cap (complete with gasket) on the purifier as illustrated. Be careful to correctly position the gaskets. Gradually tighten the nuts and evenly tighten. ...
- Page 30 CHAPTER 4: INSTALLATION AND USE 90° extraction fitting installation A 90° fitting can be installed in alternative to the standard fitting using the screws and nylon washers as illustrated below: Be careful to correctly position the gaskets. Gradually tighten the screws. ...
- Page 31 CHAPTER 4: INSTALLATION AND USE Install the clamp so that it covers Tighten the clamp. Make sure the clamp covers the the top of the flexible hose. top of the tube threading Insert the tube on the fitting Install the fastening clamp Tighten the clamp.
- Page 32 4-10 CHAPTER 4: INSTALLATION AND USE 4.2. DRAINING Install a drainage trap on the drainage tube following one of the following three methods: Unit integrity Do not use the purifier before installing a drainage trap on the drainage tube! The absence of a trap on the drainage tube and relative pre-loading operation prevents re- condensed liquids from being discharged while the purifier operates.
- Page 33 CHAPTER 4: INSTALLATION AND USE 4-11 b) Trap without drainage bracket If a drainage bracket cannot be used, in order to discharge the re-condensed liquid, make a drainage trap on the flexible discharge hose as indicated in figure ( e-f-g-h). Create a ring that has at least 150 mm diameter and whose highest point is at least 150 mm from the drainage tube.
- Page 34 4-12 CHAPTER 4: INSTALLATION AND USE i) Trap for tube submerged in container liquid Trap initiation After having created the trap, release the two front latches and lift the top part of the purifier. Use a suitable container to remove about 200-300 cc of coolant liquid (oil or emulsion) from the coolant tank.
-
Page 35: Electrical Connections
CHAPTER 4: INSTALLATION AND USE 4-13 5. ELECTRICAL CONNECTIONS Personal safety– unit integrity To prevent injuries to persons or damage to things, the unit electrical connection must be done by qualified electricians in compliance with safety procedures. Before doing the electrical wiring, make sure the line is not powered and cannot be turned on by external personnel. - Page 36 4-14 CHAPTER 4: INSTALLATION AND USE d) Adjusting motor protector e) Tightening cable gland Rotation direction intervention 5.2. Motor protector settings chart Connection voltage Electric motor Current draw Motor protector Model power settings (kW) 400V 50 Hz 0.25 0.78 0.78 230V 50 Hz 0.25 1.35...
- Page 37 CHAPTER 4: INSTALLATION AND USE 4-15 5.3. 6-wire motor electrical connection Note For special electrical plants (remote controls, disconnectors, etc.), refer to the attached documents. 400 V- 460V star electrical connection 200-220-230 V triangle electrical connection Code Description Motor protector switch Protection conductor terminal Electrical terminals on electric motor SERIES WS 2 - F190054000...
-
Page 38: Unit Use
4-16 CHAPTER 4: INSTALLATION AND USE 6. UNIT USE 6.1. Starting and stopping To start up the unit, press the start button on the motor protector switch located on the control panel. To stop the unit, press the off button on the motor protector switch. 6.2. -
Page 39: Chapter 5: Maintenance
CHAPTER 5: MAINTENANCE CHAPTER 5: MAINTENANCE SERIES WS 2 - F190054000... -
Page 40: Information
CHAPTER 5: MAINTENANCE 1. INFORMATION Read the safety instructions at the beginning of this instruction manual before performing any operation on the following devices. Personal safety– unit integrity Before servicing the unit: Press the stop button on the motor protector switch, lock out the start up button, close the protective lid and remove the keys. -
Page 41: Routine Maintenance
CHAPTER 5: MAINTENANCE 3. ROUTINE MAINTENANCE 3.1. Prefilter stage maintenance Release the safety spring and open the latches use the provided handle to lift the movable casing until it opens completely unscrew the prefilter knob remove the entire prefilter Unit integrity Cleaning must not be done with metal tools such as spatulas, brushes or other abrasive objects which may remove or damage the protective layer and sealing of the walls and... - Page 42 CHAPTER 5: MAINTENANCE g) Prefilter removal h) Prefilter replacement: sleeve Prefilter replacement with prefilter installation (WS250- Velcro 1500-2000 only) Expanded metal positioning k) Positioning top part Filter closure with hand wheels 3.1.2. “Oil" prefilter version a) Unscrew the lock hand b) Open the top c) Remove the old filter and wheels...
- Page 43 CHAPTER 5: MAINTENANCE Cleaning drainage slots k) Checking seal Unit integrity Imperfect reassembly of the filter may cause problems in closing the movable part and/or reduced main filter product life. Make sure the prefilter is properly closed! After having checked the correct positioning of each single component, tighten the knobs ...
- Page 44 CHAPTER 5: MAINTENANCE 3.2. Main filter stage maintenance Personal safety Do not remove the main filter for any reason while the unit is on. Removing the main filter while the unit is on will expose you to hazards of a mechanical nature (dragging, cutting, shearing etc.) due to rotation of the impeller.
-
Page 45: Extraordinary Maintenance
CHAPTER 5: MAINTENANCE Note The glass microfibre cartridge cannot be cleaned; replace the entire cartridge when necessary. 4. EXTRAORDINARY MAINTENANCE 4.1. Centrifugal stage maintenance Normally the centrifugal stage does not require maintenance, as the design of the impeller makes that stage self-cleaning with continuous extraction of re-condensed liquids. - Page 46 CHAPTER 5: MAINTENANCE 4.2. Impeller cleaning Personal safety– unit integrity It is advisable to replace screws and washers with new components that are identical to the originals. Original nuts and bolts can only be reused if they are in perfect condition. Comply with the torque specifications and apply the threadlocker as indicated.
- Page 47 CHAPTER 5: MAINTENANCE 4.3. Seal replacement 4.3.1. Main seal Remove the worn or broken seal remove any sealant residue using a sharp blade carefully degrease the contact surfaces on the fixed casing with alcohol or other degreasing product ...
- Page 48 5-10 CHAPTER 5: MAINTENANCE 4.4. Electric motor disassembly and reassembly 4.4.1. Disassembly Remove the impeller as indicated in the Impeller cleaning section remove the 4 screws on the cover of the electric control panel box loosen the screws on the motor's electrical terminals located on the switch or the disconnector ...
-
Page 49: Torque Settings
CHAPTER 5: MAINTENANCE 5-11 5. TORQUE SETTINGS WS 2 250 WS 2 500 WS 2 1000 WS 2 1500 WS 2 2000 Impeller screw 4 Nm 5 Nm 10 Nm 22 Nm 22 Nm Motor nuts and bolts 22 Nm 22 Nm 22 Nm 35 Nm... - Page 50 5-12 CHAPTER 5: MAINTENANCE SERIES WS 2- F190054000...
-
Page 51: Chapter 6: Troubleshooting
CHAPTER 6: TROUBLESHOOTING CHAPTER 6: TROUBLESHOOTING SERIES WS 2 - F190054000... -
Page 52: Troubleshooting
CHAPTER 6: TROUBLESHOOTING 1. TROUBLESHOOTING Possible problems and relative solutions to adopt follow. Our technical department is at your complete disposal for any doubts. Personal safety– unit integrity Before servicing the unit: Press the stop button on the motor protector switch, lock out the start up button, close the protective lid and remove the keys. - Page 53 CHAPTER 6: TROUBLESHOOTING Motor protector switch Excessive motor electric Find the causes of excessive current draw and intervenes current draw or motor correct them. Replace the motor if it short short circuits circuits. SERIES WS 2 - F190054000...
-
Page 54: Disposal And Scrapping
CHAPTER 6: TROUBLESHOOTING 2. DISPOSAL AND SCRAPPING Note To safeguard the environment and avoid fines, we recommend and ask that you abide by the following indications scrupulously. 2.1. Disposal of consumables Materials such as filters and seals that are dirty with oil must be disposed of in compliance with the laws in force on the matter of special waste. -
Page 55: Chapter 7: Spare Parts
CHAPTER 7 SPARE PARTS CHAPTER 7: SPARE PARTS SERIES WS 2... -
Page 56: Spare Parts
CHAPTER 7: SPARE PARTS 1. SPARE PARTS Additions or alterations cannot be made to the machine or its spare parts without written LNS authorisation. LNS cannot be held liable in the event spare parts not supplied by LNS are used. -
Page 57: Complete Spare Parts List
CHAPTER 7 SPARE PARTS 3. COMPLETE SPARE PARTS LIST SERIES WS 2... - Page 58 CHAPTER 7: SPARE PARTS SERIES WS 2...
Need help?
Do you have a question about the FOX WS 2 170 and is the answer not in the manual?
Questions and answers