Table of Contents
Advertisement
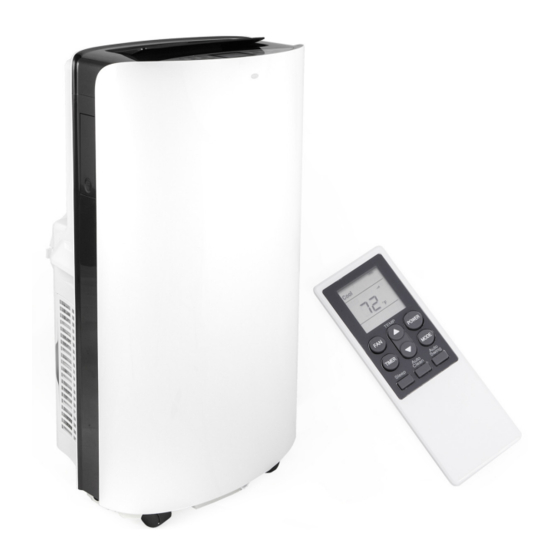
14000BTU MOBILE AIR CONDITIONER
ITEM: 99911
OWNER'S MANUAL AND SAFETY INSTRUCTIONS
SAVE THIS MANUAL: KEEP THIS MANUAL FOR SAFETY WARNINGS, PRECAUTIONS, ASSEMBLY,
OPERATING, INSPECTION, MAINTENANCE AND CLEANING PROCEDURES. WRITE THE PRODUCT'S
SERIAL NUMBER ON THE BACK OF THE MANUAL NEAR THE ASSEMBLY DIAGRAM (OR MONTH
AND YEAR OF PURCHASE IF PRODUCT HAS NO NUMBER).
FOR QUESTIONS PLEASE CALL OUR CUSTOMER SUPPORT: (909) 628 0880 MON-FRI 9AM TO 3PM PST
Advertisement
Table of Contents

Related Manuals for Barton 99911

Summary of Contents for Barton 99911
- Page 1 14000BTU MOBILE AIR CONDITIONER ITEM: 99911 OWNER’S MANUAL AND SAFETY INSTRUCTIONS SAVE THIS MANUAL: KEEP THIS MANUAL FOR SAFETY WARNINGS, PRECAUTIONS, ASSEMBLY, OPERATING, INSPECTION, MAINTENANCE AND CLEANING PROCEDURES. WRITE THE PRODUCT’S SERIAL NUMBER ON THE BACK OF THE MANUAL NEAR THE ASSEMBLY DIAGRAM (OR MONTH AND YEAR OF PURCHASE IF PRODUCT HAS NO NUMBER).
-
Page 2: Important Safety Information
IMPORTANT SAFETY INFORMATION GENERAL SAFETY WARNINGS Read all safety warnings and instructions. Failure to follow the warnings and instructions may result in electric shock, fire and/or serious injury. Save all warnings and instructions for future reference. SAFETY The warnings, precautions, and instructions discussed in this instruction manual cannot cover all possible conditions and situations that may occur. - Page 3 IMPORTANT SAFETY INFORMATION NEVER hit or shake the unit to prevent damage. NEVER spray water or place the unit near water to prevent electric shock. NEVER place the unit near gas appliances, fire or flammable liquids. Two or more people to move or install air conditioner. DO NOT let children play near the unit.
-
Page 4: Product Features
PRODUCT FEATURES Eco-friendly CFC free, lead free and high energy efficiency portable air conditioner, you can stay cool while keeping with better environmental standards and reducing energy consumption. Cools or heats up to a 500 sq. ft. space (ambient temperature and humidity may influence optimum performance); 14,000 BTU cooling capacity and 13,000 BTU heating capacity (outside temp must be above 41F);... - Page 5 DIAGRAM...
-
Page 6: Control Panel Operation
OPERATION CONTROL PANEL OPERATION 1. ENERGIZE THE UNIT : Plug in the unit and all icons on the LCD display window will light up for 2 seconds. Then the LCD display window will show an ambient temperature with a range of 5 - 35°C (41-95°F). The unit is on standby for operation. - Page 7 OPERATION 1. UP and DOWN : Depressing the UP or DOWN buttons once to increase/decrease the temperature 1°C or 1°F. Touching the UP or DOWN button for over 2 seconds will continuously increase/ decrease the temperature by 0.5 second intervals. Temperature setting range is 16~30°C/60-80°F. Depressing the UP or DOWN buttons at the same time will convert celsius degrees to farenheit degrees.
-
Page 8: Features And Parts
FEATURES AND PARTS BEFORE USING YOUR AIR CONDITIONER, INSERT BATTERIES INTO YOUR REMOTE CONTROL Before using your remote, install the AAA batteries into remote control. Use alkaline batteries only. Do not use rechargeable batteries. When replace batteries, always replace both batteries with new batteries, do not mix old and new batteries. -
Page 9: Installation
INSTALLATION Keep this mobile air-conditioner in upright position at least 2 hours before first installation. This air-conditioner may be moved indoor conveniently; keep the unit in upright position while moving it. The air-conditioner shall be placed at flat surface. DO NOT install or operate this air-conditioner in bathroom or other wet environments. INSTALLATION Installation of exhaust hose assembly and its adapter. - Page 10 INSTALLATION 1. Put front end of exhaust hose assembly onto jugged position of exhaust air outlet at back panel, fasteners will lock the exhaust hose assembly. See illustration. 2. Keep the right direction of slant side of adapter, for ease installation of window seal-plate. Make sure to keep the exhaust hose connected in good position.
-
Page 11: Manual Drainage
INSTALLATION 8. Slide the adapter downwards and assure adapter installed in good position. 9. Assure the slant panel direction to match seal-plate direction. 10. The exhaust hose cannot be bent or with flexure higher than 45°, in order to keep good ventilation of exhaust hose NOTE: The exhaust hose is 280mm-1500mm long and this length is determined based on the specification of the air-conditioner (s). -
Page 12: Multiple Protection Functions
MAINTENANCE MULTIPLE PROTECTION FUNCTIONS: 1. Under COOL mode, when the compressor continuously runs over 10 minutes, if tube temperature is <=2°C/36°F for 20 seconds, the anti-frozen protection function will be on, E4 will be shown on LCD display, compressor and water wheel motor will stop working, but upper fan remains running; If tube temperature>=8°C/46°F, the unit will stop anti-frozen protection and recover to the original working condition. -
Page 13: Filter Cleaning
MAINTENANCE FILTER CLEANING: NOTE: Clean the filter once every two weeks, or it would influence the unit function if filter clogged with dust. Grip the filter handle and pull it out gently in correct direction. Clean the dirty particles in filter by cleaner if it is necessary. Immerse and wash the filter gently into warm water (about 40 ) mixed with neutral cleaner, and then rinse and dry them thoroughly in the shade. -
Page 14: Installation Of The Filter
MAINTENANCE INSTALLATION OF THE FILTER: Be sure to install the filter to side panel then for the filter to back panel. Install the filter with opposite direction of removal. Install the filter into place gently to avoid any damage to filter. END OF SEASON STORAGE: 1. -
Page 15: Troubleshooting
TROUBLESHOOTING Please check the unit and suggestions below before asking for professional service, but never dismantle or repair the unit by yourself, it may cause harm to you and your property. Schematic diagram Correct Disposal of this product This marking indicates that the product should not be disposed with other household wastes. -
Page 16: Parts List
PARTS LIST... -
Page 17: Warranty
WARRANTY PLEASE READ THE FOLLOWING CAREFULLY THE MANUFACTURER AND/OR DISTRIBUTOR HAS PROVIDED THE PARTS LIST AND ASSEMBLY DIAGRAM IN THIS MANUAL AS A REFERENCE TOOL ONLY. NEITHER THE MANUFACTURER OR DISTRIBUTOR MAKES ANY REPRESENTATION OR WARRANTY OF ANY KIND TO THE BUYER THAT HE OR SHE IS QUALIFIED TO MAKE ANY REPAIRS TO THE PRODUCT, OR THAT HE OR SHE IS QUALIFIED TO REPLACE ANY PARTS OF THE PRODUCT.
Need help?
Do you have a question about the 99911 and is the answer not in the manual?
Questions and answers
What size is the hoseis this the right coupler/ connector