Table of Contents
Advertisement
Available languages
Available languages
Advertisement
Table of Contents

Related Manuals for Lightmaxx Vector Shaft 7R


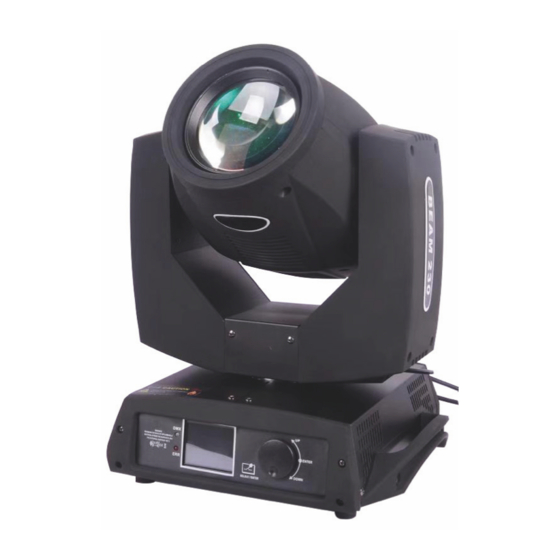
Summary of Contents for Lightmaxx Vector Shaft 7R
- Page 1 Vector Shaft 7R 11/2018 LIG0015713-000 Bedienungsanleitung User Manual...
- Page 2 Wichtige Sicherheitshinweise! Bitte vor Anschluss lesen! • Im Falle von Beschädigungen des Netzkabels muss dieses umgehend gegen ein Original Ersatzteil des Herstellers ersetzt werden. RISK OF ELECTRIC SHOCK DO NOT OPEN • Stellen Sie sicher, dass die Netzspannung nicht höher als die auf dem Gehäuse angegebene Spannung ist.
-
Page 3: Garantie
Herzlichen Glückwunsch zu Ihrem neuen LightmaXX Vector Shaft 7R! Vielen Dank, dass Sie sich für ein Produkt von LightmaXX entschieden haben. Durch effi ziente Entwicklung und ökonomische Produktion ermöglicht LightmaXX hochwertige Produkte zu einem fantastischen Preis. Bitte lesen Sie die Bedienungsanleitung sorgfältig, um über sämtliche Funktionen dieses Produktes informiert zu sein und... - Page 4 Sicherheitshinweise: GEFAHR! (Für Babys und Kinder) Verpackungen, Kunststofffolien und sonstiges Verpackungsmaterial ist ordnungsgemäß aufzubewahren oder zu entsorgen. Es ist aufgrund von Erstickungsgefahr außerhalb der Reichweite von Babys und Kindern aufzubewahren. Stellen Sie sicher, dass Kinder niemals unbeaufsichtigt das Gerät benutzen! Vergewissern Sie sich außerdem, dass Kinder keine (Klein-)Teile vom Gerät ent- fernen, da sie durch verschlucken daran ersticken könnten! GEFAHR! (Elektrischer Schlag durch hohe Spannungen im Gerät)
-
Page 5: Installation
HINWEIS! (Stromversorgung) Überprüfen Sie unbedingt die Übereinstimmung der Gerätespannung mit Ihrer örtlichen Netzspannung. Die Absicherung Ihrer Netzsteckdose mit einem Fehler- stromschutzschalter (FI) wird unbedingt empfohlen. Aufgrund des PowerCon Ein- und Ausgangs können insgesamt max. 4 Vector Shaft 7R mit dem 1. Gerät verbunden & somit mitversorgt werden. Sollten Sie ihr Gerät länger nicht benutzen, trennen Sie das Gerät vom Netz, um Gefahren zu minimieren. - Page 6 Inbetriebnahme: Sämtliche Verbindungen des Gerätes sollten vor dem Einschalten erfolgen. Benutzen Sie für die Verbindungen ausschließlich hochwertige, möglichst kurze Kabel. Konfi guration des DMX Steckers: Widerstand 120 Ohm 1/4W zwischen Pin 2 (DMX-) und Pin 3 (DMX+) der letzten Fixierung. Betriebsart DMX: Verbinden Sie den DMX Eingang Ihres Gerätes mit dem DMX Ausgang Ihres DMX-Controllers, Ihrer DMX Software oder dem DMX Ausgang eines sich bereits in Ihrer DMX Kette befi ndlichen Gerätes.
- Page 7 17 Kanal Modus: DMX Wert: Effekte: Eigenschaften: Farbrad 128-255 Rad dreht sich im Uhrzeigersinn: Linear langsam -> schnell Blau + Weiß Schrittweise Blau Schrittweise CTB8000 + Blau Schrittweise CTB8000 Schrittweise CTO190 + CTB8000 Schrittweise CTO190 Schrittweise CTO260 + CTO190 Schrittweise CTO260 Schrittweise Blau-Grün + CTO260...
- Page 8 CH2 Strobe DMX Wert: Effekte: Eigenschaften: 250-255 Einschalten Schrittweise 240-249 Zufälliger Strobe / schnell -> langsam Schrittweise 230-239 Zufälliger Strobe / mittlere Geschwin- Schrittweise digkeit 220-229 Zufälliger Strobe / langsame Ge- Schrittweise schwindigkeit 210-219 Effekt 2 Schrittweise 200-209 Effekt 1 Schrittweise 192-199 Einschalten...
- Page 9 DMX Wert: Effekte: Eigenschaften: Fixed Gobo 250-255 Gobo 16 Wackeln / langsam -> schnell Linear 249-244 Gobo 15 Wackeln / langsam -> schnell Linear 237-243 Gobo 14 Wackeln / langsam -> schnell Linear 231-236 Gobo 13 Wackeln / langsam -> schnell Linear 224-230 Gobo 12 Wackeln / langsam ->...
- Page 10 CH5 Prism DMX Wert: Effekte: Eigenschaften: load 128-255 Schrittweise 0-127 Schrittweise DMX Wert: Effekte: Eigenschaften: 193-255 Drehung im Uhrzeigersinn / langsam Linear CH6 Prisma -> schnell Drehung 191-192 Stop Schrittweise 128-190 Drehung gegen den Uhrzeigersinn / Linear schnell -> langsam 0-127 0°...
-
Page 11: Anschlüsse Und Bedienelemente
Betriebsart Statisch, Auto oder Sound: Das Gerät beinhaltet automatische Programme, die nach festen Schemata ablaufen (Au) oder über das eingebaute Mikrofon passend zur Musik abgerufen werden (Au). Die Auswahl des jeweiligen Modus erfolgt über das Menü direkt am Gerät. Anschlüsse und Bedienelemente: Bezeichnung Bezeichnung Display... -
Page 12: Bedienung
Bedienung: Menu: Die Navigation im Menu erfolgt über das Jogwheel neben dem Display. Mit Drehen oder Drücken des Jogwheels aktivieren Sie das Menu, die Navigation erfolgt über Drehung des Jogwheels nach links („Up“) und rechts („Down“), die Bestätigung erfolgt über das Drücken des Wheels („Enter“). Die Menüstruktur im Detail: Befestigungsmöglichkeit: Dieses Gerät kann in alle Richtungen der Bühne durch eine Schelle positioniert und fi -... -
Page 13: Spezifikationen
Spezifi kationen: Funktion Vector Shaft 7R LightmaXX Leuchtmittel MSD 7R Farbtemperatur 8000K Effekt Beam Abstrahlwinkel max. 4° Display Spannungsversorgung AC 100-240V, 50/60Hz Leistungsaufnahme 350 Watt Stromanschlüsse PowerCon kompatibel IN/OUT --> ingesamt max. 4 weitere Vector Shaft 7R Geräte können zusätzlich angeschlossen und mitversorgt werden... -
Page 14: Fehlerbehebung
Fehlerbehebung: Hinweis! (Störung bei Datenübertragung) Verbinden Sie auf keinen Fall den DMX Ein- oder Ausgang mit Audiogeräten! DMX Kabel ermöglichen einen störungsfreien Betrieb und höchstmögliche Übertragungssicherheit von Signaldaten. Benutzen Sie keine Mikrofonkabel. Die nachfolgende Übersicht dient als Hilfe für eine schnelle Fehlerbehebung. Sollten Sie sich unsi- cher sein, kontaktieren Sie den Hersteller, den Händler oder entsprechendes Fachpersonal. -
Page 15: Entsorgung Von Batterien
Entsorgung von Verpackungen: Sorgen Sie dafür, dass Papierverpackungen, Kunststoffmaterial, etc. getrennt und den entsprechenden Verwertungen zugeführt werden. Beachten Sie die Kennzeichnungen und die entsprechenden Vorschriften. Entsorgung von Batterien: Batterien gehören nicht in den Müll! Bitte führen Sie Batterien den behördli- chen Vorgaben entsprechenden Sammelstellen oder Entsorgungsstationen zu. - Page 16 Safety Instructions! Please read before connection • If the power cord is damaged, it must be replaced imme- and operation! diately with an original spare part from the manufacturer. • Make sure that the mains voltage is not higher than the RISK OF ELECTRIC SHOCK.
-
Page 17: Scope Of Delivery
Intended use: The product LightmaXX Vector Shaft 7R was designed for use as an electronic lighting effect. The device may only be operated for this purpose and in accordance with the operating instructions. Other purposes as well as operation under other operating conditions are expressly not intended and can lead to damage to property or personal injury! No liability is assumed for damage resulting from improper use. -
Page 18: Safety Instructions
Safety instructions: DANGER! (For babies and children) Packaging, plastic foils and other packaging material is to be properly stored or disposed of. It must be disposed of due to risk of suffocation outside the reach of babies and children to be kept in a safe place. Make sure that children never use the appliance unattended! In addition, make sure that children do not remove any (small) parts from the device, as they could suffocate by swallowing them! - Page 19 (RCD). Due to the PowerCon input and output, a maximum of 4 Vector Shaft 7R can be connected to the 1st device and supplied with power. If you do not use your device for a longer period of time, disconnect the device from the mains to minimize dangers.
- Page 20 Commissioning. All connections of the device should be made before switching on. Only use high-quality cables that are as short as possible for the connections. Confi guration of the DMX connector: Resistance 120 ohm 1/4W between pin 2 (DMX-) and pin 3 (DMX +) of the last fi xture. DMX operating mode: Connect the DMX input of your device to the DMX output of your DMX controller, your DMX soft- ware or the DMX output of a device already in your DMX chain.
- Page 21 17 channel mode: DMX value: Effects: Attribute: color wheel 128-255 Clockwise rotate wheel slow -> fast Linearity Blue + White Single step Blue Single step CTB8000 + Blue Single step CTB8000 Single step CTO190 + CTB8000 Single step CTO190 Single step CTO260 + CTO190 Single step CTO260...
- Page 22 CH2 Strobe DMX value: Effects: Attribute: 250-255 Turn on Single step 240-249 Random strobe / fast -> slow Single step 230-239 Random strobe / medium speed Single step 220-229 Random strobe / slow speed Single step 210-219 Effect 2 Single step 200-209 Effect 1 Single step...
- Page 23 DMX value: Effects: Attribute: Fixed Gobo 250-255 Gobo 16 shake / slow -> fast Linearity 249-244 Gobo 15 shake / slow -> fast Linearity 237-243 Gobo 14 shake / slow -> fast Linearity 231-236 Gobo 13 shake / slow -> fast Linearity 224-230 Gobo 12 shake / slow ->...
- Page 24 CH5 Prism DMX value: Effects: Attribute: load 128-255 Single step 0-127 Single step DMX value: Effects: Attribute: 193-255 Clockwise rotation / slow -> fast Linearity CH6 Prism rotation 191-192 Stop Single step 128-190 Anticlockw. rotation / fast -> slow Linearity 0-127 0°...
-
Page 25: Connections And Controls
Operating mode Auto or Sound: The device contains automatic programs that run according to fi xed patterns (Auto) or are recalled via the built-in microphone to match the music (Sound). The selection of the respective mode is made via the menu directly on the device. Connections and controls: Description Description... -
Page 26: Operation
Operation: Menu: Navigation in the menu is via the jog wheel next to the display. Turning or pressing the jog wheel activates the menu, the navigation takes place by turning the jog wheel to the left („Up“) and to the right („Down“), the confi rmation takes place by pressing the wheel („Enter“). Die Menu-Struktur im Detail: Mounting option: This device can be positioned and fi xed in all directions of the stage by a... -
Page 27: Specifications
Specifi cations Function Vector Shaft 7R LightmaXX Light sources MSD 7R Color temperature 8000K Effect Beam Beam angle max. 4° Display Power supply AC 100-240V, 50/60Hz Power consumption 350 Watt Power connections PowerCon compatible IN/OUT --> in total max. 4 additional Vector Shaft... -
Page 28: Troubleshooting
Troubleshooting: Note! (Error during data transmission) Never connect the DMX input or output to audio devices! DMX cables enable trouble-free operation and the highest possible trans- mission reliability of signal data. Do not use microphone cables. The following overview is intended as an aid to rapid troubleshooting. If you are unsure, contact the manufacturer, the dealer or appropriate specialist personnel. -
Page 29: Disposal Of Batteries
Disposal of packaging: Ensure that paper packaging, plastic material, etc. are recycled separately. Observe the labels and the corresponding regulations. Disposal of batteries: Batteries do not belong in the garbage! Please dispose of batteries in accor- dance with offi cial regulations at collection points or disposal stations. Disposal of your old device: This device is subject to the WEEE directive (Waste Electrical and Electronic Equipment) in its currently valid form.
Need help?
Do you have a question about the Vector Shaft 7R and is the answer not in the manual?
Questions and answers