Table of Contents
Advertisement
Quick Links
Advertisement
Table of Contents

Related Manuals for Barbeques Galore BILLABONG OFFSET SMOKER

Summary of Contents for Barbeques Galore BILLABONG OFFSET SMOKER
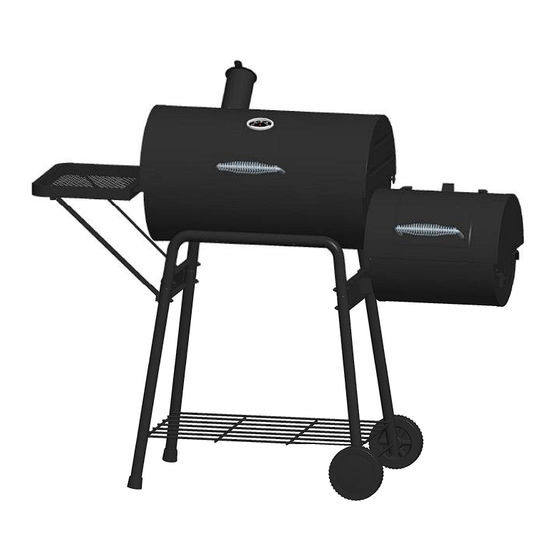
- Page 1 WELCOME TO THE WORLD OF BARBEQUES GALORE OUTDOOR COOKING INSTRUCTIONS BILLABONG OFFSET SMOKER For The Safe Use And Enjoyment Of Your New Barbeque/Smoker PRODUCT CODE:BBOFF BILLABONG OFFSET SMOKER Tools required: 1 adjustable spanner 1 phillips head screwdriver...
- Page 2 Thank you and congratulations for choosing a quality product as part of your outdoor entertaining world. By following these instructions for safe and easy operation, you will enjoy satisfying, trouble-free outdoor cooking. And when you’re fully up and running, you can visit your retailer for some great accessories and cooking tips to make your experience even more rewarding.
- Page 3 Most importantly, you must observe the clearances listed below and on the warning plate on your smoker. It will tell you how close you can put the unit to combustible surfaces (wood, gyprock, trees, wooden fences etc). If you don’t follow these clearances, there is a chance that nearby surfaces will heat up and catch fire. CLEARANCES FROM COMBUSTIBLE MATERIALS: 1000MM IN ALL HORIZONTAL DIRECTIONS.
- Page 4 STEP 1 OPEN THE CARTON, UNPACK AND CHECK THE PARTS. Open the shipping carton, take out the parts and parts box packed inside, and remove all packing materials. Bottom Shelf (19) Two Offset Cooking Grills (29) Two Hood Handles (6) Two Leg Brackets (23) Smoke Stack...
- Page 5 STEP 2 OPEN THE BOLT PACK READY FOR ASSEMBLY The following hardware are provided in a blister pack for convenient use. A. M6X10mm bolt Qty: 17 pcs D. Split Pin E. M6 Hex Nut Qty: 2 pcs Qty: 32 pcs B.
- Page 6 STEP 4 Attach one Leg Bracket (23) to Right Leg (22) as shown using one M6x40mm Bolt (B) and one M6 Hex Nut (E). □ Repeat on opposite side. Leave the bottom holes of the Leg Brackets open at this stage. Do not fully tighten bolts yet.
- Page 7 STEP 6 A helper is needed for this step. □ Insert the Bottom Shelf(19) into holes of assembled legs as shown. □ STEP 7 Attach the other end of Leg Bracket (23) to Right Leg (21) as shown using one M6x40mm Bolt (B) and one M6 □...
- Page 8 STEP 8 Insert the Axle Rod(22) though the holes in the Right Legs as shown. □ Slide the Wheels(20) onto the Axle Rod(22) and secure using Split Pin(D), packed in blister pack. Note: make □ sure the side of the wheels with the depressed hole for the Hubcaps in the center is facing outward as shown. Snap the two Hub Caps(24) onto the ends of Wheel assembly as shown.
- Page 9 STEP 10 A helper is needed for this step. □ Align the holes in the Side Shelf (7) with the holes in the Main Firebox as shown. □ Insert two M6x50mm bolts(C) through the holes in the Main Firebox and Side Shelf Short Brackets (8) into the □...
- Page 10 STEP 12 Insert two M6x10mm bolts(A) through the holes in the Offset Support(31) . Secure using two M6 hex nuts(E) □ as shown. Now go back and fully tighten all nuts and bolts from STEP 4 onwards. STEP 13 A helper is needed for this step. □...
- Page 11 STEP 14 Insert four M6x10mm bolts(A) through the holes in the Offset Firebox(26) into Offset Hood . Secure using four □ M6 hex nuts(E) as shown. Insert one M6x10mm bolt(A) through the hole INSIDE the Offset Firebox into the Offset Support (31) . Tighten □...
- Page 12 STEP 16 Align the Main Hood(10) with the Main Firebox as shown. Secure using two M6x20mm Shoulder Bolts(13) □ packed in blister pack. STEP 17 Insert the Smoke Stack (1) through the Main Hood from inside and secure with two M6x10mm bolts (A) and two □...
- Page 13 STEP 18 Unscrew the wing nut from the Thermometer (5) . □ Insert the Thermometer (5) through the slotted hole into the Main Hood. □ Secure the Thermometer (5) to the Main Hood with the wing nut. □ STEP 19 Attach one Hood Handle (6) to the Main Hood using two M6 flat washers (F) and two M6 hex nuts (E) .
- Page 14 STEP 20 Insert the Warming Rack (15) legs into the top of the Main Firebox as shown. Fit the Warming Rack top hinge □ arms into the main hood as shown. The Warming Rack should stay flat as the Main Hood is opened and closed. Insert the Main Charcoal Grill (12) into the lower firebox as shown.
- Page 15 Safe Storage and Maintenance Inspect hardware tightness on a regular basis to ensure the smoker is in a safe working condition. ALWAYS allow smoker to cool completely before handling. ALWAYS empty charcoal grills after use only when ashes have completely cooled. This will help prolong charcoal grill life.
- Page 16 It is strongly recommended to pre-burn your smoker prior to your first use. By lighting a SMALL charcoal fire to simulate the cooking process, you will burn off any residues or oils from the manufacturing process. This will also cure and harden the high temperature paint finish.
- Page 17 opening the offset firebox lid. Take out the cooking grill using a grate tool and insulated grill mitts - as the cooking grill can be VERY hot. Using long-handled tongs, stoke the coals enough to allow excess ash to fall through the charcoal grate.
- Page 18 For slow smoking, only cook in the main firebox, with the fire only in the offset firebox. Use just a small amount of fuel, usually in just one half of the offset firebox. USING CHARCOAL AND WOOD CHARCOAL Your smoker is made ideally to burn charcoal briquettes or natural wood lump charcoal – both of which have different cooking attributes.
- Page 19 Below exploded diagram and parts list for your after service reference.
- Page 20 Part Description GLG Code Number 1600017 Smoke Stack with damper, spring 1600091 PGS1600017 1 set & Nut 1600021 1600018 Thermometer 52200015 PGS52200015 Hood Handle 1600095 PGS1600095 1600059 Side Shelf & brackets 1600057 PGS1600059 1 set 1600058 1600004 Main Hood & Hinge PGS1600004 1 set 1600014...
- Page 21 And there are many more. Ultimately, anything you can cook in the kitchen, you can cook on your barbeque. Need more information or assistance in any way? You can call your Barbeques Galore store where barbeque experts will be happy to help you.
Need help?
Do you have a question about the BILLABONG OFFSET SMOKER and is the answer not in the manual?
Questions and answers