Table of Contents
Advertisement
Advertisement
Table of Contents

Related Manuals for Doortec Win-Slider Smart CASA3

Summary of Contents for Doortec Win-Slider Smart CASA3
- Page 1 CASA3 MINI SLIDING AUTOMATION...
-
Page 2: Table Of Contents
C O N T E N T S Safety Precautions Product character Technical parameter Installation Diagram,Explosion Diagram, Section Diagram Selection of Right/Left open Installation of rail Installation of anti-drop device Installation of hanger, Thickness of glass Install door leaf Adjustment of door height Adjustment of anti-drop device location of stopper Installation and adjustment of pulley... -
Page 3: Safety Precautions
S A F E T Y P R E C A U T I O N S PAGE 1... - Page 4 S A F E T Y P R E C A U T I O N S PAGE 2...
-
Page 5: Product Character
T E C H N I C A L P A R A M E T E R P R O D U C T C H A R A C T E R Technical parameter Power supply : 100 -240 V MAX Weight :... -
Page 6: Installation Diagram,Explosion Diagram, Section Diagram
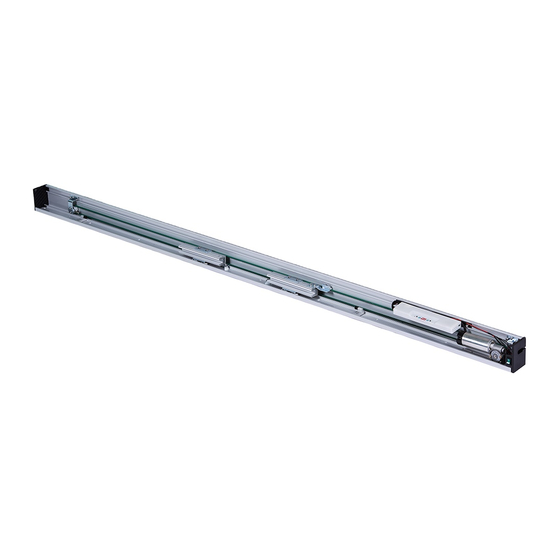
I N S T A L L A T I O N D I A G R A M PAGE 4... - Page 7 E X P L O S I O N D I A G R A M PAGE 5...
- Page 8 S E C T I O N D I A G R A M 80.5 PAGE 6...
-
Page 9: Selection Of Right/Left Open
S E L E C T I O N O F R I G H T / L E F T O P E N Motor Motor Motor Motor Moving leaf PAGE 7... -
Page 10: Installation Of Rail
I N S T A L L A T I O N O F R A I L 60KG PAGE 8... -
Page 11: Installation Of Anti-Drop Device
I N S T A L L A T I O N O F A N T I - D R O P D E V I C E Left hanger Right hanger PAGE 9... -
Page 12: Installation Of Hanger, Thickness Of Glass
I N S T A L L A T I O N O F H A N G E R , T H I C K N E S S O F G L A S S TB(10-12mm) Glass spacer Glass spacer 10mm 12mm... -
Page 13: Install Door Leaf
I N S T A L L D O O R L E A F PAGE 11... -
Page 14: Adjustment Of Door Height
A D J U S T M E N T O F D O O R H E I G H T PAGE 12... -
Page 15: Adjustment Of Anti-Drop Device
A D J U S T M E N T O F A N T I - D R O P D E V I C E PAGE 13... -
Page 16: Location Of Stopper
L O C A T I O N O F S T O P P E R PAGE 14... -
Page 17: Installation And Adjustment Of Pulley
I N S T A L L A T I O N A N D A D J U S T M E N T O F P U L L E Y PAGE 15... -
Page 18: Installation Of Belt Anti-Drop Device
I N S T A L L A T I O N O F B E L T A N T I - D R O P D E V I C E 0.5mm PAGE 16... -
Page 19: Installation Of Controller
I N S T A L L A T I O N O F C O N T R O L L E R Power on and test operator after controller installed(Refer to page 23) PAGE 17... -
Page 20: Close The Cover
C L O S E T H E C O V E R PAGE 18... - Page 21 C L O S E T H E C O V E R PAGE 19...
- Page 22 C L O S E T H E C O V E R PAGE 20...
-
Page 23: Installation Of Wooden Door
I N S T A L L A T I O N O F W O O D E N D O O R PAGE 21... - Page 24 I N S T A L L A T I O N O F W O O D E N D O O R 5*60mm PAGE 22...
-
Page 25: Data Adjustment
D A T A A D J U S T M E N T Lock Outside sensor Battery Operating indicator Remote learning indicator Power Photocell DIP Switch: Inside sensor 1.Direction L/R 4.Door/window 2.Toggle mode 5.Lock mode Motor 3.Beeper 6.Slam shut Pet sensor 1 2 3 4 5 6 1.ELE-... - Page 26 D A T A A D J U S T M E N T DIP function intro duction and setting DIP switch On (upwards) Off(downwards) ON – Left opening, OFF – Right opening. Toggle 1.Direction L/R (back and forth) to erase memory and re-learn open/close cycle.
- Page 27 D A T A A D J U S T M E N T Setting of wireless push button 1. ADD: Keep Press learning button 3second till the L2 learning indicator lighting,press wireless button L2 Flash with voice,Setting is done. 2.DELETE Keep press learning button till indicator L2 flash,...
-
Page 28: Connection Of Sensor
C O N N E C T I O N O F S E N S O R Outside sensor Photocell Inside sensor Pet sensor 1 2 3 4 5 6 PAGE 26... -
Page 29: Connection Of Photocell
C O N N E C T I O N O F P H O T O C E L L Outside sensor Photocell Inside sensor Pet sensor PAGE 27... -
Page 30: Trouble Shooting
T R O U B L E S H O O T I N G Hardwowe’s problem 1. The hanger is mounted vertically on the leaf. 2. Any friction between the floor guide and the leaf bottom 1.Power off of door leaf. 2.Open manually 3. - Page 31 T R O U B L E S H O O T I N G Causes Troubles shooting Remedy Symptoms Check the data of opening Opening or closing Adjust the opening or and closing speed. speed is set too slow closing speed.
- Page 32 T R O U B L E S H O O T I N G Adjust position of Check the receiver and Photocell is working. receiver and emitter emitter are at same level at same level. or not. The surface of receiver and Door does not close Clean the surface.
Need help?
Do you have a question about the Win-Slider Smart CASA3 and is the answer not in the manual?
Questions and answers