Advertisement
Advertisement

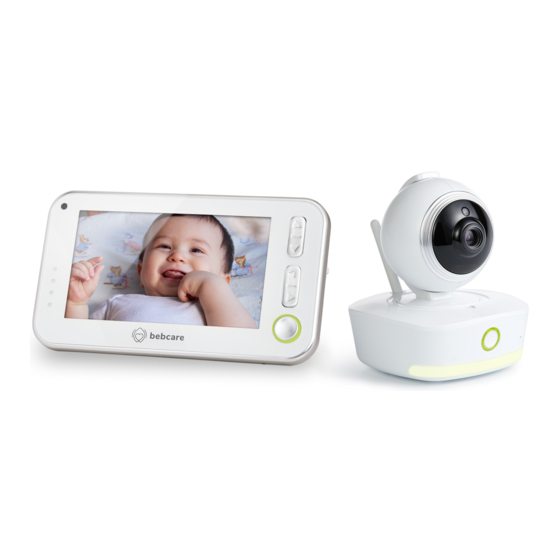
Related Manuals for Bebcare Motion


Summary of Contents for Bebcare Motion
- Page 1 BEBCARE MOTION A smart digital video baby monitor for the active tot...
-
Page 2: Table Of Contents
INDEX Featues of Bebcare Motion ………..…………………………………………… Warning…………………………………………………………………………..Control layout and Icons………………………………………………………… Power Supply……………………………………………………………………… Pairing the camera to parent unit and movement sensor mat…………… OPERATION Camera………………………………………………………………………………. Parent unit…………………………………………………………………………… Movement sensor mat……………………………………………………………... Precautions………………………………………………………………………… Standard accessories included in packaging……………………………….. Trouble Shooting guide………………………………………………………….. Specification……………………………………………………………………….. -
Page 3: Warning
Thank you for purchasing our Bebcare Motion digital video baby monitor. Your unit has been manufactured and checked under the strictest possible quality control to ensure that each monitor leaves the factory in perfect condition. In the unlikely event you find any defects or have any problem, please contact our dealer or service center. -
Page 4: Camera
CONTROLS LAYOUT Camera Parent Unit (PU) Movement Sensor Mat Power ON/OFF button Camera pan left button Power ON indicator (left button in menu mode) Transmit indicator Camera pan right button Night light (right button in menu mode) Microphone Power ON/Charging indicator USB socket Talk back button SD card slot... - Page 5 POWER SUPPLY (A) Camera Insert the output plug of supplied 5V 1A AC adapter to USB port 6 . (B)Parent Unit (PU) A Li polymer battery is already incorporated in the unit. To charge up the battery, connect the output plug of supplied 5V 1A AC adapter to USB port 21 . With the unit being switched off, the power indicator 18 will light up red.
- Page 6 PAIRING This process is the match the PU with camera and movement sensor mat so that they can communicate with each other while no other devices (even baby monitor of identical model) can interfere with you or receiving your signal. The PU and camera are already paired when they are shipped out from factory.
- Page 7 6. Now short press pairing button 11 at bottom of camera, wait for around 5 sec and two beep sound will be heard which indicate pairing become successful and the screen 20 will show the image as captured by camera lens (if not successful, short press pairing button 11 again or repeat step 4-6 when the time elapsed exceed 30 sec) : 7.
- Page 8 (110º) the camera lens to capture the different view of baby. 8. When baby grows up to become a toddler, parents can activate the motion tracking function in PU and the camera lens will automatically track the movement of toddle .
-
Page 9: Parent Unit
Parent unit 1. Switch on PU by setting the power ON/OFF/vibration switch to either I or position. (In position, the unit will start to vibrate once there is sound from baby. Such vibration is to alert the parents in case they are not watching the screen). At the same time, the power on indicator 18 show steady green. - Page 10 6. For easy viewing, the PU can be placed on table top by pulling out the lever support at the back. Besides, to achieve a better reception and longer communication range, rotate the antenna to a vertical position. 7. Short press menu button 25 to call up the main menu on screen 20, use the qqqq qqbutton 14,15,16 and 17 to select the functions to be set, then short...
- Page 11 (as indicated by a flashing CAM No.), short press OK button 19 can switch to listen to the other camera. Note : Auto motion tracking function is not available under split screen mode. Under auto scan mode, the screen 20 will show the image of each camera in turn for a period of 8 sec.
- Page 12 Under screen on mode, the screen 20 will always stay on or auto shut off after a period of time (30 sec/1 minute/2 minutes/3 minutes) as selected by parents. Please note the battery running time will become less. This function is to set the feeding alarm ON or OFF and select the feeding time interval. button 14 15 16 17 to select, then short press OK button 19 to confirm.
- Page 13 This function is to select the lullaby/nature sound to be played in camera and its volume button 14 15 16 17 to select, then short press OK button 19 to confirm. The lullaby will be played sequentially (when is selected) or repeat itself (when selected).
- Page 14 Movement This function is to set the movement alarm ON or OFF. U se button 14 15 16 17 to select, then short press OK button 19 to confirm. When set to ON, the icon will show up in screen 20. Under “ Alarm only “ mode, whenever the camera detects baby movement, the screen 20 will be turned on (even baby remains silent) and a beep tone being heard.
- Page 15 Display Brightness Select from one of the 5 levels of screen brightness. (N.B. It is not possible to adjust the brightness when there is no image displayed on screen). Flip Select normal or 180º inverted image depending on how the camera is installed. (N.B.
-
Page 16: Movement Sensor Mat
Alarm sound & Key tone This function is to switch the alarm sound and key tone ON or OFF button 14 15 16 17 to select, then short press OK button 19 to confirm. Cam Mic sensitivity and Volume Mic sensitivity Select from one of the 5 levels of sensitivity, higher value means the camera microphone 5 is more sensitive to sound. - Page 17 7. Whenever baby is making sound and camera becomes activated, the visual level meter 12 will light up. The louder the baby’s voice, the more segments will light up. This feature is useful in case the parents prefer to turn down the speaker 24 volume to keep the environment quiet while still able to monitor the activity of baby.
- Page 18 Whenever the parent unit falls back within the operating range, the audible alarm will stop and the visual level meter 12 stops flashing. The camera number shows PU is viewing which camera The temperature icon indicates the current temperature of baby’s room. In case the temperature falls outside the preset high and low limits, an audible alarm will be heard and the screen 20 will show : ...
- Page 19 Movement sensor mat 1. Place the movement sensor mat underneath the mattress, lengthwise direction and directly under where your baby sleeps. For optimum performance, there should be no bedclothes tucked between the sensor mat and the mattress. Besides, if the mattress support is too soft (such as box spring or underpadding), a hard board is required to be placed underneath the mat to provide a firm surface for it.
- Page 20 4. Besure the BU and sensor mat is within the same room or apart from each other not more than a distance of 10m, otherwise they may lost connection with each other and breathing movement of baby cannot be monitored. Mat out of range When battery of sensor mat is running low, PU will provide an alarm and the screen will show following, urging parent to replace with new battery:...
- Page 21 6. When parents need to take baby out from crib for feeding or other purpose, to avoid breathing alert alarm, short press the alarm hold button 29 . This button can be pressed before or after taking out the baby, but such action must be performed within 20 sec, or otherwise the alarm would still sound.
-
Page 22: Precautions
- Disconnect the AC adapter from the wall outlet when the monitor is not to be operated. - The Bebcare Motion is best performed within a temperature range of 0°C to +50°C. - Do not open the cabinet, no serviceable parts inside. -
Page 23: Trouble Shooting Guide
TROUBLE SHOOTING GUIDE Problem Possible Causes Solution No audio or video - Camera mic sensitivity is too low - Adjust mic sensitivity higher using signal is transmitted setting menu in PU . - AC adapter improperly connected - Check connection in camera Always transmission - Mic sensitivity or movement... -
Page 24: Specification
SPECIFICATION ● Power supply : Tx 5V DC 1A external supply Rx 3.7V 1400mAh Li polymer battery ● Communication protocol : Digital FHSS technique with FSK modulation ● Operating frequency : 2410.000MHz ~ 2473.000MHz (total 19 Channels) ● Operating distance : 300 m in open space ● ...
Need help?
Do you have a question about the Motion and is the answer not in the manual?
Questions and answers