Advertisement
Quick Links
Advertisement

Related Manuals for Blue Rhino 200209-450000


Summary of Contents for Blue Rhino 200209-450000
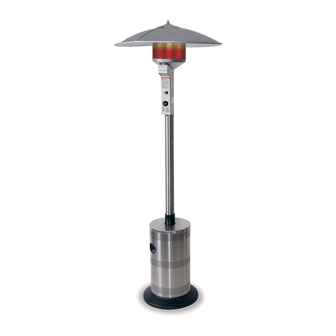
- Page 1 ® Replacing Control Valve Series: 200209 – 450000 LP Gas...
-
Page 2: Tools Required
1. Installation and repair should be done by a qualified service person. 2. Use only Blue Rhino Global Sourcing, LLC. factory authorized parts. The use of any part that is not factory authorized can be dangerous. This will also void your warranty. - Page 3 ® For assistance call 1.800.762.1142. Steps 1-5 1. Turn your LP gas tank off, unscrew regulator and remove LP gas tank. 2. Remove the dome. 3. Remove the access panel and the igniter wire, set aside 4. Disconnect the gas line. 5.
- Page 4 Remove emitter screen: A. 200209, 200308, 200605 – remove the 4 screws using a Phillips screw driver that attach the emitter to the emitter bottom, with the screws removed, remove the emitter. B. 230000-235000, 450000 – you will need to use the ratchet with an extension along with the 9/16” socket and remove the nut and washer in the bottom of the emitter.
- Page 5 ® For assistance call 1.800.762.1142. Step 7 1. Disconnect the burner supply tube from the control valve, using a 5/8” open end wrench. Note: There is a brass nut on the top of the control valve. You must remove the brass nut. 2.
- Page 6 ® For assistance call 1.800.762.1142. Step 8 1. Disconnect the pilot supply tube using the #10mm open end wrench. Note: You may need to use the #12mm open end wrench to hold the pilot orifice. 2. Remove the 2 screws that hold the pilot assembly to pilot bracket. 3.
- Page 7 Disconnect the thermal-couple 1. Remove the screw from the access panel on the rear of the valve housing. 2. Remove the access panel. 3. Using the #8 mm open end wrench remove the nut with wires coming out of it. Note: When reinstalling the nut to the back of the control valve finger tighten plus a 1⁄4 turn.
- Page 8 Disconnect the control valve 1. Remove the brass nut that holds the control valve in the valve housing using the 3/4” open end wrench 2. Remove the control valve from the valve housing 3. Remove the pilot supply tube using a #12 mm open end wrench. Replacing Control Valves Series 200209 –...
- Page 9 Re-install pilot supply tube and the control valve: 1. Connect the pilot supply tube to the control valve 2. Place the control valve into the valve housing. Secure the valve with the brass nut and tighten. Replacing Control Valves Series 200209 – 450000 LP Gas ®...
- Page 10 ® For assistance call 1.800.762.1142. Step 12 Reinstall the thermal-couple: 1. Attach the thermal-couple to the back of the control valve in the valve housing. Finger tighten plus a 1/4 turn with the #8mm open end wrench. 2. Reinstall the small access panel on the back of the valve housing Replacing Control Valves Series 200209 –...
- Page 11 ® For assistance call 1.800.762.1142. Step 13 1. Slide the burner assembly into the valve housing. 2. Attach the burner supply tube to the top of the control valve. Do not over tighten. 3. Tighten the two screws that hold the burner in place. Replacing Control Valves Series 200209 –...
- Page 12 ® For assistance call 1.800.762.1142. Step 14 1. Attach the pilot to the pilot bracket. 2. Connect the pilot supply tube to the pilot. Replacing Control Valves Series 200209 – 450000 LP Gas 404121...
- Page 13 200209, 200308, 200605 1. Attach the emitter to the valve housing, using 3 screws. 2. Secure. 230000 - 450000 1. Place the spacer ring on the burner stud. 2. Insert the burner stud through the bottom of the emitter. Secure with washer and nut. Do not fully tighten. 3.
- Page 14 16. Attach the engine to the post 17. Burner Connections 1. Make sure the regulator valve and hose connections are securely fastened to the burner and the tank. 2. If your unit was assembled for you, visually check the connection between the burner pipe and orifice.
- Page 15 Step 20 - IMPORTANT Perform leak check. If you smell gas - 1. Shut off gas to appliance. 2. Extinguish any open flame. 3. If odor continues, immediately call your gas supplier or your fire department. 1. Do not operate if gas leak is present. Gas leaks may cause a fire or explosion. 2.
- Page 16 Tank/Gas Line Connection 1. Make 2-3 oz. of leak solution by mixing one part liquid dishwashing soap with three parts water. 2. Make sure control knobs are off. 3. Turn LP gas tank ON at valve. 4. Spoon leak check solution at all “x” locations 5.
- Page 17 1.800.762.1142, www.bluerhino.com © 2004 Blue Rhino Global Sourcing, LLC All Rights Reserved. ® Endless Summer is a registered trademark of Blue Rhino Global Sourcing, LLC All Rights Reserved. ® Blue Rhino is a registered trademark of Ferrellgas, L.P. All Rights Reserved.
Need help?
Do you have a question about the 200209-450000 and is the answer not in the manual?
Questions and answers