Table of Contents
Advertisement
Quick Links
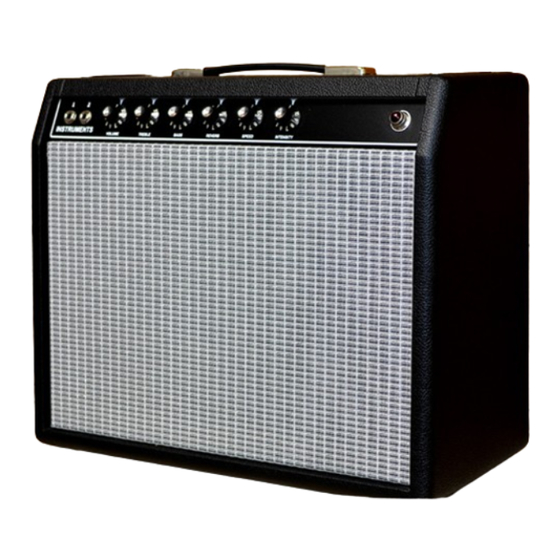
THE MOJOTONE
BLACKFACE
PRINCETON REVERB
STYLE 1 X 10 COMBO AMP
he Blackface Princeton Reverb® has
T
been a staple in guitar tone since its
inception in 1964.
Similar to the idea
behind the Vibro Champ, the Princeton
Reverb was essentially all the good parts
of its predecessor, the Tweed Princeton, but
with a long-spring reverb and tube-driven
tremolo circuit added.
These amps were
ideal not only for use in the studio, but for
traveling and gigging with as well. Over
the years the Princeton Reverb has worked
its way into the gear repertoire of many
renowned guitarists such as Larry Carlton,
Glen Campbell, and Tommy Tedesco.
WWW.MOJOTONE.COM
1
Advertisement
Table of Contents

Related Manuals for Mojotone Blackface Princeton Reverb STYLE 1 X 10 COMBO AMP


Summary of Contents for Mojotone Blackface Princeton Reverb STYLE 1 X 10 COMBO AMP
- Page 1 THE MOJOTONE BLACKFACE PRINCETON REVERB STYLE 1 X 10 COMBO AMP he Blackface Princeton Reverb® has been a staple in guitar tone since its inception in 1964. Similar to the idea behind the Vibro Champ, the Princeton Reverb was essentially all the good parts...
-
Page 2: Table Of Contents
Copyright © 2019 Mojotone, LLC All content included in this book including text, graphics and images is the property of Mojotone, LLC and protected by U.S. and international copyright laws. The collection, arrangement and assembly of all content in this book is the exclusive property of Mojotone, LLC and protected by U.S. -
Page 3: Introduction
{ Always work in a well-ventilated space. { Have safety equipment such as a fire extinguisher, a first-aid kit and a phone nearby. { Be Patient! Rushing through any type of technical work just leads to frustration and compounds issues that can easily be avoided. WWW.MOJOTONE.COM... -
Page 4: Inventory
12AX7 12AT7 (1) Mojo 772 output transformer GZ34S 12AX7 12AT7 12AX7 12AT7 12AX7 12AT7 (1) Mojotone 2 spring reverb tank (1) Mojo 760 Power Transformer GZ34S & reverb tank bag (1)VIB/REV 2 button footswitch w/ hardware (1) Mojo 776 reverb driver... -
Page 5: Tools
(1) 500pf @ 500v watt 100Ω 25µf @500v Ceramic Disc watt 1K (1) 10pf @ 500v watt 1.5K (1) Mojotone Electrolytic KingCap 100µf @100v watt 2.2K (1) 0.02 µf @ 500v watt 2.7K watt 3.3K (2) 0.01 µf @ 500v watt 6.8K... -
Page 6: Component Identity & Orientation
TO LERA N CE Black 1Ω The resistors that are included in your Brown 10Ω ± 1% Mojotone kit, all use the 4-band resistor color 7 x 10,000 = 100Ω ± 2% code for determining their values. The easiest 470,000 Ω Orange 1KΩ... -
Page 7: Soldering Basics
After they have been soldered, be sure to clip the excess leads that are underneath the boards so that they do WWW.MOJOTONE.COM... -
Page 8: Chassis Assembly
S ECT I O N 7 : CHASSIS ASSEMBLY transformer T R A N S FO R M E RS cutout { Mount the power transformer using power into the chassis using (4) 8-32 keps nuts using transformer your adjustable wrench. The transformer will be recessed through the rectangular cutout in rubber the “belly”... - Page 9 { Mount 9-pin tube sockets using (8) 4-40 x 1/4” screws and keps nuts and tighten down with adjustable wrench and screwdriver. { Mount can capacitor screws and keps nuts and tighten down with adjustable wrench and screwdriver. Be sure to mount the ground tab. WWW.MOJOTONE.COM...
-
Page 10: Transformer Wiring
S ECT I O N 8 : TRANSFORMER WIRING Pow e r T r a n s fo r m er INDICATOR LIGHT { Twist all matching pairs of wires coming out of the power transformer. { Measure length needed for each wire, allow yourself extra lead and cut to length. - Page 11 { The Red wire will be connected to the TUBE SOCKET eyelet board after the board has been installed. PREAMP T 9 PIN SOC 12AX7 { Double check your wiring and begin soldering all connections in this section. REVERB INPUT WWW.MOJOTONE.COM...
-
Page 12: Circuit Board Assembly & Installation
S ECT I O N 9: CIRCUIT BOARD ASSEMBLY & INSTALLATION C I RC U T B O A R D ASS EM B LY { Starting at one end of the front side of 1n4007 the board, identify the necessary components for each eyelet connection and place leads through the eyelet holes. - Page 13 { Install 6-32 keps nuts on the outside of the chassis and tighten. { Repeat the same procedure with the main fiber board. completed circuit boards { Once in place, fasten down the screws and nuts using a screwdriver and adjustable backer boards wrench. WWW.MOJOTONE.COM...
-
Page 14: Wiring The Sockets, Jacks & Pots
S ECT I O N 1 0 : WIRING THE SOCKETS, JACKS & POTS W I R I N G T U B E S O C K ET S INDICATOR LIGHT { Twist tightly together a length of about 5’... - Page 15 A/C POWER CORD A/C POWER SWITCH GROUND SWITCH 1 AMP FUSE HOLDER Blackface Style Princeton Reverb 04/02/2019 Revision 2.0 PHASE INVERTER / MIXER / REVERB DRIVER 1ST GAIN STAGE / TREMELO REVERB RECOVERY 2ND GAIN STAGE EXTERNAL SPEAKER JACK WWW.MOJOTONE.COM...
- Page 16 W I R I N G PO T E N T I O M ET ERS & I N P U T J AC KS: { Prepare the bus wire that will mount across the back of all the pots. Start from the “INTENSITY”...
- Page 17 VIBRATO / PHASE INV 9 PIN SOCKET 12AX7 POWER TUBE OCTAL SOCKETS A/C POWER CORD FUSE HOLDER POWER SWITCH Blackface Style Princeton Reverb J12A 1/4“ 04/02/2019 Revision 2.0 WWW.MOJOTONE.COM A/C POWER SWITCH...
-
Page 18: S Ect I O N 1 1
S ECT I O N 1 1: Speaker Wiring & Installation S P EA K ER W I R I N G: { Twist the two 15” lengths of Black and White 18 gauge stranded wire together. { Push the insulation back about 1⁄2” from both wires on one end and tin them. -
Page 19: S E Ct I O N 1 2
Plug the from wall socket, check voltages on the filter speaker into the speaker jack that is closest to capacitors (DC voltage), make sure they are the On / Off power switch. drained, and then recheck your wiring. WWW.MOJOTONE.COM... -
Page 20: S Ect I O N 1 4
S ECT I O N 1 4 : Chassis & Reverb Installation C h as s i s I n s ta ll at i o n { Make sure that the 4 mounting holes in the chassis are clear of any stray wires so that they are not damaged or short against the mount screws. -
Page 21: Sound Test
R E S O U R C E L I T E R AT U R E { Tube Guitar Amplifier Essentials and All About Vacuum Tube Guitar Amplifiers by Gerald Weber Truly must read books by Gerald Weber for any amp tech. You can purchase these at Mojotone. WWW.MOJOTONE.COM... -
Page 22: More From Mojotone
TWEED DELUXE 5E3 STYLE COMBO Mojotone’s Tweed Deluxe Style Amp is based on the popular 5E3 circuit from the 1950s and is by far our most popular amplifier. These amps were originally designed as medium power amps that would allow a musician to plug in more than one amplified instrument at a time. - Page 23 1963, the Super Reverb has remained highly sought-after due to its unique tonal qualities and extreme versatility. Having a use on stages of all sizes and in any studio situation, the Mojotone Super Reverb style amp has the potential to handle literally any task at hand.
- Page 24 WORKBENCH TESTED. AMP PRO APPROVED. Years of experience and endless passion have driven our team at Mojotone to create the quality products that we offer. Now you can use the tools that we do in your search for the perfect tone.
Need help?
Do you have a question about the Blackface Princeton Reverb STYLE 1 X 10 COMBO AMP and is the answer not in the manual?
Questions and answers