Table of Contents
Advertisement
Available languages
Available languages
Advertisement
Chapters
Table of Contents

Related Manuals for Midland Alan 48 Pro


Summary of Contents for Midland Alan 48 Pro
- Page 1 Alan 48 Pro ” G U I D A A L L ‘ U S O ” I N S T R U C T I O N G U I D E ” B E D I E N U N G S A N L E I T U N G ”...
-
Page 3: Table Of Contents
INDICE Introduzione ..................................................Pag.1 Descrizione comandi ................................................Pag.2 Installazione ..................................................Pag.4 Collegamento elettrico ..............................................Pag.4 Installazione dell’antenna..............................................Pag.4 Uso dell’ ..............................................Pag.5 ALAN 48 PRO Selezione bande di frequenza ............................................Pag.5 Tabella bande di frequenza ...............................................Pag.5 Caratteristiche tecniche ..............................................Pag.6... -
Page 4: Descrizione Comandi
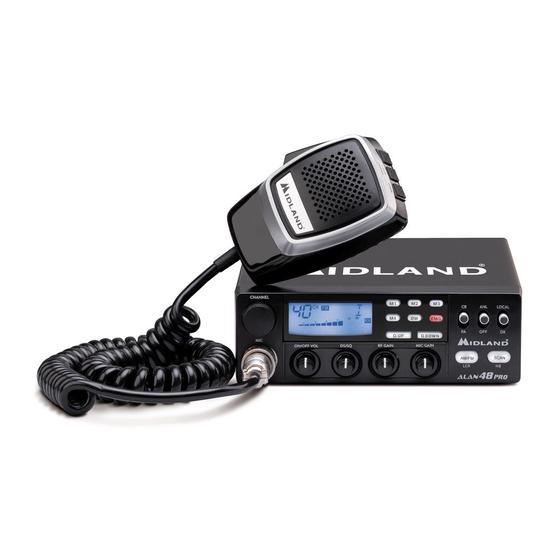
DESCRIZIONE COMANDI A. Numero canali selezionati Indicatore di intensità del segnale ricevuto e di potenza di segnale trasmesso C. AM/FM: indicatore del modo di emissione. Le icone lampeggiano se la funzione NOISE BLANKER è stata attivata (per versione senza NB e DS sul display). D. - Page 5 circa 3 secondi per memorizzare il canale prescelto nella memoria M1. Tasto DW: con questo tasto é possibile rimanere sintonizzati Ripetere le stesse operazioni per le altre memorie a disposizione. contemporaneamente su due canali a scelta dell’utente. Questa funzione Pulsante “EMG”: Canale d’emergenza: premendo questo tasto si ci permette il monitoraggio di un secondo canale.
-
Page 6: Installazione
INSTALLAZIONE MICROFONO PTT: Pulsante di trasmissione Ricercare e localizzare, sul mezzo mobile, la posizione per installare l’apparato, Pulsanti UP/DOWN: selezione canali utilizzando la staffa di supporto in dotazione o, eventualmente, un estraibile. verso l’alto (UP) e verso il basso (DN) Tale posizionamento deve essere fatto in modo da non creare intralcio a chi Tasto LOCK: permette di bloccare i guida, ma deve anche essere facilmente accessibile. -
Page 7: Uso Dell' Alan 48 Pro
Sigla sul display Paese Italia 40 CH AM/FM 4Watt USO DELL’ ALAN 48 PRO Italia 34 CH AM/FM 4Watt Dopo aver installato il vostro CB e la vostra antenna, seguire attentamente Germania 80 CH FM 4Watt / 40 CH AM 4 Watt... -
Page 8: Caratteristiche Tecniche
CARATTERISTICHE TECNICHE GENERALI Canali..................(vedi tabella bande) Gamma di frequenza* ...........26.565 - 27.99125 MHz Ciclo di utilizzo (% su 1 ora) .......TX 5%; RX 5%; Stand-by 90% Controllo di frequenza ................. a PLL Temperatura ..................-10°/+55° C Tensione di alimentazione ..........DC 12.6 V - DC ±10% Dimensione ............ - Page 9 INDEX Introduction ..................................................Pag. 1 Function and location of the controls ...........................................Pag. 2 Installation ..................................................Pag.4 Power supply..................................................Pag.4 Installing an antenna .................................................Pag.4 How to operate with your transceiver ..........................................Pag.5 Frequency band selection ..............................................Pag.5 Frequency band chart ..............................................Pag.5 Technical specifications ..............................................Pag.6...
- Page 10 FUNCTION AND LOCATION A. Channel selected number The received signal strength and the power of the transmitting signal OF THE CONTROLS C. AM/FM mode. These icons blink if the NOISE BLANKER func- tion has been activated (version without NB and DS displayed). D.
- Page 11 and press M1 for at least 3 sec to store the choosen channel in the M1 a. Select the desired channel through the channel selector. memory. Repeat these steps to memorise the other presets. b. Press the “DW” button (DW blinks on the display). 9.
- Page 12 INSTALLATION MICROPHONE PTT: transmission button Safety and convenience are the primary consideration for mounting any piece 2. UP/DOWN buttons: manual channel of mobile equipment. All controls must be readily available to the operator selector without interfering with the movements necessary for safe operation of the 3.
- Page 13 REPLACING FUSE FREQUENCY BAND CHART Digits displayed Country If you replace the fuse for DC power Cord, use F 2A 250V type. The parameters and the symbol of the fuse are indicated in the following label. Italy 40 CH AM/FM 4Watt Italy 34 CH AM/FM 4Watt F2A 250V + Germany 80 CH FM 4Watt / 40 CH AM 4 Watt...
- Page 14 TECHNICAL SPECIFICATIONS GENERAL Channels .............(see the frequency band chart) Frequency Range* ............26.565 - 27.99125 MHz Duty cycle (% on 1 hour) ........ TX 5% - RX 5% - Stand-by 90% Frequency Control ...................PLL Operating Temperature Range ............-10°/+55° C DC input voltage ................ 12.6V DC ±10% Size................180 (L)x50 (H)x150 (P) mm Weight ........................1kg RECEIVER...
- Page 15 INHALT Einführung ..................................................Seite 1 Funktion und Lage der Bedienelemente........................................Seite 2 Einbau des ALAN 48 PRO im Kraftfahrzeug ......................................Seite 4 Anschluß an die Spannungsversorgung ........................................Seite 4 Montage der Antenne ..............................................Seite 4 Bedienung Ihres ..........................................Seite 5 ALAN 48 PRO Auswahl der Frequenzbänder ............................................
-
Page 16: Funktion Und Lage Der Bedienelemente
DS (Digital Squelch) Mode umschalten. 6. HF-Abschwächer, RF Gain: Mit diesem Regler läßt sich die Eingangsempfindlichkeit des ALAN 48 PRO herabsetzen. Drehen im Uhrzeigersinn erhöht die Empfind-lichkeit, gegen den Uhrzeigersinn vermindert sie. Die Einstel-lung einer verringerten Empfindlichkeit ist sinnvoll bei beson-ders starken Stationen im Nahbereich. - Page 17 bestätigen läßt. Störunggeräusche werden vermieden, indem Störspitzen, wie sie durch 8. Kanalspeichertasten M1, M2, M3, M4: Mit den Speichertasten lassen die Zündung entstehen, gefiltert werden. sich vier frei wählbare Kanäle programmieren und auf Knopfdruck direkt 17. Taste DW: Diese Funktion erlaubt zeitgleich zwei beliebige Kanäle Ihrer anwählen.
-
Page 18: Einbau Des Alan 48 Pro Im Kraftfahrzeug
EINBAU DES ALAN 48 PRO 19. S-Meter-Anschluß, S-Meter: An diese Buchse kann ein externes S-Meter angeschlossen werden. IM KRAFTFAHRZEUG 20. Anschluß für PA-Lautsprecher, PA: Wenn an dieser Buchse ein exter- ner Durchsage-Lautsprecher ange-schlossen ist, läßt sich das Gerät als Einfache Bedienbarkeit ohne Beeinträchtigung der Verkehrssicherheit sollte Verstärker für Durchsagen einsetzen. -
Page 19: Bedienung Ihres Alan 48 Pro
übernimmt die Taste “AM/FM” statt der Betriebsartwahl die F2A 250V + LCR-Funktion (Last Channel Recall – Aufruf des zuletzt genutzten Kanals). FREQUENZTABELLE BEDIENUNG IHRES ALAN 48 PRO Land Anzeige im Display Stecken Sie den Mikrofonstecker in die Mikrofonbuchse des ALAN 48 Italien 40 Kanäle AM/FM 4 Watt... -
Page 20: Technische Daten
TECHNISCHE DATEN Allgemeine Daten Kanäle....................(Siehe die Tabelle) Frequenzbereich* ..............26.565 - 27.99125 MHz Frequenzbelegungsdauer (% pro 1 Stunde) . TX 5% - RX 5% - Stand-by 90% Frequenzerzeugung ................... PLL-System Betriebstemperatur ................10° C ± 55° C Spannungsversorgung ............nom. 12.6 V DC +/- 10% Abmessungen ..............150x50x180 mm (BxHxT) Gewicht ........................ - Page 21 INDICE Introducción ..................................................Pag. 1 Funciones y posición de los controles ...........................................Pag. 2 Instalación ..................................................Pag. 4 Alimentación ................................................... Pag. 4 Instalación de la antena ..............................................Pag. 4 Cambio del fusible ................................................Pag. 4 Funcionamiento del transceptor ............................................Pag. 5 Selección de la banda de frequencias ...........................................Pag. 5 Tabla de bandas disponibles ............................................Pag.
-
Page 22: Funciones Y Posición De Los Controles
7. Control de ganancia del micrófono: En modo TX, controla la amplifica- ción del micrófono. Para obtener los mejores resultados, use el micrófono original MIDLAND y colóquelo a la distancia óptima de su boca (5-10 cm) y al nivel de ampli-... - Page 23 modulación es óptima. una señal. Tres segundos después del cese de ésta, el equipo reanudará 8. Botones M1-M2-M3-M4: Estos botones permiten almacenar y llamar automáticamente la exploración. Si desea detenerla, pulse el PTT. 4 canales de memoria preseleccionados. Para almacenar los canales Si mientras se enciende el equipo se pulsa juntamente con la tecla “AM/ seleccione el canal deseado y pulse M1 durante al menos 3 segundos FM”, selecciona la banda operativa.
-
Page 24: Instalación
INSTALACIÓN 20. Jack PA: Conectando un altavoz externo (opcional) a este jack puede usar la unidad como amplificador de audio (PA). La seguridad y la facilidad son las consideraciones primordiales para efectuar el 21. ack EXT: para la conexión de un altavoz externo (opcional); al conectar el montaje de cualquier equipo móvil. -
Page 25: Cambio Del Fusible
conectada a una antena adecuada. Se recomienda un control periódico del NOTA : si selecciona una banda de frecuencia que opera sólo en modo FM, la cable y de las ROE. tecla “AM/FM” activa la función LCR (llamada del último canal seleccionado) TABLA DE BANDAS DISPONIBLES CAMBIO DEL FUSIBLE Sigla en el display... -
Page 26: Especificaciones
ESPECIFICACIONES Generales Canales ......................(ver la tabla) Rango de frecuencias ..............26.965-27.405 MHz Ciclo de trabajo (% en 1 hora)......TX 5% - RX 5% - Stand-by 90% Control de frecuencia ....................PLL Gama de temperaturas de operación ..........-10 ºC a +55 ºC Tensión CC de entrada ................ - Page 27 SOMMAIRE Introduction ..................................................Pag. 1 Fonctions et controles ..............................................Pag.2 Installation ..................................................Pag. 4 Alimentation ..................................................Pag. 4 Installation de l’antenne..............................................Pag. 4 Utilisation ..................................................Pag. 5 Sélection des bandes de fréquence ..........................................Pag. 5 Tableau des bandes de fréquence ...........................................Pag. 5 Specifications techniques ...............................................Pag. 6...
-
Page 28: Fonctions Et Controles
FONCTIONS ET CONTROLES A. Canaux sélectionnés Niveau du signal reçu et niveau de puissance émise. C. Mode AM ou FM. Ces icônes clignotent si la fonction NOISE BLANKER a été activée (version sans NB et DS affiché). D. RX: Réception. TX : Emission. SCAN: mode de balayage. - Page 29 7. “MIC GAIN”: Permet d’ajuster la sensibilité de votre micro. deux canaux. La double veille redémarre 4 secondes après la disparition 8. M1 - M2 - M3 et M4. Avec ces boutons vous pouvez mémoriser et de la porteuse. rappeler immédiatement 4 canaux. Sélectionner un canal puis appuyer 3 Pour activer la fonction Dual Watch : secondes sur la touche M1 pour le mémoriser.
-
Page 30: Installation
INSTALLATION MICROPHONE PTT: bouton pour l’émission. Sécurité et montage aisé doivent guider toute l’installation. Tous les contrôles UP/DOWN: boutons de changement de canal. doivent être accessibles à l’opérateur sans provoquer de mouvements pouvant LOCK: permet le blocage des touches mettre en danger le conduite du véhicule. Sélectionner la meilleure position UP/DOWN du microphone. -
Page 31: Utilisation
REMPLACEMENT DU FUSIBLE TABLEAU DES BANDES DE FREQUENCES Pays Sigle sur l’écran Remplacer le fusible du câble d’alimentation avec un similaire du type F 2A 250V. Les paramètres et le symbole du fusible sont indiqués dans cette étiquette. Italie 40 CH AM/FM 4Watt Italie 34 CH AM/FM 4Watt F2A 250V + Allemagne 80 CH FM 4Watt / 40 CH AM 4 Watt... -
Page 32: Specifications Techniques
SPECIFICATIONS TECHNIQUES GENERALITES Canaux ................... (Voir le tableau) Bande de fréquence* ............ 26.565 - 27.99125 Mhz Cicle d’usage (% dans 1 heure) .......TX 5% - RX 5% - Stand-by 90% Générateur de fréquence............par synthétiseur Température d’utilisation ..............-10°/+55°C Tension d’alimentation ..............12.6 V DC ± 10 % Dimensions ................ - Page 33 SPIS TRESCI Wprowadzenie ..................................................str.1 Funkcje i elementy sterowania ............................................str. 2 Instalacja..................................................... str. 4 Zasilanie ....................................................str. 4 Instalowanie anteny ................................................str. 4 Wymiana bezpiecznika ..............................................str. 4 Uzytkowanie radiotelefonu ...............................................str. 5 Wybieranie przedzialu czestotliwosci ..........................................str. 5 Tabela czestotliwosci ................................................str. 5 Dane techniczne .................................................str.6...
-
Page 34: Funkcje I Elementy Sterowania
FUNKCJE, WSKAZNIKI I ELEMENTY A. Numer aktualnie uzywanego kanalu B. Poziom odbieranego i wysylanego sygnalu STEROWANIA C. AM/FM rodzaj emisji. Ikona miga gdy funkcja NOISE BLANKER jest aktywna (wersja bez wyświetlanego NB i DS). D. RX/TX stan nadawanie / odbior. SCAN sygnalizuje dzialanie skanera EMG pokazuje status kanalow uznanych powszechnie za ratunkowe G. - Page 35 PANEL TYLNY Q UP/Q DOWN przyciski pozwalaja na zmiane kanalow co 10 w gore 10/11. lub w dol. CB/PA przelacznik ustawiony w pozycji PA powoduje, ze radiotelefon dziala jak wzmacniacz akustyczny, jezeli jest polaczony z glosnikiem zewnetrznym PA; pokretlo ON/OFF Volume reguluje wtedy poziom wzmocnienia;...
-
Page 36: Instalacja
INSTALACJA MIKROFONOWE PTT przycisk wlaczajacy nadawanie. Przed przystapieniem do montazu radiotelefonu w samochodzie nalezy sta- UP/DOWN przyciski zmiany kanalow. rannie wybrac najlepsze dla niego miejsce. Dostep do elementow sterujacych LOCK przycisk blokujacy dzialanie powinien byc swobodny, a manipulacja nimi nie moze utrudniac prowadzenia sasiednich, sluzacych do zmiany kanalow. -
Page 37: Wymiana Bezpiecznika
okresowe ogledziny kabla i sprawdzenie wartosci Wspolczynnika Fali Stojacej TABELA CZESTOTLIWOSCI ( SWR ). Wyswietlane KRAJ, ZAKRES Oznacznie WYMIANA BEZPIECZNIKA Wlochy 40 kanalow AM/FM, 4 W Wlochy 34 kanaly AM/FM, 4 W Jeżeli wymieniasz bezpiecznik na przewodzie zasilajacym, uzyj bezpiecznika F 2A 250V. -
Page 38: Dane Techniczne
DANE TECHNICZNE OGOLNE Ilosc kanalow ..................(Patrz tabela) Zakres czestotliwosci* ....26.960-27.400 (26.565 - 27.99125) MHz Cykl pracy (% na 1 godzine) ......TX 5% - RX 5% - Stand-by 90% Kontrola czestotliwosci ............... Petla fazowa PLL Temperatura pracy ................-10°/+55°C Zasilanie ....................12.6 V ± 10% Wymiary zewnetrzne .............. - Page 39 INDEX Introducere ..................................................Pag. 1 Functii taste ..................................................Pag. 2 Instalare ....................................................Pag.4 Alimentare ..................................................Pag.4 Instalarea unei antenei ..............................................Pag.4 Instructiuni de utilizare ..............................................Pag.5 Selectarea benzii de frecvente ............................................Pag.5 Tabel frecvente ..................................................Pag.5 Specificatii tehnice ................................................Pag.6...
- Page 40 FUNCTII TASTE A. Numar canal selectionat Indicator semnal receptionat si putere semnal transmis C. Mod AM/FM. Aceste pictograme clipesc daca functia NOISE BLANKER este activa (pentru versiunea fara NB si DS afisate pe ecran) D. RX/TX: TX=transmisie; RX=receptie. Mod SCAN Mod EMG G.
- Page 41 8. Tastele “M1-M2-M3-M4”: Aceste taste permit memorarea si apelarea b. Apasati tasta “DW” (DW clipeste pe ecran). a 4 canale preselectate. Pentru a memora canale: selectati canalul dorit c. Selectati al doilea canal. si apasati M1 pentru cel putin 3 sec pentru a stoca canalul respectiv pe d.
- Page 42 INSTALARE MICROFONUL : buton emisie Siguranta si confortul sunt principalele considerente pentru montarea oricarui 2. UP/DOWN (SUS/JOS): selector echipament mobil. Toate butoanele trebuie sa fie usor accesibile soferului fara manual de canale a interfera cu miscarile necesare pentru conducerea in siguranta a vehiculului. permite blocarea 3.
- Page 43 INLOCUIREA SIGURANTEI TABEL FRECVENTE Simbol Tara Daca trebuie sa inlocuiti siguranta de pe cablu, folositi o siguranta tip F 2A 250V. Parametrii si simbolul sigurantei sunt indicate pe eticheta de mai jos. Italia 40 CH AM/FM 4Watt Italia 34 CH AM/FM 4Watt F2A 250V + Germania 80 CH FM 4Watt / 40 CH AM 4 Watt Europa 40 CH FM 4Watt / 40 CH AM 1Watt...
- Page 44 SPECIFICATII TEHNICE GENERAL Canale ................(vezi tabelul de frecvente) Gama frecvente* ............26.565 - 27.99125 MHz Ciclu de functionare (% intr-o ora) ....TX 5% - RX 5% - Stand-by 90% Control frecventa .....................PLL Temperatura de operare ..............-10°/+55° C Tensiune de alimentare ............... 12.6V DC ±10% Dimensiuni ..............180 (L)x50 (H)x150 (P) mm Greutate ........................1kg RECEPTIE...
- Page 45 • Für allen Informationen über die Garantie der Artikel, besuchen Sie bitte www.midlandeurope.com unsere www.midlandeurope.com • Rumeno • Para mayor información sobre la garantía, visite la web www.midland.es www.midlandeurope.com • Pour des informations sur la garantie, s’il vous plaît visitez le site...
- Page 46 The use of this transceiver can be subject to national restrictions. Read the Importat de: S.C. ONLINESHOP srl instructions carefully before installation and use. Strada Olteniei 26A, 610206, Piatra Neamt, Romania - www.midland.ro Utilizarea acestei statii radio poate fi supusa restrictiilor nationale. Vertrieb durch: ALAN ELECTRONICS GmbH Cititi cu atentie instructiunile, inainte de instalare si utilizare.
Need help?
Do you have a question about the Alan 48 Pro and is the answer not in the manual?
Questions and answers
Changing a Midland Alan78 to EU
To change the Midland Alan 48 Pro to EU settings, select the country you are using the radio in. The microprocessor will then automatically adjust to the legal channels for that country. This process ensures compliance with local regulations. Full instructions are included with the device to guide you through selecting the correct country code.
This answer is automatically generated