Table of Contents
Advertisement
Quick Links
Advertisement
Table of Contents

Summary of Contents for Radix PS-1
- Page 1 Model PS-1 & PS-2 INSTALLATION AND USER’S GUIDE...
-
Page 2: Menu Button
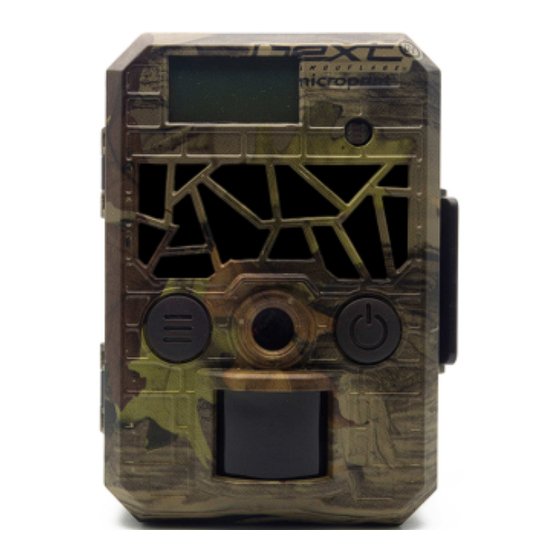
1.Introduction RADIX TRAIL CAMERAS is a digital scouting and infrared surveillance camera, triggered by any movement of humans or animals monitored by a high sensitive Passive Infrared (PIR) motion sensor, and then automatically captures high quality pictures or records audio video clips according to default settings or preset settings. - Page 3 Strap Bracket 1/4” 20 Mount 1.2 Shooting Information Display Entry to setting mode (press to be activated LCD screen). The current settings will be displayed on LCD. Time H:M:S Work Mode Resolution and frame The number of stored images Free space on the card Date 2 Cautions The working voltage of the camera is 6V 12V.
- Page 4 Before inserting the SD card, please make sure the power switch is in OFF position. Please do not insert or take out the SD card when the power switch is in ON position. It is recommended to format the SD card by the camera when used for the first time. Many other SD cards formatted by other cameras, have poor compatibility with different brands of cameras.
- Page 5 shutdown. Turn off the setting mode, pressing the power button again until the LCD displays the announcement of shutdown. Note: Even in OFF mode, the camera still consumes a small amount of battery power. Therefore, please remove the batteries if the camera is not in use. 4 Advanced Operations From the basic operations of the camera previewed in the previous chapter, we know that the camera has two key function button.
- Page 6 4.2.2 Advanced menu Photo setting Choose the image size and the shooting photo Video setting Setting the video resolution and video length so on Fixed time The camera can be set to only record/capture at a certain time of the day when set to ON mode. The rest of the time the camera will be shut off and will not record/capture any triggers by movement.
- Page 7 4.4 Overview of factory settings - Advanced menu Menu item Initial settings Optional Sub menu Photo setting Photo resolution 5 MP 8MP/12MP input Series photos 1 photo 2 photos/3 photos input Video setting Video resolution 1280X720 640X480 / 1440X1080 input Video length 20/30/60s input...
-
Page 8: Basic Menu
BASIC MENU 1.Camera name to to to Pressing select the “Name” setting menu. Pressing enter configuration page . Pressing to choose ON, press choose wanted character, pressing to confirm and move the cursor from left to the end. After reaching the end, pressing the to save the name and exit item name setting. - Page 9 to Pressing select the “Setting Mode” setting menu. Pressing the to enter into the advanced menu (detail setting menu). Please check the “advanced mean” chapter to get more details. 6.Delete to to Pressing select the “Erase Mode” setting menu. Pressing enter configuration page .
- Page 10 2.Video setting Pressing the to scroll and the to select the parameter you want to set. The FPT settings is recommended to be 30FPS, which will make the video smooth. And the refresh rate is recommended to choose 50HZ. 3.Fixed time(TIMER) Pressing enter to the fixed time menu and select whether you want turn on or off the fixed time function.
- Page 11 4.Time interval (Time Lapse) Pressing enter to the time interval menu and select whether you want turn on or off the time interval function. Confirmed by pressing . Turn it on, pressing button to choose period time lapse shooting. Move the cursor one step forward button .
- Page 12 7.Beep sound Pressing the button to turn on or off the beep sound. Choose whether you want to feature on or off. Pressing the change the selection and pressing the confirm. 1.OFF 2.ON 5.Sensitivity Pressing to select the sensitivity of the PIR sensor. Pressing to change the selection and to confirm. 1.Low 2.Middle 3.High 8.IR led Pressing to select the IR LED. Pressing to change the selection and to confirm. 1.Low 2.Middle 3.High...
- Page 13 6.Set clock Press the button to set the date and time. Change the cursor, press button . Change the value to the dial button first, adjust the date format. We recommend setting the DMY (day- month-year). Then set the date and time. DMY 24.12.2016 08:05 MM.DD.YYYY HH:MM 7.Password Press the button to protect the PIN code. Choose whether you want to feature on or off. Change the selection button and confirm 0 0 0 0 8.Factory setting Press the button to restore the factory settings. Choose whether you want to perform a reset or not. Change the selection, pressing button , confirm, pressing 1.OFF 2.ON 9.Return Press the button to exit the Advanced menu and back to the main menu.
-
Page 14: Two Year Limited Warranty
To obtain warranty service, please contact us to determine the nature of problem before return the product under this warranty (with a written description of the problem and print samples) for repairing or exchanging. RADIX TRAIL CAMERAS 12486 ROUTE J40 MILTON, IA 52570... -
Page 15: Appendix I: Technical Specifications
Appendix I: Technical Specifications Lens F/NO=2.8, FOV(Field of View)=45° Picture Resolution 12MP/8MP/5MP Video Resolution 1080P/720P/VGA Video Length 5s-600s IR Flash Range 65feet/20m LCD Display 1.5” TFT Memory Card Up to 32 GB Trigger Time <1S PIR Interval 00min 05sec to 59min 55sec. Photo Stamp LOGO, Date, Time, Moon Phase, Temperature, Device Name Photo Burst 1,2.3 per trigger Power Supply 4×AA Batteries or 12V DC Stand-by Current < 0.25mA Audio Video YES Mounting Rope/Strap/Python lock Dimensions 107x76 x40 mm Weight 0.29KG Waterproof Grade IP66 Operation Temperature -20 to+60°C / -30 to +70°C Operation Humidity...

Need help?
Do you have a question about the PS-1 and is the answer not in the manual?
Questions and answers