Table of Contents
Advertisement
Quick Links
Advertisement
Table of Contents
Troubleshooting

Subscribe to Our Youtube Channel
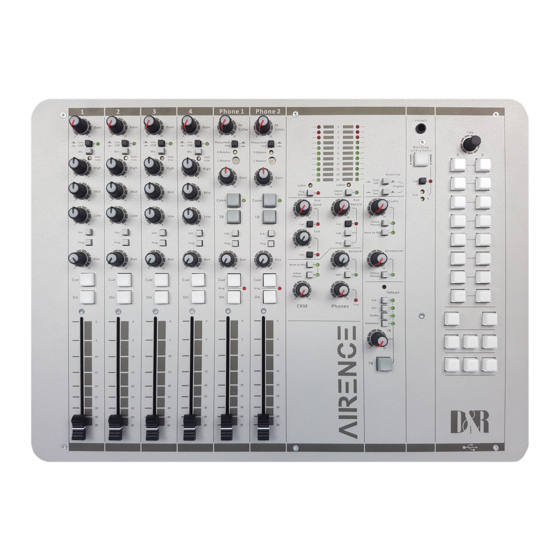
Related Manuals for D&R AIRENCE

Summary of Contents for D&R AIRENCE
- Page 1 MANUAL version 1.04 A I R E N C E - U S B M a n u a l P a g e 1...
- Page 2 24 hours per day as an “On-Air” mixer and/or a production console in the most demanding production room. We are confident that you will be using the AIRENCE-USB mixer for many years to come, and wish you much success.
- Page 3 INTRODUCTION MAIN MIXER UNIT The AIRENCE-USB MAIN mixer is designed as a 6 channel ON-AIR/Production mixer that can be expanded with one or more 6 channel extender units until you have sufficient inputs. There is no limit to the number of extender units because every unit has its own power supply and its own low noise summing amps.
- Page 4 AIRENCE MAIN UNIT BACKPANEL The Main’s section back panel shows all the in and output connectors to interface with your other equipment. The first 1 to 4 MIC/LINE/USB modules on the right have balanced XLR mic inputs with a mic insert for voice processing.
- Page 5 The low-noise design and excellent phase spec that D&R is known for is integrated through- out the AIRENCE-USB which results in a phase coherent signal path. Using balanced microphones & cables allows for the quietest and high quality audio signals throughout your AIRENCE-USB mixer. You can use standard balanced Mic cables available at any pro audio dealer or music store.
- Page 6 10dB and choose for a unity gain position in the fully up position of the fader. A jumper setting page will be shown further in this manual to customize the AIRENCE to your needs.
- Page 7 If your turntable only needs a pulse to start, ask your dealer. Or if you know how to temporarily remove the cover frame of the AIRENCE you can change a jumper setting to a momentary action, so it can be used as a pulse start switch.
- Page 8 It is also advisable to make up you mind how you want the AIRENCE to do his job for you. Let me show you first a list of jumper settings and what you can achieve with changing the jumper settings.
- Page 9 SPECIAL OPTIONS FOR USB MODULES 1 - 4 (PCB AIRENCE-2) PCB Location JUMPERS DEFAULT DESCRIPTION 48 volt phantom power on/off via Jumper Phantom ON J15. Low cut filter on Mic input done by short- ing all 4 pins on Jumper J3.
- Page 10 PLEASE DO NOT CHANGE BELOW JUMPERS DEFAULT JUMPERS IN ANY WAY Logic Port selector: 1-2 START / 3-4 Module-1 ON / 5-6 CUE Logic Port selector: 7-8 START / 9-10 Module-2 ON / 11-12 CUE Logic Port selector: 13-14 START / 15- Module-3 16 ON / 17-18 CUE Logic Port selector: 19-20 START / 21-...
- Page 11 USB LEVEL TRIMMERS On the top left of the picture above you also have two trimmers (VR2 and VR3) that adjust the level that is sent to the USB chip in the AIRENCE and thus adjust the outgoing level to your PC for left and right signal for the selected jumper setting discussed earlier.
- Page 12 UNDERSTANDING INTERNET RADIO One of the key features of the AIRENCE is you can set up your own Internet radio station from your home or office and have your friends listen to your broadcasts, be it music, talkshows, political, or religious programming.
- Page 13 Automatically canceling out the unwanted signal, they facilitate two-way communication when using a single 2 wire telephone line. Each AIRENCE-USB hybrid module has a Telephone line (WALL) connection and a handset connection. Thousands of D&R Telephone Hybrids (also built into this AIRENCE-USB) are used in radio and television broadcasting facilities around the World allowing external call- ers to be connected to the studio mixer for live broadcast.
- Page 14 INPUT CONNECTORS On the back of each of the AIRENCE-TELCO modules 1 and 2 you find five connectors. Two unbalanced stereo line RCA Cinch connectors for connecting CD players, iPods, or any play- back devices as long as they are line level equipment. The level can be set using the gain control to match most source levels.
- Page 15 SPECIAL AVAILABLE OPTIONS IN YOUR AIRENCE-TELCO MODULE On the PCB of your TELCO AIRENCE module there are several jumpers and 2 trimmers that can be changed/trimmed to enable different con- figurations of the channel settings. This should be done by a D&R dealer, service center or yourselves if you are not afraid of electronics and screwdrivers.
- Page 16 AIRENCE MASTER SECTION The AIRENCE master section houses all the controls for the mix buss Program faders and master controls for Aux return, EXT (2-Track) play-back, and master outputs. Individual functions are described below in sections as shown on the front panel below.
- Page 17 STUDIO The AIRENCE has a separate Studio output that normally follows the Program pre-fader left and right signals, but in case a guest wants to hear a caller switching to Follow Phones enables him or her to listen tot the CUE system and to communicate with the caller outside a broadcast.
- Page 18 400 Ohms to avoid mismatch or distortion. An 8-32 Ohm set of headphones will produce distortion when cranking up the level of the AIRENCE to high due to the fact that the impedance load is too low. If you must use 8-32 ohm phones, a small power amp should be used to power the phones.
- Page 19 MASTER BACKPANEL CONNECTORS The master connector panel houses 18 RCA/Cinch connectors, 2 jack sockets, and 2 male XLR connectors. There are two power supply connectors, USB connector and the SUB-D type connector to connect a slave unit to the main unit. From right to left we will describe the functions and features of the master connector panel.
- Page 20 The N.O. (Normally Open) contact is connected to the ring of the jack. The N.C. (Normally Closed) contact is connected to the “sleeve or ground” of the jack. AIRENCE-USB RED LIGHT / START EXAMPLES Start / Mic-On Jack Function relais contact...
- Page 21 SUB-D CONNECTOR TO SLAVE UNITS The AIRENCE has a Sub-D connector where you can connect an input slave unit with 6 triple inputs to extend the number of inputs of your system. All (ON-AIR) and CUE control signals are sent also through this low impedance module link.
- Page 22 Use the input gain for regular gain adjustment and the trimmer for fine adjustments to create a convenient gain range to work with. Be carefully not to place the AIRENCE near heavy power transformers such as power amps. Although the AIRENCE is constructed using a thick metal frame, this could cause hum.
- Page 23 Hybrid. These adjustments are only required once when installing the AIRENCE. To achieve the optimum attenuation, you must adjust the C and R balance first.
- Page 24 CONNECTION WIRING OF BOTH (Wall) LINE and PHONE RJ-11 CONNECTORS PHONE/WALL RJ-11 FUNCTION CONNECTION Pin 1 n.c. Pin 2 A (telephone line) In/out Pin 3 B (telephone line) In/out Pin 4 n.c. Below is an explanation for Germany Phone systems where different telephone connectors are used. Eingang und Ausgang Telefonhybrid Module (RJ11): Pin I : nicht belegt...
- Page 25 That 1510 Mic-pre which is highly acclaimed for its low noise/distortion and transparent audio. The low-noise design and excellent phase spec that D&R is known for is integrated throughout the AIRENCE- USB which results in phase coherent signal path. Using balanced microphones & cables allows for the quietest and high quality audio signals throughout your AIRENCE-USB mixer.
- Page 26 10dB and choose for a unity gain position in the fully open position of the fader. A jumper setting page will be shown further in this manual to customize your AIRENCE to your needs.
- Page 27 Now insert the stereo jack into the AIRENCE’s insert and connect the mono jack that produces a hum when the tip is touched by your finger (and the related channel fader is open) into the processors output.
- Page 28 SPECIAL OPTIONS FOR EXTENDER MODULES 1 - 6 (PCB AIRENCE-1) PCB Location JUMPERS DEFAULT DESCRIPTION Phantom ON 48 volt phantom power on/off via Jumper J9. Low cut filter on Mic input done by shorting all 4 pins on Jumper J3.
- Page 29 Studio Remote unit. The above pictured (optional) Studio Remote can be connected to the AIRENCE Extender only to pro- vide communication from the Presenter to the Studio room with the following possibilities.
- Page 30 Control Module & USB channel controls User Manual Control Section V 1.00 D&R Electronica Weesp BV, Rijnkade 15B, 1382GS Weesp, The Netherlands Phone: +31 (0)294-418014, Fax: +31 (0)294-416987, Website: http://www.d-r.nl, E-mail: info@d-r.nl A I R E N C E - U S B M a n u a l P a g e 30...
- Page 31 • Configuration viewer page 38 • Let’s get connected • Presets Store preset • Recall preset • Settings • Airence USB HID Control Protocol page 39 • Introduction • Message format page 40 • Command byte • Messages • Write •...
- Page 32 Introduction Besides the audio channels the Airence mixer is equipped with a control section. This control section is located at the right of the mixer and consists of 24 illuminated switches and a rotary encoder with push switch. The switches are able to illuminate red, green, and yellow to indicate various conditions.
- Page 33 Communication Interface The present USB bus on the Airence mixer is used as the interface to transfer all the control signals to the PC. In order to keep things simple the HID (Human Interface Device) protocol is used for communication between the Airence mixer and PC.
- Page 34 Controlling your software application In order to be able to control a software application (i.e. play out software) with the Airence control signals (control module / USB channel controls), one can choose one of the two available methodologies as can be seen in the figure below.
- Page 35 Control signals In total there are 39 control signals coming from the Airence mixer which can be mapped to keystrokes using the Airence virtual keyboard mapper application. These 39 control signals are divided into the Control Module signals and USB Channel controls.
- Page 36 Setting up your configuration The Airence virtual keyboard mapper application can be split up in an configuration editor and configuration viewer section as can be seen in the figure above. In the configuration editor section one is able to attach keystrokes to the control signals. To do so, clicking on one of the switches, encoder or faders opens up a keystroke configuration editor window where the configuration of the relevant control signal can be done.
- Page 37 Play out plug-ins An play out plug-in is a set of function descriptions of a specific software application (play out software) which are mapped to keystrokes. A plug-in is represented as a standard XML-file which can be seen in the figure below. There is a plug-in folder PLUGINS created in the installation directory during setup where the plug-ins are located or has to be placed when creating one.
- Page 38 Select one of the available functions from the Quick Function Learn box and press the Learn button. The window as seen in the figure below will show up and waits for a control signal event coming from the Airence mixer. If a control signal is received the selected function is immediately mapped to this control signal.
- Page 39 When done with setting up the configuration the Virtual Keyboard Mapper application is ready to receive changes of the control signals from the Airence mixer. To do so, you have to press the START button in the Service box. If the application is able to con- nect to the Airence mixer the label on the button would change into STOP and the firmware revision of the mixer is shown.
- Page 40 Airence mixer. For the communication between the PC (host) and Airence (device) the USB generic HID (Human Interface Device) class protocol is used. HID devices are identified by their PID and VID. For the Airence the PID=0x2402, and the VID=0x03EB.
- Page 41 Write A message of the type WRITE is transmitted from the PC to Airence. The message is intended to perform an action on the Airence control section (i.e. illuminate a LED). If the action is correctly executed, the Airence will reply with a corresponding event.
- Page 42 Description byte SIZE 0x02 Message size COMMAND 0x41 AIRENCE_FIRMWARE_VERSION_REQUEST Response A message of the type RESPONSE is transmitted from the Airence to the PC when prior a firmware version request message was received. AIRENCE_FIRMWARE_VERSION_RESPONSE byte: SIZE COMMAND PAYLOAD 0x04 0x81...
- Page 43 Events A message of the type EVENT is transmitted from the Airence to the PC. An event will be generated when the state of a switch , encoder, or LED has changed. These events can be used to synchronize states of LEDs and switches between the Airence and the controlled application on the PC.
- Page 44 Absolute encoder value [ 0 - 255 ] (wrap around) We hope to have given you some inside information about this control section of the AIRENCE and sure hope you will be happy with its performance to make your performance even better.
- Page 45 TROUBLESHOOTING ‘USB Controller bandwidth exceeded’ Windows 7 Version 1.0 - 2013-05-23 A I R E N C E - U S B M a n u a l P a g e 45...
- Page 46 BACKGROUND USB System Architecture 2.1.1 USB Host 2.1.2 USB Devices Airence USB System Architecture ANALYSIS SOLUTION USED TOOLS A I R E N C E - U S B M a n u a l P a g e 46...
- Page 47 2 Background USB System Architecture The USB System Architecture consists of the following main components: • Host (PC) Computer • One or more USB Devices • A physical bus represented by the USB Cable that links the devices with the host (PC) computer. 2.1.1 USB Host (your PC) The main responsibility of the host computer is to control the communication between the host system and USB devices.
- Page 48 Due to the fact the Airence is a composite USB device consisting of four audio codecs, Control section, USB to Serial converter and USB Hub there is a lot of USB traffic between the Airence and your PC, if all individual components are used at the same time.
- Page 49 Figure 2. Windows 7 generates warning message Figure 3. USB View: Visualize the USB System Architecture A I R E N C E - U S B M a n u a l P a g e 49...
- Page 50 To do so, a software program called ‘USB View’ is used here to visualize the USB tree structure in your system. With this tool you are able to check if the Airence is exclusively connected to a root hub. If not, you will see other devices con- nected to the same Root Hub.
- Page 51 Therefore, the Airence does not need to share the USB bandwidth with other devices. To recognize the Airence device you can try to identify the internal USB Hub with the aid of the vendor- and product id’s, 0x0451 and 0x2077 respectively.
- Page 52 TECHNICAL SPECIFICATIONS SPECIFICATIONS INPUTS. : Mic inputs : XLR connector balanced impedance 2 kOhm. : Pin 1 = ground. : Pin 2 = hot (in phase). : Pin 3 = cold (out of phase). : +48 volt Phantom power : bal, 2 kOhm, XLR. ,48 volt Phantom. : Noise 128 dBr (A-weighted).
- Page 53 Firmware Update Procedure VERSION 1.0 D&R Electronica Weesp BV, Rijnkade 15B, 1382GS Weesp, The Netherlands Phone: +31 (0)294-418014, Fax: +31 (0)294-416987, Website: http://www.d-r.nl, E-mail: info@d-r.nl A I R E N C E - U S B M a n u a l P a g e 53...
- Page 54 Contents INTRODUCTION ............................3 Bootloader mode ............................... 3 INSTALLATION ............................... 3 Airence Firmware Updatetool .......................... 3 USB bootloader drivers ............................ 7 FIRMWARE UPDATE PROCEDURE ........................ 9 Preparation ................................ 9 Flash firmware into device ..........................9 TROUBLESHOOTING ........................... 10 Firmware update failed ........................... 10 Java virtual machine (JVM) ..........................
- Page 55 Introduction Every now and then new firmware versions will be released to provide the Airence mixer with new features or solved bug fixes. In order to be able to update the current firmware residing in the Airence mixer a special operating mode called ‘bootloader mode’...
- Page 56 Select a destination location for the update tool to be installed into and click Next. Select a start menu folder and click Next. A I R E N C E - U S B M a n u a l P a g e 56...
- Page 57 Enable the ‘Create a desktop icon’ for a shortcut on the desktop and click Next. If you agree with the configuration click Install to begin installation. A I R E N C E - U S B M a n u a l P a g e 57...
- Page 58 Setup copies files to the destination install folder. Click Finish to complete the installation. A I R E N C E - U S B M a n u a l P a g e 58...
- Page 59 USB bootloader drivers When the Airence mixer enters the bootloader mode it will probably sign up as an ‘unknown device’ in the device manager from Windows. To determine if this unknown device is the Airence in bootloader mode, right-click on the device and select properties.
- Page 60 In the device manager the unknown device is correctly installed and now shown as : ATxmega32A4U The ATxmega32A4U device indicates the Airence is in bootloader mode. A I R E N C E - U S B M a n u a l P a g e 60...
- Page 61 Airence mixer automatically leaves the bootloader mode and reboots with the new firmware in normal operation mode. The fol- lowing message should appear: To verify the current firmware version inside the Airence mixer, press the ‘Get version info’ button. You only can obtain the ver- sion info if the device is NOT in bootloader mode.
- Page 62 Firmware update failed If you get the following error after pressing the UPDATE button you should check if the Airence mixer is properly connected with a USB cable and if the device is in bootloader mode. To determine if the device is in bootloader mode open up the device man- ager and look for the device: Atmel USB Devices ->...
- Page 63 SUMMERY We hope this manual has given you sufficient information to use this new AIRENCE mixer in your studio. If you require more info please contact your local dealer or send us an email at info@d-r.nl and we will answer your email within 24 hours during weekdays.
- Page 64 : D&R Electronica Weesp b.v. Address manufacturer : Rijnkade 15B, : 1382 GS Weesp, : The Netherlands declares that this product Name product : AIRENCE and AIRENCE EXT Model number : n.a. Product options installed : none passed the following product specifications: Safety : IEC 60065 (7th ed.
Need help?
Do you have a question about the AIRENCE and is the answer not in the manual?
Questions and answers