
Related Manuals for barebones Outfitter Safari Tent


Summary of Contents for barebones Outfitter Safari Tent
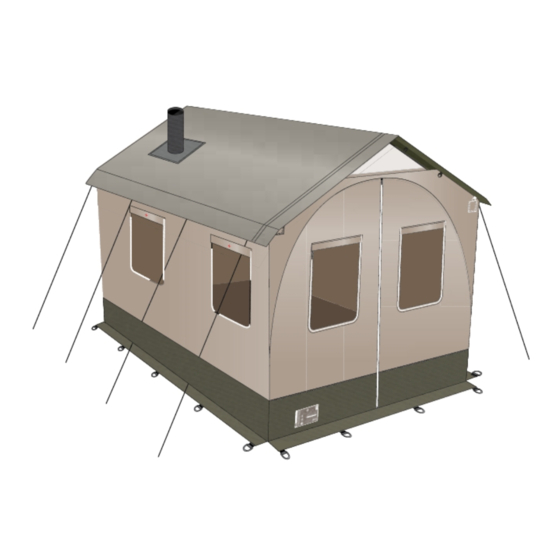
- Page 1 Outfitter Safari Tent Manual #STR-557 14513 South, Center Point Way, Suite 100 Bluffdale, UT 84065 1-855-895-7040 info@barebonesliving.com...
- Page 2 SET UP CARE AND INSTRUCTIONS Understanding the “Barebones” System • The Barebones pole and joint system was designed with strength and durability in mind, and allows for a very sturdy connection between poles and joints. • When assembling the Barebones frame, always wear protective gloves to prevent injury.
- Page 3 BEFORE YOU BEGIN, SEPARATE AND COUNT PARTS 3-Point 90º Angle Joint T Joint 3-Point 120º Angle Joint QTY: 4 QTY: 8 QTY: 6 4-Point 120º Angle Joint Connector Swivel Joint QTY: 9 QTY: 26 QTY: 10 Extension Poles 34.5 Inch Poles 34.5 Inch Poles Tent Floor QTY: 6...
- Page 4 SET UP OVERVIEW Step 1: Put On Gloves Step 9: Drape All Weather Cover and Attach Step 2: Assemble Base Step 10: Insert and Assemble Stove Pipe Step 3: Attach Tent Floor Step 11: Add Poles To Raise Tent Step 4: Assemble Roof Step 12: Connect To Base Cross Beam Assembly Step 13: Assemble Door Frame...
- Page 5 STEP 2 CONTINUED: ASSEMBLE BASE Setup Tip: Place exactly as shown; arc sits on the ground. Layout Joints Inside of tent • Lay out (A) joints on each of the four corners. • Lay out three (B) joints on each wall &...
- Page 6 STEP 3: ATTACH TENT FLOOR Set Tent Floor Inside Base Helpful Tip For Floor • Tent floor has a top and bottom. • Buckles and velcro are attached • Unfold (I) tent floor inside base. to the bottom. • Line up corner port holes which are located by Back Door on each side Attach To Base •...
- Page 7 STEP 4: ASSEMBLE ROOF Parts needed: QTY: 6 QTY: 9 QTY: 12 QTY: 24 QTY: 8 Cross Beam Assembly Clamp 1” • Disassemble swivel joint. TIP! Attach swivel joint clamp onto second pole. • Set wing-nut/screws, and Swivel joint base aside for now. Base Build Truss 1 and 5 Arc goes between poles.
- Page 8 STEP 4: ASSEMBLE ROOF Tip! Slide (F) joint on poles before connecting poppels. Assemble Beam • Build the following. Connect • Reattach to swivel joint base on Truss 1 and 5 using wingnuts and screws Wing-nut on inside. Building Center Trusses 2-4 Arc goes between poles.
- Page 9 STEP 4 CONTINUED: ASSEMBLE ROOF • Starting with Truss 1, insert three (H) poles and connect Truss 2. • Repeat with Truss 2-3, 3-4, and 4-5. Completed Roof...
- Page 10 STEP 5: ASSEMBLE HALF WALL Parts needed: QTY: 10 QTY: 10 Build 10 • Insert (H) Pole into (E) joint. IMPORTANT! For All Corner Poles • Insert poppel exactly as shown. Insert In Order • Insert pole 1 into corner. •...
- Page 11 STEP 6: MOVE ASSEMBLED ROOF/HALF WALL • Rest assembled portion of frame onto tent base as shown. STEP 7: DRAPING CENTER PANEL ACROSS FRAME Drape Folded Center Panel • Drape panel across frame as shown. • Stove pipe will be positioned near Back Door.
- Page 12 STEP 8: ATTACH DOORS Identifying Your Doors Back Door Front Door Back Door Front Door Helpful Tip For Doors per B • Attaching doors is easier with two people. Back Door can be may when trying to get it past the last joint. Pull fabric up away from joint, zip down, then with your partner pull over joint.
- Page 13 STEP 9: DRAPE ALL WEATHER COVER AND ATTACH TO ROOF If setting up tent but not using a stove, close flap over stove pipe hole and fasten fastex clips on the All Weather Cover and Tent top. Drape and Attach •...
- Page 14 STEP 10: (OPTIONAL) INSTALLING STOVE Important! Insert stove pipe following manufacturers instructions. Using Stove with Outfitter Tent • Always use a Spark Arrestor to prevent roof damage. • Always use a Heat Mat under your stove. • Always secure tent to ground properly to prevent stove pipe movement in high winds. * Using stove for extended periods of time requires special assembly, please refer to stove manufacturers instruction to ensure proper installation.
- Page 15 STEP 11: ADD POLES TO RAISE TENT Parts Needed: QTY: 10 Insert In Order • Insert pole 1 into corner. • On the same side, continue down the line 2, 3, 4 and 5. • Then, insert poles 6, 7, 8, 9, and 10. STEP 12: CONNECT STRUCTURE TO BASE Set Poles First •...
- Page 16 STEP 13: ASSEMBLE FRONT DOOR FRAME TIP! If ground is uneven you may need to adjust where poppel is released, check to see that no poles are being bent. Parts needed: QTY: 2 QTY: 2 QTY: 2 Front Door Frame •...
- Page 17 STEP 13: ASSEMBLE BACK DOOR FRAME TIP! If ground is uneven you may need to adjust where poppel is released, check to see that no poles are being bent. Parts needed: QTY: 2 QTY: 4 QTY: 2 Back Door Frame •...
- Page 18 STEP 14: PLACE HEAT MAT AND FINISH STOVE ASSMEBLY • Place Heat Mat. • Complete Assembly Important! Use Heat Mat • Use provided Heat Mat to prevent floor damage. • Position stove to the back of the Heat Mat as shown. Use Spark Arrestor •...
- Page 19 STEP 15: FINAL STEPS Tent Doors and Center Panel • Velcro and connect around poles • DO NOT cinch straps too tightly. • Finish Zipping Doors Attach Tent Floor To Wall • Start at the opening of Front Door • Move to corners.
- Page 20 STEP 16: SECURING TENT All Weather Cover must be secured with rope and stakes to the ground in order to prevent loss and or damage in high wind or inclimate weather situations. • Loop rope through D rings of TENT. Staking Down Tent •...
Need help?
Do you have a question about the Outfitter Safari Tent and is the answer not in the manual?
Questions and answers