Table of Contents
Advertisement
Quick Links
Advertisement
Table of Contents

Subscribe to Our Youtube Channel
Related Manuals for CZone Touch 7


Summary of Contents for CZone Touch 7
- Page 1 Touch 7 User & Installation Manual v1.0...
- Page 2 EN / CZone® Touch 7 User & Installation Manual Copyright This document is copyright 2020 under the Creative Commons agreement. Rights are granted to research and reproduce elements of this document for non-commercial purposes on the condition that Power Products is credited as the source. Electronic re-distribution of the document in any format is restricted, to maintain quality and version control.
-
Page 3: Table Of Contents
EN / CZone® Touch 7 User & Installation Manual Table of Contents GENERAL INFORMATION ......................5 Use of this manual ......................... 5 Liability ........................... 5 Warranty ..........................5 Identification Label ......................... 5 OVERVIEW ............................. 6 Description ..........................6 Features ..........................6 Overview .......................... - Page 4 EN / CZone® Touch 7 User & Installation Manual Table of Figures Figure 1. Touch 7 Front ........................... 6 Figure 2. Touch 7 Connections ....................... 7 Figure 3. Supplied Parts .......................... 7 Figure 4. Access Point Example ......................8 Figure 5. Client Mode Wireless Example ....................8 Figure 6.
-
Page 5: General Information
Conditions of Sale. Warranty The CZone product warranty covers the Touch 7 for the first two years after the purchase date, on the condition that the product is installed and used according to the instructions in this manual. Installation or use that do not comply with these instructions may result in under performance, damage or failure of the product and may void this warranty. -
Page 6: Overview
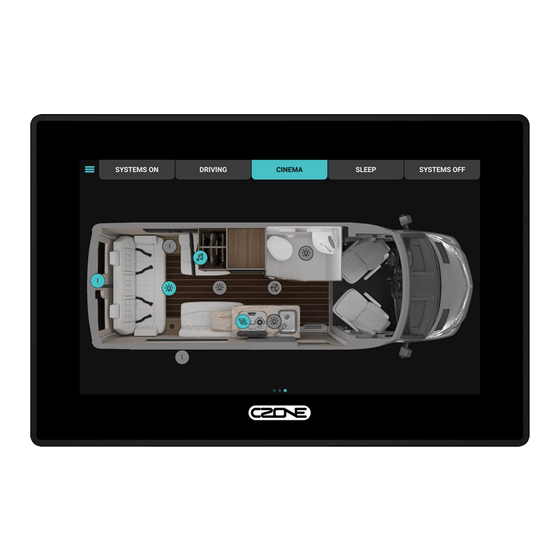
Introducing the newest member of the CZone display family the Touch 7. With an excellent 7” IPS LCD panel it can be viewed from any angle. The Touch 7 features all new electronics with the fastest processer ever in a CZone Touch display and built in connectivity for tablet pairing. Installation is easy with front mount installation, shallow mounting depths and a wide voltage range. -
Page 7: Supplied Parts
EN / CZone® Touch 7 User & Installation Manual 8-32VDC Ethernet NMEA2000 Power Figure 2. Touch 7 Connections Supplied Parts Figure 3. Supplied Parts 1. Display 2. Mounting bracket 3. Mounting screws x 4 4. NMEA2000 Drop Cable 5. DC Power Connector... -
Page 8: Network Configuration
See below for a description of each: 2.5.1 Access Point Use access point if the Touch 7 is the only wireless device onboard the vessel or you want to keep the wireless devices separate with the iPad and PC communicating directly to the Touch 7. iPad... -
Page 9: Client Mode (Wired)
Use client mode wired if you plan to use another Wireless Network onboard the vessel as the access point, with the Touch 7 connected to this via the Ethernet port. This simplifies the system as you will not need to keep changing between Wireless networks when using the CZone App. -
Page 10: System Example
EN / CZone® Touch 7 User & Installation Manual System Example Figure 7. System Example... -
Page 11: Installation
EN / CZone® Touch 7 User & Installation Manual 3 INSTALLATION Things You Need • Touch 7 Display • Mounting bracket (supplied) • 4 x self tapping mounting screws (supplied) • DC Power connector (supplied) • NMEA2000 drop cable (supplied) and t-connector •... -
Page 12: Mounting Instructions
EN / CZone® Touch 7 User & Installation Manual Mounting Instructions Follow the below steps for mounting the Touch 7 to the chosen mounting surface Mounting surface Mounting bracket Mounting screws Display Figure 8. Mounting Exploded View 1. Using the supplied mounting template as a guide, cut the hole in the mounting surface 2. -
Page 13: Display Removal
EN / CZone® Touch 7 User & Installation Manual Display Removal Follow the below steps to remove the Touch 7 from mounting bracket once installed 1. Locate the 2 release tabs at the top sides of display 2. Using an appropriately sized flat head screwdriver or similar, carefully push one of the release tabs in about 5mm until it unclips from bracket. -
Page 14: Connections
EN / CZone® Touch 7 User & Installation Manual Connections Warning! Before starting the installation, be sure to turn electrical power off. If power is left on or turned on during the installation, fire, electrical shock, or other serious injury may occur. Be sure that the voltage of the power supply is compatible with the unit. -
Page 15: Connect Dc Power
2. Connect Ethernet to Router (Optional) Run an ethernet cable from the Ethernet port on the Touch 7 to an ethernet port on the router, only if the Touch 7 will be configured in Client Mode Wired. Refer to 2.5 for definitions of the supported network configurations. -
Page 16: Operation
4 OPERATION First Power Up If connecting Touch 7 to an existing CZone network, ensure the display has been added to the CZone configuration and assigned a dipswitch. Every CZone device on a network requires a unique dipswitch to operate correctly, and the Touch 7 has a virtual dipswitch. Refer to the CZone Configuration Tool manual for this process. -
Page 17: Updating Software
EN / CZone® Touch 7 User & Installation Manual Updating Software To keep the Touch 7 up to date with the latest software refer to https://downloads.czone.net/. It is recommended to update the entire CZone system when updating the Touch 7 to ensure the system operates correctly. -
Page 18: Setting Up Wireless Server
CZone configuration includes the two devices (Display Interface and Wireless Interface) each with a unique dipswitch. Follow the below steps to enable the Wireless Server on the Touch 7, by default the WiFi will be disabled. 1. Go to Settings > Advanced > Wireless Server. - Page 19 4. If Access Point is enabled the WiFi SSID and password will be shown per below image. Use these credentials to connect iPad to the Touch 7 or laptop to the Touch 7 for sending favorites configuration files (.cfp) wirelessly from the Favorites Tool.
-
Page 20: Calibrating Touch Screen
If issues are experienced with touchscreen performance try recalibrating the screen following the below steps 1. On the Touch 7, go to the Settings > System > Screen Calibration page. 2. Press the ‘Calibrate’ button. The calibration process will take around 10 seconds. -
Page 21: Specifications
EN / CZone® Touch 7 User & Installation Manual 5 SPECIFICATIONS Technical Specifications Model Touch 7 Article number 80-911-0200-00 Display Size 7.0 Inch Resolution 1024 x 600 pixels Brightness 550 cd/m² Colours 24-bit RGB Touch Screen Projected Capacitive NXP/Freescale i.MX6DL Dual-Cortex A9... -
Page 22: Nmea2000 Plug Pinout
EN / CZone® Touch 7 User & Installation Manual NMEA2000 Plug Pinout Note: Image shows rear of connector where contacts are inserted. 6 ORDERING INFORMATION Touch 7 Part Numbers and Accessories Part Number Description 80-911-0200-00* CZONE TOUCH 7 KIT 80-911-0201-00... -
Page 23: Ec Declaration Of Conformity
EN / CZone® Touch 7 User & Installation Manual 7 EC DECLARATION OF CONFORMITY...
Need help?
Do you have a question about the Touch 7 and is the answer not in the manual?
Questions and answers