Table of Contents
Advertisement
Quick Links
For seperate use, it is only allowed to use the
M
BACKPACKS
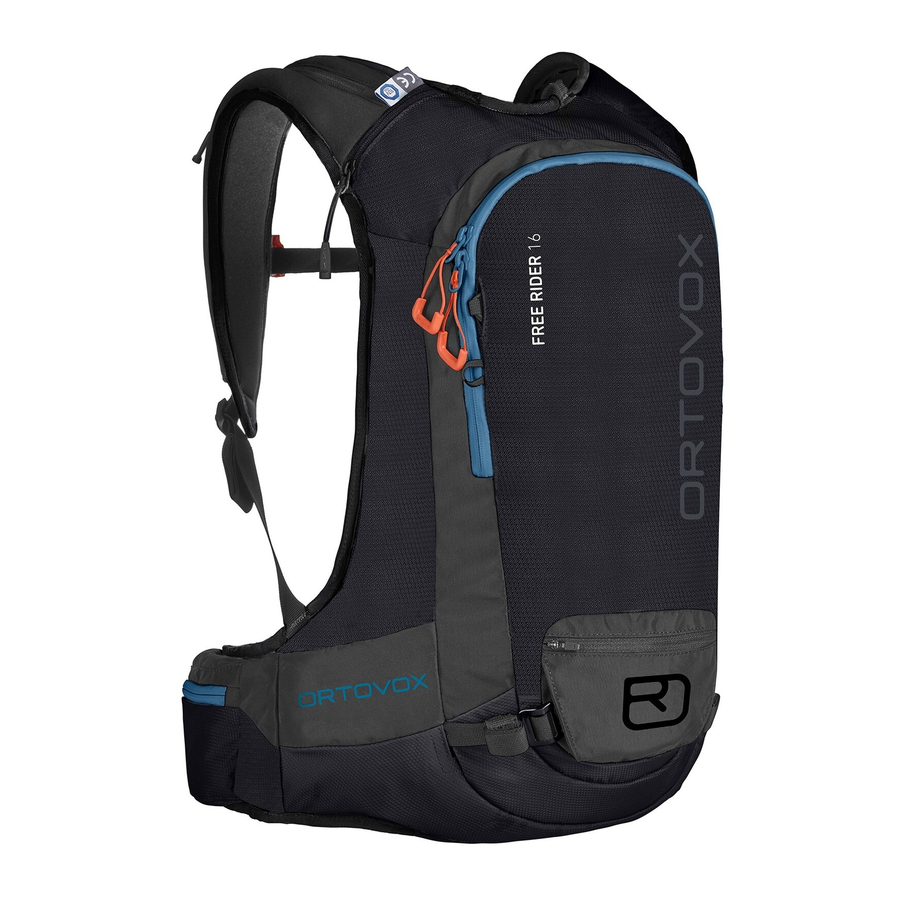
FREE RIDER 16
FREE RIDER 18
the backpanel and take out
protector under your outerwear.
K
L
M
- to attach ice axe or poles
- for helmet fixation, when
carrying snowboards or full
Open the velcro pocket at
You can wear the
protector seperately
under your clothes.
For full protection without
the backpack, attach the
extra straps with the
plastic eyelets (K) at the
small loops (L) on the
You can adjust the straps
to your shoulder and hip
size for a firm fit (M).
- regular helmet fixation
the protector.
Seperate Use:
protector.
Back length:
FR 16: 48cm
FR 18: 52cm
Small loop
Big loop
face helmets
Advertisement
Table of Contents

Related Manuals for Ortovox FREE RIDER 16


Summary of Contents for Ortovox FREE RIDER 16
- Page 1 firm fit (M). For seperate use, it is only allowed to use the protector under your outerwear. BACKPACKS Back length: FREE RIDER 16 FR 16: 48cm FREE RIDER 18 FR 18: 52cm Helmet Fixation Small loop - regular helmet fixation...
- Page 2 Additional straps stored in mesh pocket 2x Ice Axe loop 1x helmet 1x protector harness (see back side) Backpanel Access to main compartment to drinking bladder to protector Drinking System You can fit any standard drinking bladder. The neopren shoulder strap insulates the tube against freezing.
- Page 3 Ski Fixation Use the upper straps inside the zipper pocket and the 2 lower straps with the metal hook for fixing your gear as shown below. X-fixation Put the skis in the bottom straps with the ALU Hook. Attach each ski with a loop from the zipper compartment and tension the loops.
- Page 4 Safety Compart- ment holds the probe (A, small loop) and the shovel shaft (B, big loop). The blade goes in at the bottom in front (C). Ice Axe Fixation Use loops (A) to attach ice axe, poles etc. at lower end. There is 2 di erent lengths, depending on your equipment.
- Page 5 Removable Protector Open the velcro pocket at the backpanel and take out the protector. Seperate Use: You can wear the protector seperately under your clothes. For full protection without the backpack, attach the extra straps with the plastic eyelets (K) at the small loops (L) on the protector.
- Page 6 Additional straps stored in mesh pocket 2x Ice Axe loop 1x helmet 1x protector harness (see back side) Backpanel Access to main compartment to drinking bladder to protector Drinking System You can fit any standard drinking bladder. The neopren shoulder strap insulates the tube against freezing.
- Page 7 Ice Axe Fixation Use loops (A) to attach ice axe, poles etc. at lower end. There is 2 di erent lengths, depending on your equipment. The extra elastic band (B) works as upper attachment. Ski Fixation Use the upper straps inside the zipper pocket and the 2 lower straps with...
- Page 8 Safety Compartment holds the probe (B, small loop) and the shovel shaft (A, big loop). The blade goes in at the bottom in front (C). Removable Goggle Case The goggle case is attached with 2 plastic rails at the side and can easily be removed.
Need help?
Do you have a question about the FREE RIDER 16 and is the answer not in the manual?
Questions and answers