
Related Manuals for PICZO IRIS Plus

Summary of Contents for PICZO IRIS Plus
- Page 1 USER MANUAL Model: PICZO IRIS Plus Scan barcode for more setup info youtube or click the link below https://www.youtube.com/watch?v=7GvtCiwxOis&t=4s...
- Page 2 Sida Package Contents Appearance Remote Basic Operations Power ON/OFF Adjusting Focus ResizingProjectionScreen Focus/Brightness/Keystone/Projection mode Charging Indicator Light Status Battery Capacity Interface Display AptoideTV Aptoide Store Eshare Files Settings APPS HDMI Eshare Screen Mirroring IOS Iphone,Ipad Screen Mirroring IOS Iphone Ipad Screen Mirroring Mac Screen Mirroring iMirror HDMI Lightning Cable...
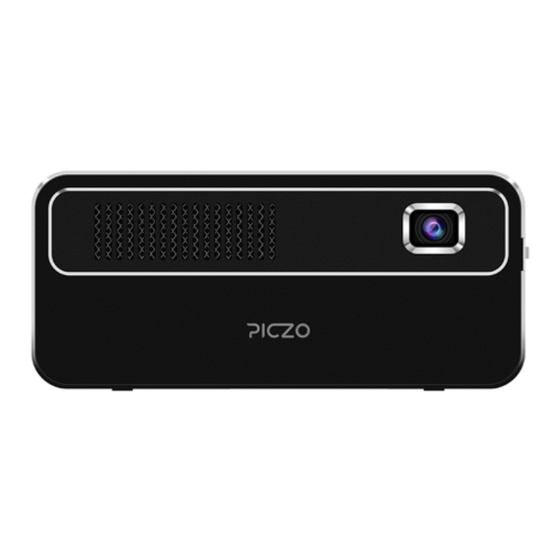
- Page 3 1 Package Contents Projector Power Adapter Power Plug Cable ® HDMI Wireless Mouse Remote Mini tripod 1.1 Appearance SPEAKER...
- Page 4 2 Remote Please refer to the following Bluetooth Remote Pairing Enter "Bluetooth ”. Hold the "OK" and "VOLUME-" key 5 seconds to turn on the Bluetooth function of �lash quickly when bluetooth function is remote. The red indicator of remote will opened.
- Page 5 3 BASIC OPERATION OF THE PROJECTOR 3.1 Power on In battery mode, holding power button 5 seconds In charging mode, holding power button 5 seconds(P1), or holding power key of remote 5s seconds(P2). 3.2 Power off In battery mode, holding power button 5 seconds In charging mode, holding power button 5 seconds(P1),or holding power key of remote 5s seconds(P2).
- Page 6 3.4 Focus/Brightness/Keystone/Projection mode 1. Adjust focus Slide the focus wheel to adjust the screen’s de�inition. 2. Adjust Brightness adjust the screen’s definition. 3. Keystone Correction and Projection mode Enter “Setting” on the home screen,and select.
-
Page 7: Indicator Light Status
4 Charging The projector can be powered by AC adapter or internal rechargeable battery. To have maximum battery life, it is highly suggested to charge the battery for at least 2 hours the first time. 1. Ensure the projector is turned off and connect it to the Power Adapter. 2. - Page 8 5 Interface Display 5.1 Aptoide TV Aptoide TV brings you an app store that offers content with a rich user experience, optimized for the larger screen devices, Yep, it means that you can use Aptoide not only in your mobile devices but also from the comfort of your couch.
- Page 9 6 Eshare Compatible iOS,Android and Windows device. 1.Allows user to share/mirror smartphone/Computer to the projector with the use of the app. 2.Allows user to control the projector with the use of EShare app.Please make sure your device is connected to the same network with projector. 3.Visit "http://XXX.XXX.X.XXX:8000"...
- Page 10 7 Screen Mirroing IOS Iphone,Ipad 7.1 Iphone Ipad 7.2 Mac EShare-XXXX 1.Projector Networked: Click connect it to projector through the same network. 2.Click choose ID “EShare-XXXX”and be done. 7.4 HDMI Lightning Cable 7.3 iMirror 1.In Wi-Fi environment:Go to iPhone's 1.Please connect iphone to the projector as shown. "Setting"---"Wi-Fi", then connect your phone and projector to the same network.
- Page 11 7.5 Android Connect To Interactive Touchscreen/projector Firstly ensure that your Android device and Interactive Touchscreen/projector are connected at the same network. Then launch the EShare App on the phone, and EShare will automatically find the Interactive Projector(s) connected on the same network with the EShare Server App. Next, click the device name you plan to connect to, and the client device will be connected to Touchscreen/TV.
- Page 12 8 Eshare Remote Click “Remote” to act your phone as wireless mouse, remote controller, keyboard, air mouse, etc. 8.1 Eshare App Scan for download Iphone and Ipad. "Press tv mirror" You can use your screen as a touch panel on your Iphone or Ipad" Touch Control Key Control Mouse...
-
Page 13: Product Maintenance
9 Input Sources 9.1 microSD Card Make sure to insert the microSD card the correct way to playback and view content. The microSD card should gently be inserted all the way inside the card slot, leaving the microSD card flush with the surface of the projector. -
Page 14: Technical Specifications
11 Technical Specifications Product Name Mini Projector Display Technology 0.2" DMD DLP Native Resolution FWVGA(854*480) Compatible Resolution Up to 1080P Light source RGB 3LED OSRAM LED working life Above 30000 hrs Focus Manual Zoom Offset Support Operation System Android Cortex A7 Quad-Core, 1.2GHz Memory RAM:DDR3 1G + ROM Flash memory 16 GB(EMMC 5.1) Wi-Fi... -
Page 15: Frequently Asked Questions
12 Frequently Asked Questions Question: Why is the indicator light status showing blue, but the projection screen is not showing? Answer: Make sure not to press and hold the Power key too long. Release the Power key as soon as the indicator turns blue. Please be patient and do not push the Power key repeatedly during the system boot process, which may cause the projector to crash. -
Page 16: Regulatory Information
13 Trademarks Piczo is a registered trademark of Swede Invent AB, registered in Sweden. Distributed by Swede Invent AB, Säterivägen 16, 65341 Karlstad, Sweden. © 2019 All Rights Reserved. Made in China. SD and related marks and logos are trademarks of SD-3C LLC in the United States, other countries or both.
Need help?
Do you have a question about the IRIS Plus and is the answer not in the manual?
Questions and answers