
Related Manuals for EvoJet JETRONIC-BOX

Summary of Contents for EvoJet JETRONIC-BOX
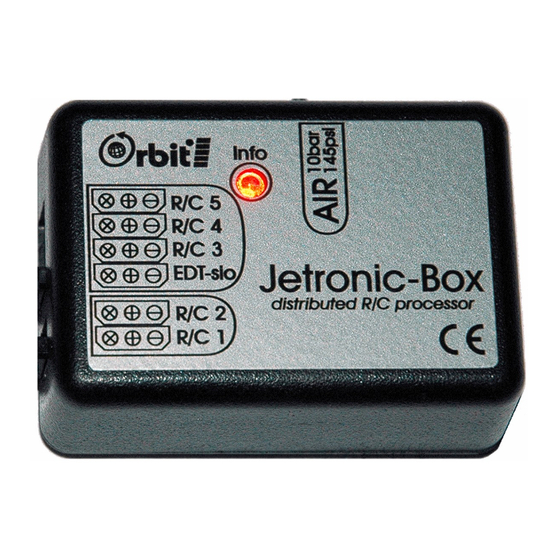
- Page 1 ® JETRONIC -BOX [0288] R/C Controller – Doorsequencer with Air Failsave 2006-2011 evoJet GmbH ● Am Parir 4A ● D-52379 Langerwehe/Germany ● www.evojet.de ©...
-
Page 2: Table Of Contents
JETRONIC-BOX – Instructions 1.8 Inhaltsverzeichnis Introduction .........................3 Schematic Overview 'Doorsequencer'................4 Factory Setting 'Doorsequencer'..................5 Jetronic Display EDT (Engine Data Terminal)..............6 JETRONIC-BOX – Setup......................7 1:BOX-SETUP Menu......................8 2:RC-CONTROL Menu.......................11 3/4/5: RC-3/4/5-CONTROL Menu..................14 6:TEST-DEVICES Menu ....................17... -
Page 3: Introduction
JETRONIC-BOX – Instructions 1.8 Introduction The JETRONIC-BOX is a universal R/C processor for use in medium-sized and large model aircraft. Two R/C inputs can be programmed to control up to three R/C outputs, for example to implement a landing gear with door control or a cockpit with open/close and lock functions, where even an R/C transmitter with microprocessor control is not sufficient. -
Page 4: Schematic Overview 'Doorsequencer
JETRONIC-BOX – Instructions 1.8 Schematic Overview 'Doorsequencer'... -
Page 5: Factory Setting 'Doorsequencer
JETRONIC-BOX – Instructions 1.8 Factory Setting 'Doorsequencer' Landing Gear with different Door Controls RC4 / RC5 RC3: The landing gear waits 1 second before retraction/extension. RC4: The door type-1 closes always automatically after a delay of 8 seconds (gear extended) and after a delay of 6 seconds (gear retracted). -
Page 6: Jetronic Display Edt (Engine Data Terminal)
JETRONIC-BOX – Instructions 1.8 Jetronic Display EDT (Engine Data Terminal) EDT-LEFT and EDT-RIGHT are configurable function displays for operating parameters. In the BOX-SETUP menu, you can choose what should be displayed in the LEFT and RIGHT areas. In the BOX-SETUP menu under 12:EDT →... -
Page 7: Jetronic-Box - Setup
JETRONIC-BOX – Instructions 1.8 JETRONIC-BOX – Setup SETUP Menu To activate the SETUP menu for changing the firmware configuration, first press the SET key, then use the Up/Down keys to switch between the available items. To leave the SETUP menu and to return to the BOX status display, press the SET key for more than 2 seconds (ESC). -
Page 8: 1:Box-Setup Menu
JETRONIC-BOX – Instructions 1.8 1:BOX-SETUP Menu To activate the 1:BOX-SETUP menu, first press the SET key, then use the Up/Down keys to switch between the available items. To leave the 1:BOX-SETUP menu and to return to the SETUP menu, press the SET key for more than 2 seconds (ESC). - Page 9 JETRONIC-BOX – Instructions 1.8 1:BOX-SETUP – Basic Settings for the Box 10:R/C-BATTERY Specifies the type of battery used (required for a correct voltage display). Ni = NiCd or NiMh, Li = lithium ion Default setting: Ni4 (4.8V) 11:INFO-LED Specifies the display function for the info LED on the top side of the device.
- Page 10 Range: 14:AIR-FAIL – 10 bar Default setting: 8.0 bar 16:SET-DOORSEQ. Resets the JETRONIC-BOX to the factory settings, a typical 'Doorsequencer'. See page 4 and page 5 for the overview and description. Default setting: NO Set value to YES and push the SET-key two times.
-
Page 11: 2:Rc-Control Menu
JETRONIC-BOX – Instructions 1.8 2:RC-CONTROL Menu To activate the 2:RC-CONTROL menu, first press the SET key, then use the Up/Down keys to switch between the available items. To leave the 2:RC2-CONTROL menu and to return to the SETUP menu, press the SET key for more than 2 seconds (ESC). - Page 12 JETRONIC-BOX – Instructions 1.8 2:RC-CONTROL – Settings for the Inputs RC1 and RC2 20:RC1-MODE Specifies the input function for the remote control input RC1. NORMAL: Standard remote control input, ON ≥ 1.65 ms, OFF ≤ 1.25 ms REVERSE: Inverted remote control input, OFF 1.65 ms, ON...
- Page 13 JETRONIC-BOX – Instructions 1.8 24:@AIR~FAIL Specifies the failsafe function that is activated when the air pressure falls below the minimum value specified with 14:AIR-FAIL. Typically, the failsafe function activates an ON-signal-OUT at RC1 (=> extend gear). On the dis- play, this is indicated by a -! at the RC1 or RC2 status.
-
Page 14: 3/4/5: Rc-3/4/5-Control Menu
JETRONIC-BOX – Instructions 1.8 3/4/5: RC-3/4/5-CONTROL Menu To activate the 3/4/5:RC3/4/5-CONTROL menu, first press the SET key, then use the Up/Down keys to switch between the available parameters. To change a parameter, first press the SET key, then use the Up/Down keys to switch between the available values. - Page 15 JETRONIC-BOX – Instructions 1.8 3/4/5:RC3/4/5-CONTROL – Settings for the Outputs RC3, RC4 and RC5 30:RC3-MODE Specifies the basic function for the remote control output RC3. OFF: The output is switched off and disabled. RC1-DIRECT for gears and doors that remain open (bistable function)
- Page 16 JETRONIC-BOX – Instructions 1.8 35:RC3-MID Specifies the middle position (MID). Range: +-150 % Default setting: +0 % 36:RC3-HIGH Specifies the upper end position (HIGH). Range: +-150 % Default setting: +100 % 37:RC3-DELAY Additional rotation delay time between the positions 34:RC3-LOW and 36:RC3-HIGH.
-
Page 17: 6:Test-Devices Menu
JETRONIC-BOX – Instructions 1.8 6:TEST-DEVICES Menu To activate the 6:TEST-DEVICES menu, first press the SET key, then use the Up/Down keys to switch between the available test functions. To activate a test function, first press the SET key, then use the Up/Down keys to test the respective system setting. - Page 18 JETRONIC-BOX – Instructions 1.8 6:TEST-DEVICES – Testing the System Settings without Remote Control 60:RC1-SIM Simulates an ON/OFF signal at the RC1 input, as if you would use the switch on the transmitter. Range: ON (high) / OFF (low) Default setting: value of 21:RC1-PRESET 61:RC2-SIM Simulates an ON/OFF signal at the RC2 input, as if you would use the switch on the transmitter.
- Page 19 JETRONIC-BOX – Instructions 1.8 Notes...
Need help?
Do you have a question about the JETRONIC-BOX and is the answer not in the manual?
Questions and answers