Advertisement
Quick Links
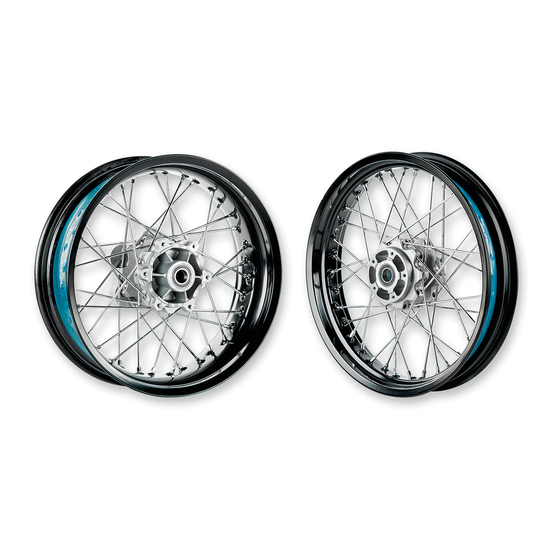
Scrambler
Kit cerchi a raggi
Spoke rim kit
Simbologia
Per una lettura rapida e razionale sono stati impiegati simboli che
evidenziano situazioni di massima attenzione, consigli pratici o
semplici informazioni.
Prestare molta attenzione al significato dei simboli, in quanto la
loro funzione è quella di non dovere ripetere concetti tecnici o
avvertenze di sicurezza. Sono da considerare, quindi, dei veri e
propri "promemoria" .
Consultare questa pagina ogni volta che sorgeranno dubbi sul loro
significato.
Attenzione
La non osservanza delle istruzioni riportate può creare una
situazione di pericolo e causare gravi lesioni personali e anche la
morte.
Importante
Indica la possibilità di arrecare danno al veicolo e/o ai suoi
componenti se le istruzioni riportate non vengono eseguite.
Note
Fornisce utili informazioni sull'operazione in corso.
Riferimenti
I particolari evidenziati in grigio e riferimento numerico (Es.
rappresentano l'accessorio da installare e gli eventuali componenti
di montaggio forniti a kit.
I particolari con riferimento alfabetico (Es.
componenti originali presenti sul motoveicolo.
Tutte le indicazioni destro o sinistro si riferiscono al senso di marcia
del motociclo.
Avvertenze generali
Attenzione
Le operazioni riportate nelle pagine seguenti devono essere
eseguite da un tecnico specializzato o da un'officina autorizzata
DUCATI.
Attenzione
Le operazioni riportate nelle pagine seguenti se non eseguite a
regola d'arte possono pregiudicare la sicurezza del pilota.
Note
Documentazione necessaria per eseguire il montaggio del Kit
è il MANUALE OFFICINA, relativo al modello di moto in vostro
possesso.
Note
Nel caso fosse necessaria la sostituzione di un componente del kit
consultare la tavola ricambi allegata.
1
)
A
) rappresentano i
ISTR - 637 / 00
Symbols
To allow quick and easy consultation, this manual uses graphic
symbols to highlight situations in which maximum care is required,
as well as practical advice or information.
Pay attention to the meaning of the symbols since they serve to
avoid repeating technical concepts or safety warnings throughout
the text. The symbols should therefore be seen as real reminders.
Please refer to this page whenever in doubt as to their meaning.
Warning
Failure to follow these instructions might give raise to a dangerous
situation and provoke severe personal injuries or even death.
Caution
Failure to follow these instructions might cause damages to the
vehicle and/or its components.
Notes
Useful information on the procedure being described.
References
Parts highlighted in grey and with a numeric reference
1
(Example
) are the accessory to be installed and any assembly
components supplied with the kit.
Parts with an alphabetic reference (Example
components fitted on the vehicle.
Any right- or left-hand indication refers to the vehicle direction of
travel.
General notes
Warning
Carefully perform the operations on the following pages since they
might negatively affect rider safety.
Warning
Carefully perform the operations on the following pages since they
might negatively affect rider safety.
Notes
The following documents are necessary for assembling the Kit:
WORKSHOP MANUAL of your bike model.
Notes
Should it be necessary to change any kit parts, please refer to the
attached spare part table.
96380031A
A
) are the original
1
Advertisement

Related Manuals for Ducati 96380031A


Summary of Contents for Ducati 96380031A
- Page 1 Scrambler ISTR - 637 / 00 96380031A Kit cerchi a raggi Spoke rim kit Simbologia Symbols Per una lettura rapida e razionale sono stati impiegati simboli che To allow quick and easy consultation, this manual uses graphic evidenziano situazioni di massima attenzione, consigli pratici o symbols to highlight situations in which maximum care is required, semplici informazioni.
- Page 2 Pos. Denominazione Description Cerchio anteriore a raggi Front wheel spoke rim Nastro paranippli Nipple protective tape Camera d'aria anteriore Front tube Vite TBTI M8x20 TBTI screw M8x20 Cerchio ruota posteriore a raggi Rear wheel spoke rim Nastro paranippli Nipple protective tape Camera d'aria posteriore Rear tube Vite TCEIR M8x18...
- Page 3 Smontaggio componenti originali Removing the original components Importante Caution Per lo smontaggio dei componenti originali e il successivo To disassemble the original components and then montaggio dei componenti del kit, occorre sollevare il motoveicolo assemble the kit components, it is necessary to lift the motorcycle con un’adeguata gruetta idraulica e inserire la prima marcia.
- Page 4 Smontaggio ruota anteriore Front wheel disassembly Svitare e rimuovere il dado (C1). Loosen and remove nut (C1). Recuperare il dado (C1). Collect nut (C1). Allentare le n.4 viti (B1) di bloccaggio perno sui gambali della Loosen no.4 screws (B1) retaining shaft to fork legs. forcella.
- Page 5 Smontaggio paracatena Chain guard disassembly Svitare la vite (D1) e la vite (D2) con boccola (D3). Loosen screw (D1) and screw (D2) with bushing (D3). Rimuovere il paracatena (D) dal forcellone posteriore. Remove chain guard (D) from rear swinging arm. Svitare la vite (E1) e rimuovere la rondella (E5) e il piastrino (E6).
- Page 6 ISTR 637 / 00...
- Page 7 Smontaggio gruppo portatarga Removing the number plate holder unit Note Notes Per comprendere meglio lo smontaggio del cablaggio del gruppo To make it clearer the disassembly of number plate holder unit portatarga viene rappresentato solo il gruppo forcellone posteriore. wiring, only the rear swinging arm unit is shown. Scollegare la presa del cablaggio luce targa (E3) dalla spina (F1) del Disconnect the socket of number plate light wiring (E3) from plug cablaggio principale.
- Page 8 ISTR 637 / 00...
- Page 9 Note Notes La lunghezza dei tubi dell’impianto frenante rappresentati in figura The length of the braking system hoses shown in the figure is to è da ritenersi puramente indicativa. be considered purely indicative. Smontaggio ruota posteriore Rear wheel disassembly Svitare e rimuovere il dado di fissaggio (I1) dal perno ruota Loosen and remove retaining nut (I1) from rear wheel shaft (I2).
- Page 10 Rimuovere il gruppo flangia portacorona (M) dal mozzo della ruota Remove rear sprocket flange assembly (M) from hub of rear wheel posteriore (I), assicurandosi che la boccola (M3) resti montata sul (I) making sure bushing (M3) remains assembled on rear sprocket gruppo portacorona (M).
-
Page 11: Kit Installation
Assemble tube (7) and tyre (P) on rear wheel spoke rim (5). posteriore (5). Notes Note The original equipment rear tyre supplied by Ducati features the Il pneumatico posteriore di primo equipaggiamento fornito da following parameters: Ducati ha i seguenti parametri: •... - Page 12 Assemble tube (3) and tyre (Q) on rear wheel spoke rim (1). posteriore (1). Notes Note The original equipment front tyre supplied by Ducati features the Il pneumatico anteriore di primo equipaggiamento fornito da Ducati following parameters: ha i seguenti parametri: •...
- Page 13 25 Nm ± 10% 25 Nm ± 10% 25 Nm ± 10% Premontaggio ruota posteriore Rear wheel pre-assembly Operando sul lato sinistro: Working on LH side: Montare il distanziale interno (M3) sulla flangia portacorona (M), Fit internal spacer (M3) on rear sprocket flange (M), aiming it as orientandolo come mostrato in figura.
- Page 14 145 Nm ± 10% ISTR 637 / 00...
- Page 15 Note Notes La lunghezza dei tubi dell’impianto frenante rappresentati in figura The length of the braking system hoses shown in the figure is to è da ritenersi puramente indicativa. be considered purely indicative. Montaggio ruota posteriore Rear wheel assembly Posizionare la pinza posteriore (N) sul disco freno (I7) della ruota Position rear calliper (N) on brake disc (I7) of rear wheel (5).
- Page 16 22Nm ± 10% 22 Nm ± 10% 2 Nm ± 10% 2 Nm ± 10% 2 Nm ± 10% ISTR 637 / 00...
- Page 17 Montaggio gruppo portatarga Fitting the number plate holder unit Applicare LOCTITE 243 su tutta la lunghezza del filetto di n.2 viti Apply LOCTITE 243 all along the thread of no.2 screws (E4). (E4). Position number plate holder assembly (E) on swinging arm (O) Posizionare il gruppo portatarga (E) sul forcellone (O) e impuntare and start no.2 screws (E4) on plate (E5).
- Page 18 22 Nm ± 10% 5 Nm ± 10% 5 Nm ± 10% 22 Nm ± 10% Montaggio paracatena Chain guard assembly Applicare LOCTITE 243 su tutta la lunghezza del filetto delle viti Apply LOCTITE 243 all along the thread of screws (E1) and (E2). (E1) e (E2).
- Page 19 63 Nm ± 10% 30 Nm ± 10% Premontaggio ruota anteriore Front wheel pre-assembly Posizionare il disco freno anteriore e la ruota fonica in corrispondenza Position front brake disc and phonic wheel on the holes of front delle forature presenti sul mozzo ruota anteriore (1) e impuntare le n.5 wheel hub (1) and start no.5 screws (4).
- Page 20 10 Nm ± 10% 45 Nm ± 10% Montaggio pinza freno anteriore Front brake calliper assembly Applicare GRASSO GADUS S2 V220 AD 2 su filetto e sottotesta Smear the thread and underhead of no.2 original screws (A1) with delle n.2 viti originali (A1). GADUS S2 V220 AD 2 GREASE.
- Page 21 Scrambler ISTR - 637 / 00 96380031A Kit jantes à rayons Kit Drahtspeichenfelgen Symboles Symbole Pour faciliter la consultation de ce manuel, des symboles signalent Zum schnellen und übersichtlichen Lesen werden Symbole des situations exigeant le maximum d'attention, des conseils verwendet, die außerordentlich wichtige Situationen, praktische...
- Page 22 Pos. Designation Bezeichnung Jante avant à rayons Vorderrad-Drahtspeichenfelge Ruban cache-raccords Nippelschutzband Chambre à air avant Luftkammer für Vorderreifen Vis TBTC M8x20 Spezialschraube M8x20 Jante roue arrière à rayons Hinterrad-Drahtspeichenfelge Ruban cache-raccords Nippelschutzband Chambre à air arrière Luftkammer für Hinterradreifen Vis TCHCF M8x18 Spezial-Innensechskantschraube M8x18 Plot antivibratoire amortisseur de couple en caoutchouc Ruckdämpfer...
- Page 23 Dépose composants d'origine Ausbau der Original-Bestandteile Important Wichtig Pour déposer les composants d'origine et Für den Ausbau der Originalteile und die darauf folgende poser les composants du kit il faut lever le motocycle Montage der im Kit enthaltenen Komponenten muss das Motorrad à...
- Page 24 Dépose de la roue avant Abnahme des Vorderrads Desserrer et retirer l'écrou (C1). Die Mutter (C1) lösen und entfernen. Récupérer l'écrou (C1). Die Mutter (C1) aufnehmen. Desserrer les 4 vis (B1) de blocage axe sur les tubes de fourche. Die 4 Feststellschrauben (B1) der Radachse an den Gabelbeinen Avec un maillet en plastique riveter l'axe de roue (C2) du côté...
- Page 25 Dépose cache-chaîne Abnahme des Kettenschutzes Desserrer la vis (D1) et la vis (D2) avec bague (D3). Die Schraube (D1) und die Schraube (D2) mit Buchse (D3) lösen. Retirer le cache-chaîne (D) du bras oscillant arrière. Den Kettenschutz (D) von der Hinterradschwinge entfernen. Desserrer la vis (E1) et retirer la rondelle (E5) ainsi que la plaquette Die Schraube (E1) lösen und die Unterlegscheibe (E5) und das (E6).
- Page 26 ISTR 637 / 00...
- Page 27 Dépose de l'ensemble support de plaque d'immatriculation Abnahme der Kennzeichenhaltereinheit Remarques Hinweis Pour mieux comprendre la dépose du câblage de l'ensemble Um den Ausbau der Verkabelung der Kennzeichenhaltereinheit support de plaque d'immatriculation, il est représenté uniquement besser zu verstehen, wird nur die Hinterradschwingeneinheit le groupe du bras oscillant arrière.
- Page 28 ISTR 637 / 00...
- Page 29 Remarques Hinweis La longueur des tuyaux du système de freinage représentés dans Die Länge der in der Abbildung abgebildeten Leitungen des la figure est sensée être indicative. Bremssystems ist rein indikativ zu verstehen. Dépose de la roue arrière Abnahme des Hinterrads Desserrer et retirer l'écrou de fixation (I1) de l'axe de roue arrière Die Klemmmutter (l1) von der Hinterradachse (l2) lösen und (I2).
- Page 30 Déposer l'ensemble flasque porte-couronne (M) du moyeu de la Die Kettenblattträgereinheit (M) von der Hinterradnabe (l) entfernen roue arrière (I), en s'assurant que la bague (M3) reste en place sur und sich dabei darüber vergewissern, dass die Buchse (M3) an der l'ensemble porte-couronne (M).
- Page 31 Die Luftkammer (7) und den Reifen (P) an der Hinterrad- (5). Drahtspeichenfelge (5) montieren. Remarques Hinweis Le pneu arrière de première monte fourni par Ducati présente les Der von Ducati in der Erstausstattung gelieferte Hinterreifen weist paramètres suivants : die folgenden Parameter auf: • Référence Ducati : 49141021A •...
- Page 32 Die Luftkammer (3) und den Reifen (Q) an der Hinterrad- (1). Drahtspeichenfelge (1) montieren. Remarques Hinweis Le pneu avant de première monte fourni par Ducati présente les Der von Ducati in der Erstausstattung gelieferte Vorderreifen weist paramètres suivants : die folgenden Parameter auf: • Référence Ducati : 49040741A •...
- Page 33 25 Nm ± 10% 25 Nm ± 10% 25 Nm ± 10% Pré-installation de la roue arrière Vormontage des Hinterrads En agissant du côté gauche : An der linken Seite: Poser l'entretoise interne (M3) sur le flasque porte-couronne (M) Das interne Distanzstück (M3) am Kettenblattträger (M) montieren, en l'orientant comme la figure le montre.
- Page 34 145 Nm ± 10% ISTR 637 / 00...
- Page 35 Remarques Hinweis La longueur des tuyaux du système de freinage représentés dans Die Länge der in der Abbildung abgebildeten Leitungen des la figure est sensée être indicative. Bremssystems ist rein indikativ zu verstehen. Pose de la roue arrière Montage des Hinterrads Positionner l'étrier de frein arrière (N) sur le disque de frein (l7) de Den hinteren Bremssattel (N) an der Bremsscheibe (l7) des la roue arrière (5).
- Page 36 22Nm ± 10% 22 Nm ± 10% 2 Nm ± 10% 2 Nm ± 10% 2 Nm ± 10% ISTR 637 / 00...
- Page 37 Pose de l'ensemble support de plaque d'immatriculation Montage der Kennzeichenhaltereinheit Appliquer du LOCTITE 243 sur toute la longueur du filet des 2 vis LOCTITE 243 auf die gesamte Gewindelänge der 2 Schrauben (E4) (E4). auftragen. Positionner l'ensemble support de plaque d'immatriculation (E) sur Die Kennzeichenhaltereinheit (E) an der Hinterradschwinge (O) le bras oscillant (O) et présenter les 2 vis (E4) sur la plaquette (E5).
- Page 38 22 Nm ± 10% 5 Nm ± 10% 5 Nm ± 10% 22 Nm ± 10% Pose du cache-chaîne Montage des Kettenschutzes Appliquer du LOCTITE 243 sur toute la longueur du filet des vis LOCTITE 243 auf die gesamte Gewindelänge der Schrauben (E1) (E1) et (E2).
- Page 39 63 Nm ± 10% 30 Nm ± 10% Pré-installation de la roue avant Vormontage des Vorderrads Positionner le disque de frein avant et la roue crantée au niveau Die vordere Bremsscheibe und den Impulsring an den in der Nabe des trous présents sur le moyeu de la roue avant (1) et présenter des Vorderrads (1) vorhandenen Bohrungen anordnen, dann die 5 les 5 vis (4).
- Page 40 10 Nm ± 10% 45 Nm ± 10% Repose de l'étrier de frein avant Montage des vorderen Bremssattels Appliquer de la Graisse GADUS S2 V220 AD 2 sur le filet et le Das FETT GADUS S2 V220 AD 2 auf das Gewinde und unter den dessous des 2 vis d'origine (A1).
- Page 41 Scrambler ISTR - 637 / 00 96380031A Conjunto de jantes de raios Spoke rim kit Símbolos Symbols Para uma leitura rápida e racional, foram utilizados símbolos que To allow quick and easy consultation, this manual uses graphic evidenciam situações de máxima atenção, conselhos práticos ou symbols to highlight situations in which maximum care is required, simples informações.
- Page 42 Pos. Descrição Description Jante dianteira de raios Front wheel spoke rim Fita de proteção dos niples Nipple protective tape Câmara de ar dianteira Front tube Parafuso Torx interno de cabeça abaulada M8x20 TBTI screw M8x20 Jante da roda traseira de raios Rear wheel spoke rim Fita de proteção dos niples Nipple protective tape...
- Page 43 Desmontagem dos componentes originais Removing the original components Importante Caution Para a desmontagem dos componentes originais e a próxima To disassemble the original components and then montagem dos componentes do conjunto, é preciso levantar a assemble the kit components, it is necessary to lift the motorcycle moto using a suitable hydraulic crane and engage the first gear.
- Page 44 Desmontagem da roda dianteira Front wheel disassembly Desatarraxe e remova a porca (C1). Loosen and remove nut (C1). Recupere a porca (C1). Collect nut (C1). Desaperte os 4 parafusos (B1) de bloqueio do perno nos pés da Loosen no.4 screws (B1) retaining shaft to fork legs. forquilha.
- Page 45 Desmontagem do protetor de corrente Chain guard disassembly Desatarraxe o parafuso (D1) e o parafuso (D2) com o casquilho Loosen screw (D1) and screw (D2) with bushing (D3). (D3). Remove chain guard (D) from rear swinging arm. Remova o protetor de corrente (D) do braço oscilante traseiro. Loosen screw (E1) and remove washer (E5) and plate (E6).
- Page 46 ISTR 637 / 00...
- Page 47 Desmontagem do grupo porta-matrícula Removing the number plate holder unit Notas Notes Para compreender melhor a desmontagem da cablagem do grupo To make it clearer the disassembly of number plate holder unit porta-matrícula, está representado apenas o grupo braço oscilante wiring, only the rear swinging arm unit is shown.
- Page 48 ISTR 637 / 00...
- Page 49 Notas Notes O comprimento dos tubos do sistema de travagem representados The length of the braking system hoses shown in the figure is to na figura deve ser considerado puramente indicativo. be considered purely indicative. Desmontagem da roda traseira Rear wheel disassembly Desatarraxe e remova a porca de fixação (I1) do perno da roda Loosen and remove retaining nut (I1) from rear wheel shaft (I2).
- Page 50 Remova o grupo da flange porta-coroa (M) do cubo da roda traseira Remove rear sprocket flange assembly (M) from hub of rear wheel (I), certificando-se de que o casquilho (M3) fique montado no grupo (I) making sure bushing (M3) remains assembled on rear sprocket porta-coroa (M).
-
Page 51: Montagem Dos Componentes
Assemble tube (7) and tyre (P) on rear wheel spoke rim (5). Notas Notes O pneu traseiro do equipamento original fornecido pela Ducati The original equipment rear tyre supplied by Ducati features the possui os seguintes parâmetros: following parameters: • Código Ducati: 49141021A •... - Page 52 Assemble tube (3) and tyre (Q) on rear wheel spoke rim (1). Notas Notes O pneu dianteiro do equipamento original fornecido pela Ducati The original equipment front tyre supplied by Ducati features the possui os seguintes parâmetros: following parameters: • Código Ducati: 49040741A •...
- Page 53 25 Nm ± 10% 25 Nm ± 10% 25 Nm ± 10% Pré-montagem da roda traseira Rear wheel pre-assembly Atuando no lado esquerdo: Working on LH side: Monte o espaçador interno (M3) na flange porta-coroa (M), Fit internal spacer (M3) on rear sprocket flange (M), aiming it as orientando-o como o mostrado na figura.
- Page 54 145 Nm ± 10% ISTR 637 / 00...
- Page 55 Notas Notes O comprimento dos tubos do sistema de travagem representados The length of the braking system hoses shown in the figure is to na figura deve ser considerado puramente indicativo. be considered purely indicative. Montagem da roda traseira Rear wheel assembly Posicione a pinça traseira (N) no disco do travão (I7) da roda Position rear calliper (N) on brake disc (I7) of rear wheel (5).
- Page 56 22Nm ± 10% 22 Nm ± 10% 2 Nm ± 10% 2 Nm ± 10% 2 Nm ± 10% ISTR 637 / 00...
- Page 57 Montagem do grupo porta-matrícula Fitting the number plate holder unit Aplique LOCTITE 243 em todo o comprimento da rosca de 2 Apply LOCTITE 243 all along the thread of no.2 screws (E4). parafusos (E4). Position number plate holder assembly (E) on swinging arm (O) Posicione o grupo porta-matrícula (E) no braço oscilante (O) e and start no.2 screws (E4) on plate (E5).
- Page 58 22 Nm ± 10% 5 Nm ± 10% 5 Nm ± 10% 22 Nm ± 10% Montagem do protetor de corrente Chain guard assembly Aplique LOCTITE 243 em todo o comprimento da rosca dos Apply LOCTITE 243 all along the thread of screws (E1) and (E2). parafusos (E1) e (E2).
- Page 59 63 Nm ± 10% 30 Nm ± 10% Pré-montagem da roda dianteira Front wheel pre-assembly Posicione o disco do travão dianteiro e a roda fónica em Position front brake disc and phonic wheel on the holes of front correspondência das perfurações presentes no cubo da roda wheel hub (1) and start no.5 screws (4).
- Page 60 10 Nm ± 10% 45 Nm ± 10% Montagem da pinça do travão dianteiro Front brake calliper assembly Aplique MASSA GADUS S2 V220 AD 2 na rosca e na parte inferior Smear the thread and underhead of no.2 original screws (A1) with da cabeça dos 2 parafusos originais (A1).
-
Page 61: Advertencias Generales
Scrambler ISTR - 637 / 00 96380031A Kit llantas con radios ワイヤースポークホイールキット Símbolos シンボル Para una lectura rápida y racional se han empleado símbolos que 素早くかつ合理的に読み進めることができるように、本マニュア evidencian situaciones de máxima atención, consejos prácticos o ルではいくつかのシンボルを導入し、最大限の注意を払う必要が simples informaciones. Prestar mucha atención al significado de ある状況や、推奨事項、または一般情報を明確にしてあります。... - Page 62 Pos. Denominacion 説明 Llanta delantera con radios ワイヤースポークフロントリム Cinta para-niples フラップテープ Cámara de aire delantera フロントエアチューブ Tornillo TBTI M8x20 スクリュー TBTI M8x20 Llanta rueda trasera con radios ワイヤースポークリアホイールリム Cinta para-niples フラップテープ Cámara de aire trasera リアエアチューブ Tornillo especial TCEIR M8x18 スクリュー...
- Page 63 Desmontaje componentes originales オリジナル部品の取り外し Importante 重要 Para el desmontaje de los componentes originales y el sucesivo オリジナルの部品を取り外してキットの部品を montaje de los componentes del kit, se debe levantar la 取り付けるには、適切な油圧リフターで車両を motocicleta 持ち上げ、ギアを 1 速に入れる必要があります。 con una grúa hidráulica adecuada y engranar la primera marcha. フロントブレーキキャリパーの取り外し...
- Page 64 Desmontaje rueda delantera フロントホイールの取り外し Desatornillar y quitar la tuerca (C1). ナット (C1) を緩めて取り外します。 Recuperar la tuerca (C1). ナット (C1) を回収します。 Aflojar los 4 tornillos (B1) que bloquean el perno en las patas de la フォークレッグの 4 本のシャフトピンチボルト (B1) を緩めま horquilla. す。...
- Page 65 Desmontaje protector de cadena チェーンガードの取り外し Desatornillar el tornillo (D1) y el tornillo (D2) con el casquillo (D3). スクリュー (D1) とスクリュー (D2) を緩めてブッシュ (D3) と Quitar el protector de cadena (D) del basculante trasero. 一緒に外します。 Desatornillar el tornillo (E1) y quitar la arandela (E5) y la plaqueta チェーンガード...
- Page 66 ISTR 637 / 00...
- Page 67 Desmontaje grupo porta-matrícula ナンバープレートホルダーユニットの取り外し Notas 参考 Para entender mejor el desmontaje del cableado del grupo porta- ナンバープレートホルダーユニットの配線取り外しを分かりやす matrícula sólo se representa el grupo basculante trasero. くするために、スイングアームユニットだけを表示しています。 Desconectar la toma del cableado luz matrícula (E3) de la clavija ナンバープレートランプ配線 (E3) のソケットを主要配線のプラ (F1) del cableado principal.
- Page 68 ISTR 637 / 00...
- Page 69 Notas 参考 La longitud de los tubos del sistema de frenos representados en la 図中に描かれているブレーキシステムホースの長さは参考です。 figura se debe considerar puramente indicativa. リアホイールの取り外し Desmontaje rueda trasera リアホイールシャフト (I2) から固定ナット (I1) を緩めて取り Desatornillar y quitar la tuerca de fijación (I1) del perno rueda 外します。...
- Page 70 Quitar el grupo brida porta-corona (M) del cubo de la rueda trasera リアスプロケットホルダーユニット (M) をリアホイールハブ (I) (I), asegurándose de que el casquillo (M3) se quede montado en el から取り外します。このとき、ブッシュ (M3) がリアスプロケッ grupo porta-corona (M). トホルダーユニット (M) に取り付けられた状態にあることを確認 Desatornillar los 6 tornillos (I5) quitando la rueda fónica trasera (I6) してください。...
- Page 71 (5). 参考 Notas ドゥカティ社から提供される標準装備のリアタイヤは、次の特性 El neumático trasero del primer equipamiento proporcionado por を有しています。 Ducati tiene los siguientes parámetros: • ドゥカティ部品番号:49141021A • Código Ducati: 49141021A • メーカー:PIRELLI • Marca: PIRELLI • モデル:MT 60 RS • Modelo: MT 60 RS •...
- Page 72 エアチューブ (3) およびタイヤ (Q) をリアワイヤースポークリ radios trasera (1). ム (1) に取り付けます。 Notas 参考 El neumático delantero del primer equipamiento proporcionado por ドゥカティ社から提供される標準装備のフロントタイヤは、次の Ducati tiene los siguientes parámetros: 特性を有しています。 • Código Ducati: 49040741A • ドゥカティ部品番号:49040741A • Marca: PIRELLI • メーカー:PIRELLI • Modelo: MT 60 RS •...
- Page 73 25 Nm ± 10% 25 Nm ± 10% 25 Nm ± 10% Pre-montaje rueda trasera リアホイールの仮取り付け Operando desde el lado izquierdo: 左側から作業します。 Montar el separador interno (M3) en la brida porta-corona (M), インナースペーサー (M3) を図に示す方向に向けて、リアスプロ orientándolo como ilustra la figura. ケットホルダー...
- Page 74 145 Nm ± 10% ISTR 637 / 00...
- Page 75 Notas 参考 La longitud de los tubos del sistema de frenos representados en la 図中に描かれているブレーキシステムホースの長さは参考です。 figura se debe considerar puramente indicativa. リアホイールの取り付け Montaje rueda trasera リアキャリパー (N) をリアホイール (5) のブレーキディスク Colocar la pinza trasera (N) en el disco freno (I7) de la rueda trasera (I7) に配置します。...
- Page 76 22Nm ± 10% 22 Nm ± 10% 2 Nm ± 10% 2 Nm ± 10% 2 Nm ± 10% ISTR 637 / 00...
- Page 77 Montaje grupo porta-matrícula ナンバープレートホルダーユニットの取り付け Aplicar LOCTITE 243 en toda la rosca de los 2 tornillos (E4). 2 本のスクリュー (E4) のネジ部の全長にわたって LOCTITE 243 Colocar el grupo porta-matrícula (E) en el basculante (O) e を塗布します。 introducir los 2 tornillos (E4) en la plaqueta (E5). ナンバープレートホルダーユニット...
- Page 78 22 Nm ± 10% 5 Nm ± 10% 5 Nm ± 10% 22 Nm ± 10% Montaje protector de cadena チェーンガードの取り付け Aplicar LOCTITE 243 en toda la rosca de los tornillos (E1) y (E2). スクリュー (E1) および (E2) のネジ部の全長にわたって Introducir la arandela (E5) y la plaqueta (E6) en el tornillo (E1). LOCTITE 243 を塗布します。...
- Page 79 63 Nm ± 10% 30 Nm ± 10% Pre-montaje rueda delantera フロントホイールの仮取り付け Colocar el disco freno delantero y la rueda fónica en フロントブレーキディスクおよびフォニックホイールを、フロン correspondencia de los orificios presentes en el cubo de la rueda トホイール (1) のハブにある穴に合わせて配置し、5 本のスクリ delantera (1) e introducir los 5 tornillos (4). ュー...
- Page 80 10 Nm ± 10% 45 Nm ± 10% Montaje pinza freno delantero フロントブレーキキャリパーの取り付け Aplicar GRASA GADUS S2 V220 AD 2 en la rosca y debajo de la グリース GADIUS S2 V220 AD 2 を 2 本のオリジナルスクリュー cabeza de los 2 tornillos originales (A1). (A1) のネジ山と座面に塗布します。...
- Page 81 DUCATI PERFORMANCE レース専用部品 ご注文書 ご注文商品 商品名 P/N P/N 商品名 商品名 P/N P/N 商品名 P/N 商品名 お客様ご記入欄 私は上記レース専用部品を下記車両に装着し、サーキット走行のみに 利用し、一般公道には利用しません。 車台番号 ZDM モデル名 お客様署名 ご注文日 ドゥカティ正規ネットワーク店記入欄 お客様に上記レース専用部品を販売し、レース専用部品のご利用方法を 説明いたしました。 販売店署名 販売日 年 月 日 販売店様へお願い 1. 上記ご記入の上、弊社アフターセールス部までFAXしてください。FAX:03-6692-1317 1. 上記ご記入の上、弊社アフターセールス部までFAXしてください。FAX:03-6692-1317 2. 取り付け車両1台に1枚でご使用ください。...
- Page 82 Scrambler ISTR - 637 / 00 96380031A Kit cerchi a raggi / Spoke rim kit / Kit jantes à rayons / Kit Drahtspeichenfelgen / Conjunto de jantes de raios / Kit llantas con radios / ワイヤースポークホイールキット CLASSIC / / / /...
- Page 83 Pos. Art.-Nr. Denominazione Denominación Designation Bezeichnung Descrição Denominacion Q.ty 説明 Cerchio Front wheel spoke Jante avant à rayons Vorderrad-Drahtspeichenfelge Jante dianteira de raios Llanta delantera con ワイヤースポークフ 50122011AA anteriore a raggi radios ロントリム Nastro Nipple protective Ruban cache-raccords Nippelschutzband Fita de proteção dos niples Cinta para-niples フラップテープ...
Need help?
Do you have a question about the 96380031A and is the answer not in the manual?
Questions and answers